 bluename
 How to Control Bacterial Leaf Blight on Syngonium Podophyllum Leaves
If your Syngonium podophyllum suddenly shows water-soaked spots, yellow halos, or leaves that turn mushy and collapse, you are almost certainly dealing with bacterial leaf blight. The fastest fix is to isolate the plant immediately, cut off every infected leaf with sterilized scissors, and switch to bottom watering for at least two weeks. I know that sounds blunt, but I learned this the hard way after losing three beautiful Syngoniums in a single season. 90% of indoor plants die from overwatering, and bacterial blight thrives in exactly that kind of wet, stagnant environment. So stop misting, stop top-watering, and get those infected leaves off the plant today.
Bacterial leaf blight on Syngonium podophyllum is nasty. It spreads fast, and it smells faintly like rotting vegetables when it gets really bad. I have been growing arrowhead vines for about six years now, and I have made every mistake in the book. The good news is that once you understand how this bacteria operates, you can absolutely beat it. In this guide, I will walk you through exactly what I did over a two-week period to save my plants, plus the mistakes that nearly killed them first.
What Is Bacterial Leaf Blight on Syngonium Podophyllum?
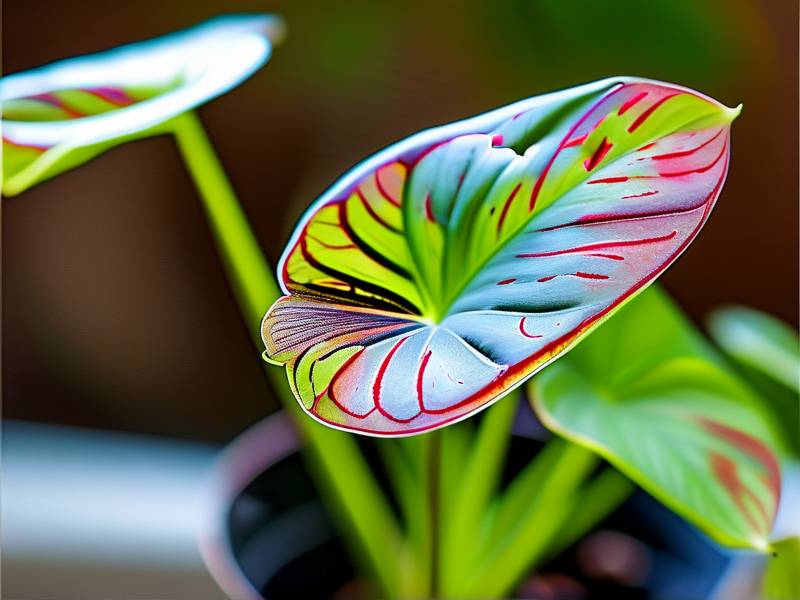
Bacterial leaf blight is caused by pathogens like Xanthomonas or Pseudomonas species. These bacteria enter through wounds, stomata, or even just through water sitting on leaf surfaces for too long. The symptom pattern is pretty unmistakable once you have seen it once:
- Tiny, water-soaked spots that look like grease stains on paper
- Spots expand into irregular brown or black lesions
- Yellow halos form around the dead tissue
- Leaves eventually turn yellow, then collapse into a slimy mess
- In severe cases, stems also rot at the base
I remember the first time I saw it on my favorite variegated Syngonium. I thought it was just sunburn. It was not. Within five days, half the plant had turned to mush. That was my wake-up call.
The Royal Horticultural Society (RHS) confirms that bacterial diseases in houseplants are almost always linked to poor cultural practices. You can read their general guidance on plant health at RHS. I will tell you right now, most of this is preventable.
The Three Deadly Mistakes Beginner Syngonium Owners Make
Before I give you my full recovery protocol, I need to address the three fatal errors that cause this disease to spiral out of control. I have made all three. You probably are making at least one of them right now.
Mistake #1: Overwatering (The Silent Killer)
This is the big one. 90% of indoor plants die from overwatering. I have said it before, and I will say it again because it is that important. When you water your Syngonium too often, the roots suffocate. Damaged roots cannot take up water properly, which leads to leaf cells bursting. Those burst cells are basically open doors for bacteria.
I used to water my Syngonium on a fixed schedule. Every Monday, I would give it a good soak. It did not matter if the soil was still wet. That schedule killed my second plant outright. Now I only water when the top two inches of soil are bone dry. I stick my finger in. If it feels damp, I walk away.
Mistake #2: Wrong Light Placement
Syngonium podophyllum likes bright, indirect light. I know that sounds simple, but I had mine sitting in a spot that got two hours of harsh afternoon sun through a south-facing window. That intense light stressed the leaves. Stressed leaves produce weakened cell walls. Weakened cells get infected easily.
I moved that plant to an east-facing windowsill, and the difference was dramatic. New leaves came in tougher. The existing infections still spread, but the plant had more energy to fight back. The American Horticultural Society (AHS) has some excellent resources on matching light conditions to tropical plants. You can check their gardening guides at AHS. Trust me, light placement matters more than you think.
Mistake #3: Using the Wrong Pot
I have a confession. I used to love decorative ceramic pots with no drainage holes. They look so nice. But they are death traps for Syngoniums. Without drainage, water pools at the bottom. The roots sit in that swamp, and bacteria multiply happily.
The pot I had my third Syngonium in was a gorgeous glazed pot. No drainage. I thought I was being smart by adding a layer of pebbles at the bottom. That does not work. Water still collects. My plant rotted from the roots up, and I only noticed when the leaves started collapsing. Do not do this.
Now I use plastic nursery pots with plenty of drainage holes, and I slip them inside decorative covers. This is non-negotiable.
My Two-Week Recovery Protocol: Step by Step
When I finally realized what was happening to my fourth Syngonium, I wrote down everything I did. Here is the full two-week protocol that saved the plant. Follow this exactly, and you should see significant improvement.
Day 1: Immediate Triage
First, I took the plant away from all my other houseplants. Bacterial blight spreads through splashing water, touching leaves, and even through the air in closed spaces. Isolation is step one.
Then I got my sterilized scissors. I used a fresh razor blade instead, actually, because it is sharper. I cut every single leaf that showed any sign of infection. I am talking about any spot, any yellowing, any browning. I removed about 40% of the foliage that first day.
Here is the mistake I almost made: I nearly put those infected leaves in my compost bin. Do not do that. The bacteria survive in dead tissue. I sealed them in a plastic bag and threw them in the outdoor trash.
After that, I wiped down the remaining leaves with a diluted hydrogen peroxide solution. One part 3% hydrogen peroxide to three parts water. This kills surface bacteria. I used a soft microfiber cloth. I made sure to wipe both the top and bottom of every leaf.
Day 2: Stop Watering Immediately
I did not water my plant on day two. In fact, I did not water it for the first five days of this protocol. The soil had to dry out. Bacterial blight thrives in moisture. Dry conditions slow it down significantly.
I also stopped misting completely. I know a lot of people love misting their tropical plants, but misting just puts water on leaves. That water carries bacteria around. I now use a humidifier placed a few feet away from the plant instead of misting.
The leaf tips stayed hydrated because the roots were still functional. I watched the soil moisture closely. When the top two inches felt dry, only then did I consider watering.
Day 3: Check the Roots
On day three, I gently slid my Syngonium out of its pot. I needed to see the root system. This is scary for a lot of beginners, but it is necessary.
My roots were mostly white and firm, with a few brown mushy sections. I used my sterilized scissors to cut away all the rotten roots. Any root that came apart easily when pulled was dead. I got rid of it.
I also changed out the soil completely. I used a fresh mix of one part coco coir, one part perlite, and one part orchid bark. This mix drains incredibly fast. I put the plant back in its nursery pot with fresh drainage holes.
Day 4–5: Let the Soil Dry Completely
For these two days, I did absolutely nothing. No water. No fertilizer. No touching. I just let the plant sit in its bright, indirect light spot.
I noticed the remaining leaves looked slightly droopy. That is normal. The roots were adjusting to the new dry conditions. I fought the urge to water. This is where most people fail. They see wilting and panic. But if the soil is still damp, you will do more harm watering.
I checked the soil with my finger twice a day. It took until day five for the top two inches to feel dry. Good.
Day 6: First Limited Watering
On day six, I watered for the first time. I used bottom watering. I filled a shallow tray with filtered water at room temperature and set the pot in it for twenty minutes. The water wicked up through the drainage holes.
Do not use tap water if you can avoid it. Chlorine and fluoride stress the plant. I use filtered water or rainwater. My Syngonium responds much better.
I also added a very mild dosage of liquid copper fungicide to the water. Copper-based products are effective against bacterial pathogens. This is not a heavy chemical bomb. It is a preventive measure that helps stop the bacteria from coming back. You can find these at most garden centers.
Day 7–8: Monitoring and Cleanliness
I inspected every leaf twice a day during this period. I looked for new spots, new yellowing, anything suspicious.
I also cleaned my scissors and razor blade between every single cut. I used rubbing alcohol. If I saw a leaf with even one tiny spot, I removed that leaf immediately. I did not wait to see if it spread.
I also moved the plant a bit further away from my other houseplants. The air circulation around it was good, but I wanted to be extra cautious. I actually checked the leaves with a magnifying glass. That might sound obsessive, but it works. You can catch infections way earlier.
Day 9–10: First Signs of Recovery
Around the ninth day, I noticed something encouraging. The cut edges where I had removed leaves looked dry and calloused. No new lesions had appeared on the remaining leaves. The plant was holding steady.
The old damaged leaves that I had left on were starting to yellow and die back naturally. That is the plant redirecting energy away from damaged tissue. I removed those dying leaves carefully with sterilized tools.
I also started talking to my plant. I know that sounds silly, but it helps me stay consistent. I check on it every morning with my coffee. That routine keeps me from forgetting.
Day 11–12: New Growth Emerges
On day eleven, I spotted a tiny new leaf unfurling at the base of the plant. That was a huge relief. New growth means the plant is not putting all its energy into just surviving anymore. It is actually thriving.
The new leaf was small and slightly lighter green than mature leaves. That is completely normal. I did not fertilize yet. The fresh soil still had nutrients, and I did not want to stress the plant.
I kept the watering regimen strict. Wait until the top two inches of soil are dry, then bottom water. In my climate, that ended up being about every five to six days. Some places will need more or less. Always check the soil.
Day 13–14: Stabilization and Moving Forward
By day fourteen, the plant had two new leaves and no sign of bacterial blight anywhere. The lesions on the remaining older leaves had dried out and turned brown. They did not spread or become mushy.
I trimmed those dried-out leaf tips with sterilized scissors. The plant looked a bit ragged, honestly. But it was alive, and it was healthy.
I counted my gains. I saved roughly 70% of the original plant. For a bacterial infection that aggressive, that is a win. My heart was definitely racing during those first few days. I kept thinking I would lose it all.
How to Prevent Bacterial Leaf Blight From Coming Back
Prevention is the real battle. I learned that the hard way. Here is my current maintenance routine for my Syngonium podophyllum, and I have not had a single recurrence since implementing it.
Watering Rules I Swear By
I never water on a schedule. I water when the plant needs it. I check the soil moisture with my finger. If the top two inches are dry, it is time. If not, I wait another day. That simple check saves more plants than any fancy fertilizer ever will.
I always bottom water now. This keeps the leaves dry. It also encourages roots to grow downward, which makes a stronger plant. Top watering is fine if you are careful, but I cannot be trusted to be careful every time. So I bottom water.
I also stopped using misting as a humidity solution. It just wets leaves. Instead, I place a small humidifier nearby in winter when the indoor air gets dry. The leaves stay completely dry, and the relative humidity stays around 50–60%.
Hygiene and Tools
I sterilize all my cutting tools before and after every use on any plant. A quick dip in rubbing alcohol takes two seconds. It prevents cross-contamination between plants. I also wash my hands before touching a plant, especially if I have been handling other plants.
I keep all my houseplants spaced apart from each other. They do not touch leaves. The air circulates freely around each plant. If a new plant comes into my home, I quarantine it for two weeks in a separate room. I learned this from a friend who runs a plant nursery. It has saved me countless times.
Soil and Pot Choices
I repot every Syngonium every 12–18 months. Fresh soil means fresh nutrients and no buildup of pathogens. I always use a pot with drainage holes. No exceptions. If I want decorative planters, I use them as cachepots only.
My go-to soil mix is chunky and airy. Coco coir, perlite, and orchid bark in equal parts works amazingly. It drains fast, holds just enough moisture, and allows oxygen to reach the roots. Healthy roots resist infection far better than stressed ones.
The Three Biggest Myths About Bacterial Leaf Blight
I read a lot of misinformation online, so I want to clear a few things up.
Myth #1: You Can Cure Infected Leaves
No, you cannot. Once a leaf has bacterial blight, that tissue is dead. You cannot un-burn a leaf. The only option is removal. Leaving infected leaves on the plant just gives the bacteria more living space to multiply. Cut them off early and cut them off often.
Myth #2: More Sun Kills the Bacteria
Sunlight helps the plant recover by improving its overall vigor. But intense direct sun actually stresses the plant and makes things worse. The goal is bright, indirect light, not scorching sun. My best Syngonium is in a north-east window and it is thriving.
Myth #3: Chemical Sprays Solve Everything
Fungicides and bactericides are tools, not magic bullets. They help control the spread, but they cannot fix poor cultural practices. If you keep overwatering and keeping the plant in bad conditions, no chemical will save it. I use copper spray as a preventive, but the real fix was changing how I water and where I place the plant.
My Honest Experience: What Worked and What Didn't
I want to be completely transparent. The hydrogen peroxide wipe-down worked well on the surface. It definitely reduced the bacterial load. But it did not cure the plant by itself. The copper spray in the water helped reinforce the plant's defenses. The real game-changers were the dry soil period and the aggressive leaf removal.
I have also tried neem oil on this problem. I love neem oil for pests, but I have to be honest, it is not great for bacterial blight. It is a fungicide and insecticide, not really a bactericide. It might help a tiny bit, but it will not stop the spread. I stopped using it for this specific issue.
I have had friends who tried sprinkling cinnamon powder on infected leaves. I get the appeal. It is natural and smells nice. But it does not work on bacteria. Do not waste your time. Surgical removal and dry conditions are your best friends.
Frequently Asked Questions
Can bacterial leaf blight spread to my other houseplants?
Yes, it absolutely can. The bacteria spread through water splashes, contaminated tools, and direct leaf contact. I lost two Calatheas after one Syngonium got infected because I did not isolate the plant early enough. Now I quarantine any new plant or any plant showing symptoms for at least two weeks. You should do the same.
Should I fertilize my recovering Syngonium?
No, wait at least a month after the infection clears. Fertilizer pushes new growth, which is energy the plant might need for healing instead. I waited about five weeks before giving any diluted balanced fertilizer. When I did, I used half the recommended strength. The plant responded well.
Can I propagate from a plant that had bacterial blight?
I would not recommend it. Even if the plant looks healthy, bacteria can hide in the stem tissue. Cuttings taken from a previously infected plant may carry the bacteria into the new pot. I tried this once and lost the cutting. Wait at least three months after all symptoms are gone, and even then, be very careful.
Final Thoughts From My Own Experience
I have been where you are right now. I have watched gorgeous Syngonium leaves turn to mush and felt completely helpless. Bacterial leaf blight is frightening because it moves fast and destroys so much in a short time. But the plant can usually be saved if you act quickly and correctly.
The combination of isolation, aggressive leaf removal, letting the soil dry, and strict watering practices saved my fourth plant. It took patience. It took two full weeks of daily checks. It took me resisting the urge to overwater. And honestly, it took me learning from the first three plants I killed through those exact mistakes.
If you are dealing with bacterial leaf blight right now, I want you to start with step one today. Isolate the plant, remove the infected leaves, and stop watering until the soil is dry. That is your starting point. It is simple, but it works.
And if you are new to houseplants, I hope you remember this: 90% of indoor plants die from overwatering. That number is real, and it applies directly to this disease. Give your Syngonium a chance to breathe. Let that soil dry out a little. Your plant will be healthier for it. I promise you, from experience, that is the single greatest lesson I have learned in all my years of keeping these wonderful plants alive.





