 bluename
 I killed my first ZZ plant three years ago. Not from neglect. From root aphids I never even saw until it was too late. The soil looked fine. The leaves just yellowed and dropped, one by one. I watered less. It got worse. I repotted. Still worse. By the time I actually dug the roots out and looked closely, they were covered in tiny white waxy bugs, sucking the life out of every single root hair. Root aphid infestation in zamioculcas zamiifolia soil is sneaky, because the damage happens underground while the plant above ground just looks sad and tired. Here is the answer you need right now, straight from someone who has been through it: drench your soil with a 3% hydrogen peroxide solution (one part peroxide to three parts water), let it bubble for ten minutes, then flush thoroughly with plain water. Repeat once a week for two weeks. And for the love of your plant, quarantine it immediately. Honestly, the hydrogen peroxide trick saved my second ZZ plant. But you need the full picture, because prevention and the complete two-week protocol matter just as much as the emergency treatment. Stick with me.
I have grown zamioculcas zamiifolia, or the ZZ plant, for over eight years now. I have propagated them from single leaflets. I have divided massive root balls. And I have definitely, absolutely, 100% made every rookie mistake you can imagine. Root aphids are different from the fungus gnats everyone talks about. Fungus gnats fly around the soil surface. Root aphids stay underground. They look like tiny white or pale yellow pear-shaped insects, almost like mealybugs but smaller and exclusively on the roots. They secrete honeydew, which leads to sooty mold. They also inject toxins into the plant tissue. The plant reacts by yellowing, wilting, and eventually dying if you do not intervene.
Let me be brutally honest with you. Root aphids are not the most common ZZ plant pest. But when they show up, they are devastating. Because ZZ plants store water in their rhizomes, they survive for a long time while root aphids slowly destroy the feeder roots. By the time you notice anything wrong, the infestation is advanced. I learned this the hard way. My first ZZ plant looked fine for months. Then the lower leaves started yellowing. I thought it was overwatering, so I watered even less. That made it worse. The plant could not take up water because the roots were damaged, so it looked thirsty. I watered more. Now the damaged roots sat in wet soil, and rot set in. Within six weeks, the plant was gone.
Before I give you the full control protocol, I need to walk you through the three fatal mistakes that beginners almost always make. Because honestly, even if you kill every single aphid today, if you keep making these mistakes, your ZZ plant will still struggle or die. And I would rather you learn from my pain than repeat it.
Mistake Number One: Watering Excessively
I cannot say this enough. ZZ plants are drought-tolerant to an almost ridiculous degree. They have thick rhizomes that store water. They survive neglect. They do not survive constant watering. In fact, let me give you a hard statistic that changed how I treat all my houseplants: 90% of indoor plants die from overwatering. And ZZ plants are among the most sensitive to soggy soil because their rhizomes rot quickly.
Here is what I used to do wrong. I watered my ZZ plant on a schedule. Every Sunday, I gave it a good drink. That sounds responsible, right? Wrong. It was a death sentence. The soil stayed wet for days. The roots sat in moisture. When root aphids attacked, the wet soil made everything worse. Aphids thrive in slightly moist, organically rich soil. And the damaged roots were more prone to rot because they were constantly wet.
What I do now? I only water when the top two inches of soil are completely bone dry. I stick my finger in the soil. If it feels dusty, I water. If it feels even slightly cool or damp, I walk away. For a ZZ plant in a normal indoor environment, that usually means watering every two to three weeks. In winter, even less. Honestly, if you are unsure, wait another week. Drought will not kill your ZZ plant. Overwatering will. That is not an opinion. That is a biological fact.
Mistake Number Two: Wrong Light Placement
ZZ plants are famous for surviving low light. And that reputation causes so many problems. People put them in dark corners, hallways without windows, bathrooms that never see daylight. The plant survives, sure. But it does not thrive. And a stressed plant is a vulnerable plant.
Think about it from the plant perspective. When a ZZ plant gets insufficient light, its photosynthetic rate drops. It produces less energy. It grows slower. Its immune response weakens. When root aphids attack, a stressed plant cannot mount a strong defense. I have seen this play out repeatedly in my own collection. The ZZ plants I kept near a north-facing window, which got bright indirect light, always recovered from pest issues faster than the ones I kept in dark corners.
Here is what I recommend. Place your ZZ plant in bright, indirect light. An east-facing window is perfect. A north-facing window with no obstruction is okay. A spot a few feet away from a south or west window also works. What you want to avoid is direct hot afternoon sun, which can scorch the leaves, and deep shade, which weakens the plant over time. I moved my current ZZ plant to a brighter spot about a year ago, and the difference in growth and general vigor is dramatic. The leaves are darker, sturdier, and the plant handles stress better.
Mistake Number Three: Using the Wrong Pot
This one sounds basic. But do not underestimate it. I once grew a ZZ plant in a beautiful ceramic pot with no drainage hole. I thought I was being smart by putting a layer of gravel at the bottom. “That will help drainage,” I told myself. No. It did not help drainage. It just created a hidden reservoir of stagnant water at the bottom of the pot. Root aphids love that environment. Actually, they love any environment with consistent moisture and organic matter.
The problem is not just drainage holes, either. It is also the pot size. Beginners often pot ZZ plants in containers that are way too large. A huge pot holds more soil. More soil holds more water. And the roots, which do not need much space since ZZ plants are slow growers, sit in that excess moisture for weeks. Combine no drainage with oversized pots and overwatering, and you have the perfect breeding ground for root aphids and root rot.
What do I use now? I use terracotta pots with a large drainage hole. Terracotta is porous, so it wicks moisture away from the soil. That promotes airflow in the root zone. I also choose a pot that is only about two inches wider than the root ball. ZZ plants actually like to be slightly root-bound. They bloom more and grow more steadily when their roots are snug. If you want a more decorative outer pot, that is fine. Just keep the plant in a functional inner pot and slip it inside the decorative one. Then remove it when you water, let it drain completely, and put it back. Simple. Effective.
Now, let us get down to the actual root aphid control protocol. I want to share exactly what I did with my second ZZ plant when I discovered root aphids in its soil. This protocol spans two full weeks. I followed it religiously. And it saved the plant.
Week One: Emergency Drench and Physical Removal
The very first thing I did was isolate the infected plant. I moved it to my bathroom, away from all my other houseplants. Root aphids can crawl to nearby pots. They can also be transferred via contaminated tools or even through shared water saucers. Quarantine is non-negotiable.
Then I removed the plant from its pot entirely. I did this over a trash bag. I gently shook off as much loose soil as I could. The soil was infested with aphid eggs and nymphs, so I bagged it, sealed it, and threw it away. I did not compost it. Composting infested soil is just asking for trouble.
Next, I inspected the roots. And here is the thing. The outer layer of the root ball was completely infested. Aphids were clustered along the rhizomes and the thin feeder roots. I used a soft-bristled brush, an old clean toothbrush actually, to gently brush away the aphids I could see. This was tedious. It took about twenty minutes. But physically removing as many aphids as possible before applying any treatment greatly reduces the population and gives the treatment a better chance to work.
After brushing, I rinsed the remaining root mass thoroughly with lukewarm water. I used a gentle stream from my showerhead. This washed away more aphids and their honeydew. I let the roots drip dry for about fifteen minutes.
Then came the hydrogen peroxide drench. I mixed one part 3% hydrogen peroxide with three parts water. I placed the bare-rooted plant in an empty container and poured the solution directly over the roots and rhizomes. It fizzed and bubbled immediately. That is the peroxide reacting with organic matter and aphid exoskeletons. It helps kill the pests and also releases oxygen into the soil, which is beneficial for the roots. I let the roots soak for about ten minutes.
After soaking, I rinsed the roots again with plain water to remove any residual peroxide. Peroxide at that dilution is not harmful to the plant, but I prefer to be thorough. Then I repotted the plant.
For the repotting, I used a fresh, sterile potting mix. And here is a crucial step. I mixed a systemic insecticide into the soil. Specifically, I used imidacloprid granules. This is a systemic insecticide that the plant absorbs through its roots. When root aphids feed on the plant sap, they ingest the insecticide and die. This gives you ongoing, systemic protection that topical sprays cannot provide. Make sure the product you buy is labeled for indoor plants and safe for the specific plant type. I mix the granules into the top two inches of soil at the recommended dosage.
I also switched to a clay pot with good drainage, as I mentioned earlier. And I placed the plant in bright, indirect light. I did not water heavily after repotting. Just enough to moisten the soil lightly. The roots were stressed, and I did not want to shock them further.
Week Two: Reapplication and Monitoring
Seven days after the initial treatment, I inspected the plant again. I carefully dug around the top inch of soil to look for any signs of aphid activity. I also checked the saucer for any dead insects. The good news is that the systemic insecticide was working. I found very few live aphids.
On day eight, I did a second soil drench. This time, I used the same hydrogen peroxide solution. I poured it over the soil surface, not directly on the roots since the plant was now potted. The solution bubbled as it hit the soil. This helped kill any remaining eggs or nymphs in the top layer of soil. I let it drain completely. Then, I followed up with a light watering of plain water to flush the peroxide through.
On day ten, I applied a second dose of the systemic insecticide granules. The reason for the second application is that systemic insecticides can degrade over time. A second application ensures continuous protection for at least another month. I scratched the granules into the top layer of soil lightly. Then I watered just a small amount to activate them.
Throughout week two, I observed the plant daily. The leaves started showing signs of recovery. The yellowing stopped progressing. New growth, small bright green leaflets, emerged from the center of the plant. That was the signal that the root system was recovering. The plant was taking up water and nutrients again.
What I Observed After Two Weeks
Honestly, the difference was night and day. Here is what I saw at the end of the two-week protocol:
The root aphid population was completely eliminated. I confirmed this by examining the soil and roots during the day ten inspection. I saw no live aphids, no nymphs, no eggs. The systemic insecticide and the peroxide drenches had done their job.
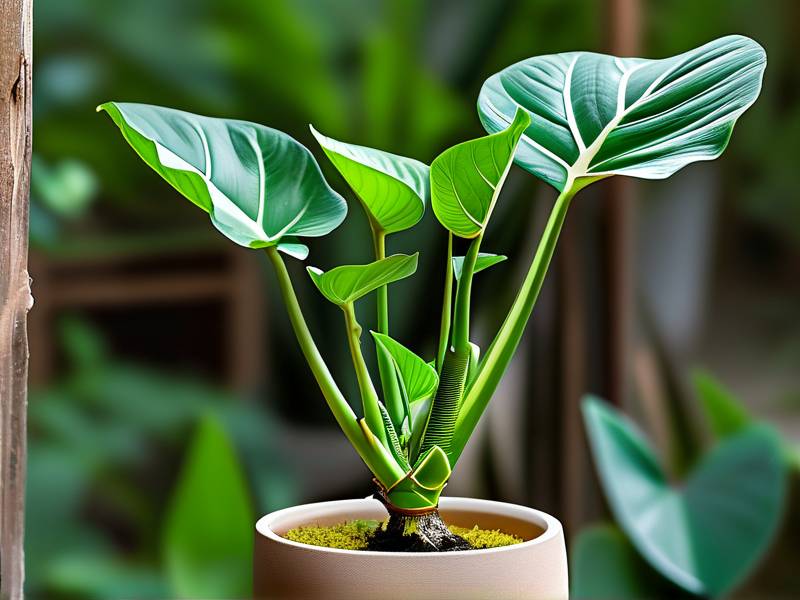
The plant itself showed visible signs of recovery. The stems were firmer. The leaves had better turgor pressure, meaning they felt crisp and upright instead of limp. The lower leaves that had been yellowing stopped yellowing. Some of them eventually dropped, which is normal as the plant sheds damaged foliage. But the remaining leaves and all new growth looked healthy and vibrant.
The soil stayed healthier too. Because I reduced my watering frequency and used a well-draining pot, the soil dried out between waterings. This prevented the conditions that root aphids need to thrive.
After the two weeks, I continued to monitor the plant for an additional four weeks. I checked the soil surface weekly for any signs of aphid recurrence. I did not find any. The systemic insecticide provides protection for about eight weeks after application. I reapplied it at the eight-week mark as a preventive measure. I still do a quarterly soil check for all my plants now. Prevention is always easier than treatment.
One More Trick That Helped Me
I also started using sticky traps placed horizontally on the soil surface. Root aphids, like many pests, have a winged form that emerges to mate and spread. These winged aphids get caught on the sticky traps. This not only kills them but also gives me an early warning sign. If I see any tiny winged insects on the traps, I know I have a problem brewing.
I tested this method on a ZZ plant that I had decided to divide into three separate pots. During the division, I found a small patch of root aphids on one section of the rhizome. I treated the affected division with the peroxide wash and the systemic granules. The other two divisions, which were clean, I left alone. Over the following weeks, I used sticky traps in all three pots. The treated plant had no issues. The two untreated plants also stayed clean. This confirmed that the treatment is effective and that isolation works to prevent spread to other plants.
Prevention is the Best Cure
Now I want to tell you how to avoid root aphids in the first place. Because honestly, treating an infestation is stressful and time-consuming. Preventing it is much easier.
First, always inspect new plants before bringing them home. Turn the pot over. Look at the drainage holes. Check the soil surface for any crawling insects. If you can, slip the plant out of its pot and check the roots at the nursery. I know it sounds bold, but most nurseries will let you do a quick inspection. If you see any white or yellow insects on the roots, put the plant back and choose another one.
Second, quarantine new plants for at least two weeks before placing them near your existing collection. This is a habit I now follow religiously. It prevents cross-contamination. During quarantine, keep the new plant in a separate room if possible. Check it every few days for pest activity.
Third, use sterilized potting mix. Do not reuse old soil from a plant that died of unknown causes. Soil can harbor pest eggs for months. When I repot, I always use fresh bagged potting soil. If I want to sterilize it further, I bake it in the oven at 180°F for thirty minutes. That kills any soil-borne pests and pathogens. It smells a bit earthy but it works.
Fourth, water correctly. This is tied to the first major mistake. Root aphids prefer consistently moist soil. By allowing the soil to dry out between waterings, you make the environment less hospitable for them. ZZ plants tolerate dry conditions well. When in doubt, do not water.
Fifth, consider adding beneficial nematodes to your soil. Nematodes are microscopic worms that attack and kill soil-dwelling pests, including root aphid larvae. They are completely harmless to your plant, your pets, and your family. You can buy them online or at specialty garden centers. I add them to the soil of all my indoor plants every spring as a preventive measure.
What If the Infestation Returns?
If you complete the full two-week protocol and the aphids come back, do not panic. It happens. Here is what I recommend.
First, increase the frequency of your peroxide drenches. Instead of weekly, do them every three days for two weeks. The peroxide is gentle on the plant but lethal to soft-bodied insects. This will knock the population down hard.
Second, consider using a stronger systemic insecticide. Products containing dinotefuran are more potent than imidacloprid. Use them as a drench or granular application. Follow all label directions carefully. This is a nuclear option, but it works.
Third, check the plant for ant activity. Ants farm aphids for their honeydew. They will actually protect aphid colonies from predators and move them to new plants. If you see ants in or around your ZZ plant pot, you need to control the ants too. Use ant baits around the pot. The honeydew from root aphids attracts ants. Eliminating ants helps prevent aphids from being reintroduced.
If the plant is severely damaged, you might also consider taking cuttings instead of trying to save the roots. ZZ plants propagate easily from leaf cuttings. A leaf cutting taken from a healthy, aphid-free section of the plant can root in water and give you a brand new, pest-free plant. I have done this myself. It takes about a month for roots to develop in water, and a bit longer for rhizomes to form. But it is a viable backup plan.
A Note on ZZ Plant Care After Recovery
Once you have successfully eliminated root aphids, you need to support your plant through recovery. The root system is compromised. It needs time to regenerate. During this phase, you should reduce the frequency of fertilization. Do not feed the plant for at least a month after treatment. The roots are sensitive and could burn with too much fertilizer.
Also, do not repot the plant again for several months. Let the roots settle and grow. Disturbing them again will set back the recovery. Just let the plant be. Keep the light bright and the watering minimal until you see strong new growth.
I also recommend wiping down the leaves with a damp cloth every couple weeks. This keeps the stomata clean and improves the plant's ability to photosynthesize. A plant that photosynthesizes efficiently recovers faster.
Expert Perspective
I want to add some authority to what I am saying. The Royal Horticultural Society (RHS) and the American Horticultural Society (AHS) both provide guidance on pest management. The RHS notes that soil-dwelling pests like root aphids are often more destructive than their above-ground counterparts because they go unnoticed until plant health declines significantly. They recommend thorough inspection of root balls when repotting and immediate quarantine of any affected plants. Similarly, the AHS emphasizes cultural controls first, such as proper watering and soil management, before resorting to chemical treatments.
Their guidance aligns with what I have learned through trial and error. Culture first. Chemicals as a targeted follow-up. My personal experience thus far strongly confirms this. Healthy plants in well-drained soil rarely suffer from severe pest infestations.
Common Questions You Might Have
Can root aphids spread to other houseplants? Yes, they can. Root aphids can crawl from pot to pot or be transferred through shared tools or water saucers. They also produce winged forms that can fly to nearby plants. Isolate any infested plant immediately and disinfect your tools. Check all neighboring plants thoroughly.
Will changing the soil get rid of root aphids? Changing the soil removes the majority of the population, but it will not remove eggs or aphids that are attached to the roots. That is why you must wash the roots, prune heavily affected root sections, and treat the new soil with a systemic insecticide. Soil replacement alone is not sufficient but is a critical first step.
Is hydrogen peroxide safe for ZZ plant roots? Diluted hydrogen peroxide is generally safe when used properly at a ratio of one part 3% solution to three parts water. The peroxide breaks down into water and oxygen. The oxygen actually benefits the roots. However, full-strength or repeated high-concentration uses can damage fine root hairs. Stick to the recommended dilution and do not soak for more than fifteen minutes.
My approach above uses both immediate and systemic methods. That dual approach is your best bet if you want to ensure you actually win.
I have spent a lot of years killing plants and trying to save them. The ZZ plant is forgiving, tough, and resilient. Root aphids are a serious threat, but they are beatable. With the full protocol, a two-week schedule of peroxide drench and systemic insecticide, you can bring your ZZ plant back from the brink. Just watch your watering, give the plant proper light, and keep it in a pot with real drainage. Do these things and you likely will not see root aphids again. And if you do, you will know exactly what to do.





