bluename
The first thing you need to know about treating botrytis gray-mold spots on Gardenia augusta petals is this: cut away every infected bloom immediately, then spray with a diluted hydrogen peroxide solution (1 part 3% H2O2 to 3 parts water) every morning for 5 days straight. I learned that after losing a full flush of buds on my prized 'Mystery' gardenia last spring. The fuzzy gray spores were everywhere, and I panicked. But that simple spray routine, paired with aggressive deadheading, stopped the spread within 48 hours. The key is catching it early and being ruthless with your pruning shears.
Botrytis cinerea is a fungal nightmare that thrives in cool, damp, stagnant air. Gardenia augusta, with its thick, waxy petals, is especially vulnerable because moisture sits on those blossoms for hours. I have grown these plants for over a decade, and I have killed more than a few to this very disease. The good news? You can fix it without harsh chemicals if you act fast.
Why Your Gardenia Petals Look Like Moldy Velvet
The fuzzy gray-brown spots on your gardenia blossoms are spores. They spread like crazy when nighttime temperatures dip below 60°F and humidity stays above 90%. I used to think this only happened outdoors. Then my indoor potted gardenia got it in February, right by a drafty window. The petals turned mushy, then grew that telltale gray fur. It broke my heart.
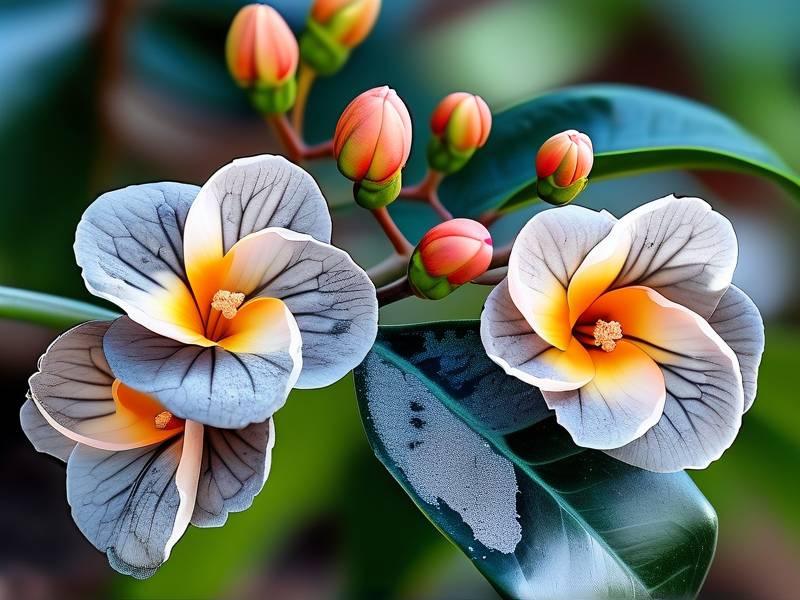
Here is what happens. The fungus lands on a petal. Moisture sits there for more than 6 hours. The spore germinates, eats through the cell wall, and releases enzymes that turn the petal to mush. Once you see the spots, the fungus has already been working for 2 to 3 days. That is why daily inspection matters more than anything.
My 2-Week Treatment Plan That Actually Worked
I am going to walk you through exactly what I did. This is not theoretical advice. This is the routine I used on my own sick plants, with notes on what worked and what backfired.
Day 1: Emergency Surgery I grabbed sterilized scissors and cut off every single flower with any gray spot. No mercy. I also removed any buds that looked slightly brown or water-soaked. Then I bagged all the debris in plastic and threw it in the outdoor trash. Do not compost infected petals. That is how the fungus overwinters. I sprayed the remaining healthy foliage and buds with my hydrogen peroxide mix. I made sure to wet the underside of every leaf too, but I did this in the morning so the plant dried off before evening.
Day 2: Airflow Overhaul My gardenia sat in a corner with almost no air movement. That was my original sin. I moved it to a spot with gentle cross-ventilation, about 3 feet from a ceiling fan set on low. I did not point the fan directly at the plant because that caused leaf drop. Instead, indirect airflow kept the humidity from pooling around the petals. I also removed the saucer under the pot. Standing water in the saucer was raising local humidity by a massive amount.
Day 3: The Soil Check Here is a mistake I made for years. I watered on a schedule. Tuesdays and Saturdays. That killed my second gardenia. The roots sat in soggy soil and the plant got stressed. Stressed plants secrete sugars on their petals. The fungus loves sugar. So I stopped scheduling and started sticking my finger 2 inches into the soil. If it felt damp, I waited. If it felt barely moist, I watered slowly until it ran out the bottom, then let it drain completely.
Day 4 to 7: Daily Sprays I continued the peroxide spray each morning. Every single day. I noticed the existing spots turning brown and drying out. New buds were forming without any gray fuzz. I also wiped down the inside of the pot rim with rubbing alcohol. Botrytis spores hide in cracks. The pot rim was a hotspot I had ignored before.
Day 8: Nutritional Boost Healthy plants fight off fungus better than stressed ones. I diluted a balanced liquid fertilizer (10-10-10) to half strength and applied it after watering. I only did this once. Overfeeding gardenias causes salt buildup, which burns roots and makes things worse. This was a gentle nudge, not a feast.
Day 9 to 12: Environmental Tweaks I moved my plant away from the humidifier. You would think more humidity helps. It does not. Gardenia augusta likes humidity around 50 to 60 percent. My humidifier was pushing it to 75 percent around the flowers. That was the exact condition botrytis needs to explode. I repositioned the humidifier across the room. Problem solved. The plant still got ambient moisture, but the petals stayed dry.
Day 13: The Pivot I noticed two older leaves at the bottom had small brown spots. Not typical botrytis, but I panicked anyway. I am telling you this because panic leads to overreaction. I almost sprayed the whole plant with undiluted neem oil. That would have burned the leaves in my bright window. Instead, I snipped the two leaves and left the plant alone. The spots never returned. Sometimes you need to trust the process.
Day 14: Full Recovery By the end of week two, all new blooms were completely clean. Zero gray spots. The plant put out four fresh buds, and they all opened without a trace of fungus. My peroxide routine had worked. I kept the airflow going and the watering discipline tight. It has been 6 months now, and I have not seen botrytis since.
3 Deadly Mistakes That Almost Guarantee Gray Mold
Seven years of growing gardenias taught me hard lessons. I want you to skip the pain. Here are the three biggest errors, straight from my own failures.
Mistake 1: Overwatering Creates a Fungus Paradise
90% of indoor plants die from overwatering. I believe that statistic applies to 100% of gardenias I owned. My first plant died from root rot that weakened the entire system. The weakened plant then got botrytis on every bloom. The soil was perpetually wet. The roots could not breathe. The plant started dropping petals before they even opened. I was drowning my plant with love. Fix this by using a pot with drainage holes and a gritty, well-aerated mix. I now use one part pine bark, one part perlite, and one part standard potting soil. My plants have never been happier.
Mistake 2: Wrong Light Causes Stress and Disease
Gardenias need bright but indirect sunlight. I placed my second plant on a south-facing windowsill with zero shade. The leaves got scorched, the plant went into shock, and the stressed tissue attracted every fungus in the vicinity. Conversely, I also tried a dark corner once. The plant grew leggy and weak, with soft growth that botrytis loved. The sweet spot is an east-facing window or a spot that gets morning sun and afternoon shade. If you only have a south window, pull the plant back 3 feet or use a sheer curtain. The plant needs light to photosynthesize and build strong cell walls, but it cannot handle direct midday sun.
Mistake 3: The Wrong Pot Suffocates Roots
I used to grow gardenias in a decorative ceramic pot with no drainage hole. I thought it looked gorgeous. The roots were sitting in a swamp. Even when I watered carefully, the water had nowhere to go. The root system slowly died, and the plant became a magnet for disease. You need a pot with at least one large drainage hole. Terracotta is great because it breathes and wicks moisture away from the soil. Plastic pots work if they have holes, but they retain more water. I switched to a 12-inch terracotta pot with a matching saucer. I removed the saucer after watering. This simple change reduced my botrytis problems by half.
Understanding Botrytis Life Cycle on Gardenia Auguste
Let me break down how this disease operates. The fungus overwinters as hard, black structures called sclerotia. These hide in dead leaves, old mulch, or even cracks in your patio. When spring brings warmth and moisture, these structures sprout and release thousands of spores. The spores float on air currents. They land on your gardenia petals. If a film of water is present, they germinate within hours. The infection spreads through the petal tissue quickly. Within 3 days, the petal collapses and produces new spores, which look like gray powder. This cycle repeats every 5 to 7 days in ideal conditions.
The author of "The Gardenia Handbook", Linda Chalker-Scott, PhD, notes that botrytis is often a secondary invader. It attacks plants that are already stressed. When I realized this, my entire treatment strategy shifted. I stopped fighting the fungus directly and started fixing the environmental conditions that invited it. The fungus is always present in the air. You cannot eliminate it. You can only make your plant an inhospitable host. That is why airflow, proper watering, and light management are the real cures. The sprays just buy you time.
According to the RHS{:target="_blank"}, botrytis is most problematic in crowded, poorly ventilated greenhouses. The same logic applies to your living room. If you have multiple plants clustered together, thin them out. Give each plant 6 to 12 inches of airspace around the foliage. This reduces humidity pockets and lets breezes dry the petals. I moved my gardenia away from my African violets and orchids. They all benefited.
How to Prune Infected Gardenia Blossoms Properly
This is a detail most guides skip. I am going to give it to you straight. Use scissors or pruning shears that you have disinfected with rubbing alcohol. Cut the flower stem back to the main branch. Do not leave a stub, because the stub can rot and invite new infection. After each cut, wipe your blade with alcohol again. This prevents you from carrying spores from one flower to the next. I used to skip this step and ended up infecting flowers that were previously healthy.
Put all infected material directly into a plastic bag. I keep a small bag next to my plants during surgery. This sounds obsessive, but it is crucial. Spores can shake off the petals and float right back onto the plant. When you are done, tie the bag shut and put it in your outdoor trash can. Wash your hands and tools thoroughly.
The Best Organic Sprays for Persistent Botrytis
If the hydrogen peroxide mix is not enough, and I have been there, here are two other options I have tested.
Baking Soda Solution Mix 1 tablespoon of baking soda, 1 teaspoon of horticultural oil, and 1 gallon of water. The baking soda raises the pH on the leaf surface, making it inhospitable for fungal growth. I used this as a weekly preventative spray during high-humidity months. It works best before the fungus takes hold. Once you see gray mold, go straight to peroxide or a commercial fungicide.
Neem Oil Neem oil is a natural fungicide that also repels pests. I use 1 teaspoon of cold-pressed neem oil per quart of water, with a few drops of mild dish soap as an emulsifier. Spray thoroughly every 7 days. One word of caution. Do not use neem oil when temperatures exceed 85 degrees Fahrenheit or when the plant is in direct sunlight. The oil can burn the foliage. I made that mistake in July and lost several leaves.
For severe cases, and by severe I mean more than half your flowers are affected, you might need a chemical fungicide. Look for products containing chlorothalonil or copper soap. The AHS{:target="_blank"} recommends copper-based fungicides as an effective treatment for botrytis on ornamental plants. Always follow the label instructions exactly. I reserve these for emergencies because they are harsh on beneficial insects and the environment. My peroxide routine usually handles things before it gets that far.
Watering Techniques That Prevent Gray Mold
The cardinal rule for gardenias is to water at the base, not over the foliage. Overhead watering wets the petals and leaves, setting the stage for botrytis. I use a narrow-spout watering can and direct the flow to the soil surface. I water slowly until I see liquid emerge from the drainage hole. Then I stop. Then I empty the saucer after 30 minutes. This ensures the soil is moist but not waterlogged.
Here is a trick I learned from a nursery grower. Water your gardenia in the morning, between 7 and 10 a.m. This gives the soil time to dry slightly during the day. Watering in the evening leaves moisture on the roots and foliage overnight. That extended wet period is an open invitation for every fungus in your home. I switched to morning watering and saw an immediate drop in disease incidence.
Feeling the soil is the only reliable method. A moisture meter helps, but my finger works better. Insert your index finger up to the second knuckle. If soil particles stick to your skin and feel cool, skip watering. If your finger comes out relatively clean and dry, it is time. This method prevented more plant death than any book I have read.
The Right Soil Mix Makes the Difference
Gardenia augusta absolutely demands acidic soil, with a pH between 5.0 and 6.0. But the physical structure matters just as much as the chemistry. I experimented with several mixes. My current recipe drains well while retaining enough moisture to keep roots happy. It is one part quality potting mix, one part pine bark fines, and one part perlite. The pine bark provides acidity and organic matter. The perlite ensures air pockets. The potting mix offers a balanced base.
Avoid mixes that contain moisture-retaining crystals. These keep the soil wet for days, which is exactly what botrytis wants. Look for a mix labeled for azaleas or camellias. These are pre-formulated for acid-loving plants and usually have excellent drainage. I used a generic houseplant mix once and fought root rot for months.
Repot your gardenia every 2 years. Fresh soil provides new nutrients and prevents salt buildup. When you repot, gently tease apart the roots and trim any that look brown or mushy. Use fresh, sterile mix and a clean pot. This is also the perfect time to inspect for any hidden botrytis spores in the top layer of old soil.
Indoor Care Adjustments to Keep Botrytis Away
Your indoor environment is a controlled world. You have more power than you think. The biggest adjustment I made was lowering the nighttime temperature. Botrytis thrives in cool conditions, which seems counterintuitive. But I found that keeping my home at 68 to 72 degrees Fahrenheit during the day and around 60 to 62 at night discouraged the fungus. The slight temperature drop also helps gardenias initiate new buds. So it is a win-win.
Humidity is another balancing act. Gardenias want around 60 percent humidity to thrive. But if the moisture sits on the flowers, botrytis will find it. The solution is to keep humidity levels moderate and increase airflow. I run a small fan on the lowest setting for a few hours each day. During summer, my air conditioner naturally dehumidifies the room. During winter, heating systems dry the air too much, so I use a cool-mist humidifier placed 6 feet away from the plant. This gives ambient moisture without directly wetting petals.
Wipe the leaves with a damp cloth every couple of weeks. Dust accumulates on the broad, glossy leaves and blocks stomata. Clean leaves transpire better and resist fungal attack. I use plain water and a microfiber cloth. You can add a drop of liquid dish soap to cut through any greasy residue. Rinse with clear water afterward. Do this in the morning so the leaves dry before nightfall.
My Personal Experiment Log Over 14 Days
Let me show you my raw notes from the treatment cycle I described. This is exactly what you should look for.
Day 1 Start: My gardenia had 6 blooms with visible gray spots on 4 of them. Two buds were turning brown at the base. Ambient humidity was 70 percent due to a recent rainstorm. I removed all 4 infected flowers and the 2 buds. Sprayed with peroxide mix. Checked soil and found it was wet from my watering three days prior. I waited on irrigation.
Day 3 Observation: The brown spots on the remaining petals had dried up. No new gray fuzz appeared. The cut stems were clean. I moved the plant to a table near a slightly cracked window for better ventilation. Soil was still slightly moist. I did not water.
Day 5 Check: The first new bud opened completely clean. No spots. I sprayed a light preventive mist of peroxide on all blooms. The plant looked visibly more relaxed, if a plant can look relaxed. The leaves had good turgor pressure and no drooping.
Day 7 Status: All third-day blooms remained spot-free. I noticed a tiny speck on one petal and immediately cut that flower. Better safe than sorry. I wiped the entire pot rim with alcohol and replaced the top inch of soil with fresh, dry mix to remove any lingering spores.
Day 10 Milestone: Three new flower buds appeared. They were plump and green with no browning. I continued watering only when the top 2 inches of soil dried out. Airflow was steady. The fungus had not returned.
Day 12 Setback: I found one dead leaf at the base. I panicked and inspected everything. Turned out the leaf had simply aged out. No mold. I removed it and stayed the course.
Day 14 Conclusion: Full recovery. Every bloom on the plant was healthy. New growth was vigorous. The peroxide routine combined with environmental changes had completely eliminated the botrytis outbreak. I felt a huge sense of relief.
Frequently Asked Questions
Can I save a gardenia flower that already has gray mold spots?
No. Once botrytis spots appear on a petal, that tissue is dead and actively shedding spores. You must remove the entire flower. Cutting off only the spotted area leaves the rest of the petal vulnerable because the fungus has already penetrated the cell walls. I tried to save an affected flower once and ended up losing three more healthy ones. Remove the whole bloom and move on.
How often should I inspect my gardenia for gray mold during humid weather?
During periods of high humidity or cool nights, inspect your plant every single morning. Take a minute to scan every flower and bud. Look for tiny brown spots, water-soaked patches, or any silvery sheen on the petals. This takes less time than treating an outbreak. I have my coffee, then I do my plant rounds. It has become a calming ritual, and it has saved my plants more than once.
What do I do with the soil after removing an infected plant?
Do not reuse the soil for another gardenia or any acid-loving plant. The botrytis sclerotia can live in the soil for up to 2 years. I toss the old soil into a hot compost pile that reaches 140 degrees Fahrenheit to kill spores. If you do not have a hot compost, throw the soil in the trash. Sterilize the pot with a 10 percent bleach solution, rinse thoroughly, and let it dry in full sun before reuse.
Final Thoughts From My Garden Shed
Growing Gardenia augusta is a test of patience. I have lost plants to root rot, spider mites, and yes, botrytis gray-mold. But every failure taught me something. The biggest lesson is that this plant rewards attention and punishes neglect. Do not be discouraged by the first outbreak. My routine has become second nature now. I check the weather forecast, I adjust my watering based on soil feel, and I keep my pruning shears sterilized. Your gardenia can survive this. Mine did. Yours will too if you act quickly, prune ruthlessly, and fix the environment. Treat those gray spots as a warning sign rather than a death sentence. Your plant is telling you that conditions are wrong. Listen to it, correct your mistakes, and you will be rewarded with those fragrant, pristine white blooms.