bluename
How to Rescue Dying Ceropegia Sandersonii from Stem Rot
If your Ceropegia sandersonii is turning mushy at the base and you're watching those lovely parachute flowers wilt before your eyes, here's the honest truth: stem rot moves fast, but you can still save this plant. I've done it. I've also lost one to rot because I panicked and watered it more.
The core answer: stop watering immediately, unpot the plant, cut away every brown or black mushy section with sterilized scissors, let the cuttings callus for 24-48 hours, and repot in fresh, fast-draining soil in a small pot. Then don't water for a week.
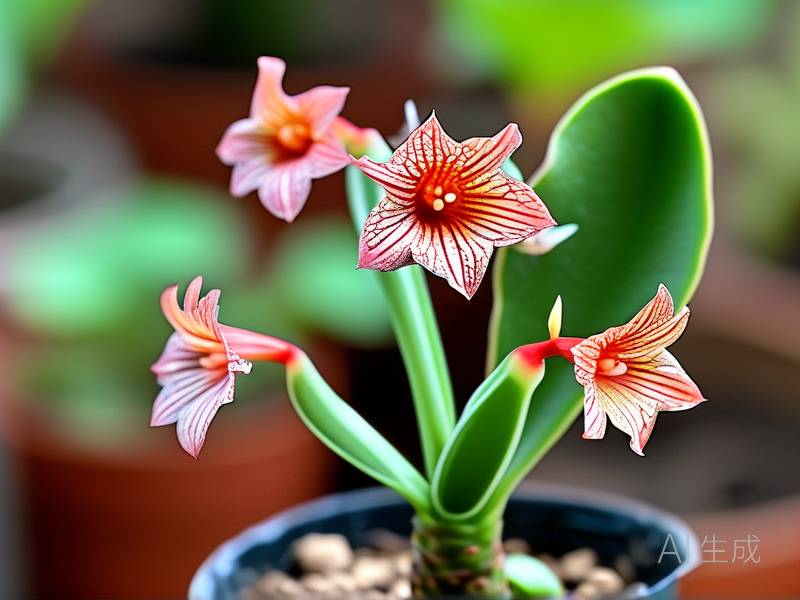
This Parachute Plant is genuinely lovely when happy. Those quirky green and white flowers look like tiny umbrellas, and the vines cascade beautifully from a hanging basket. But it's also a succulent-adjacent vine. That means it loves drying out between waterings. Rot starts when we love it too much with the watering can.
Here's the thing that changed my whole approach: 90% of indoor plants die from overwatering. Not underwatering. Not pests. Overwatering. Once I wrapped my head around that number, my success rate with Ceropegia sandersonii went from "constantly rescuing" to "actually thriving."
Why Stem Rot Happens So Fast With This Plant
Ceropegia sandersonii stores water in its stems. Those fleshy, vining stems are basically little canteens. When the soil stays consistently wet, the plant can't use up that stored moisture. The tissue softens. Bacteria and fungi move in. And by the time you notice the stem going dark and squishy, the rot has often traveled further than you think.
I learned this the hard way with my second Parachute Plant. The soil looked dry on top, so I watered. Turns out the bottom two inches of the pot were a soggy mess. The stem was rotting from below while I kept topping it up. By the time I caught on, I had maybe one healthy cutting to salvage.
The RHS is pretty clear on this — most container plants suffer from poor drainage and overwatering far more than from neglect. And honestly, that matches everything I've seen in my own collection. AHS also emphasizes that proper drainage is non-negotiable for succulents and semi-succulents. I should have listened sooner.
First 48 Hours: The Rescue Protocol I Actually Use
When I pull a rotted Ceropegia sandersonii from its pot, here's exactly what I do. This isn't theoretical. This is the sequence I've followed three times now, and it saved two out of three plants.
Step One: Unpot and Inspect
Gently work the root ball out of the pot. Don't yank. If the soil is soaking wet, shake off as much as you can over a bin.
Now look at the stems from base to tip. Healthy tissue is firm and green. Rotten tissue is brown, black, translucent, or mushy. The line is usually pretty clear. Smell matters too — rot has a sour, earthy smell that's unmistakable once you know it.
Step Two: Cut Back Everything Rotten
Use clean scissors or a knife. Wipe them with rubbing alcohol first. Then cut.
Cut above the rot, into clean green tissue. Don't try to "save" a stem that's half-rotted. It won't work. I tried that once, trimming just the visible rot and leaving the rest. Two weeks later, the rot was back and I'd lost the whole cutting.
If the roots are brown and mushy, remove those too. Healthy roots on this plant are pale and firm. If you have very few healthy roots left, you'll need to reroot the healthy stem cuttings entirely.
Step Three: Let Everything Callus
This step feels like you're doing nothing, and that's exactly the point. Lay the healthy cuttings on a paper towel in a dry, bright spot — out of direct sun. Leave them for 24 to 48 hours.
The cut ends will form a dry callus layer. This is crucial. If you pot a fresh cutting into moist soil immediately, the open wound is basically an invitation for rot to start again. I skipped this step early on because I was impatient. Every single cutting rotted. Every one.
Step Four: Repot in Fresh, Dry Mix
Use a small pot — 3 to 4 inches is fine for a few cuttings. Fill it with a gritty, fast-draining mix. More on the exact recipe below. Water lightly after potting, or even skip the first watering entirely and wait three days. I typically wait.
The Three Mistakes That Kill Most Ceropegia Sandersonii
Let me be blunt about the three things that cause almost every dead Parachute Plant I've seen, including my own failures.
Mistake One: Watering Too Much and Too Often
This is the big one. People see a vine with thin stems and think "tropical plant, needs moisture." Wrong. Ceropegia sandersonii is more like a succulent in disguise. It wants to dry out between waterings, and not just the top inch — the top two to three inches of soil.
I water mine every 10 to 14 days in summer and once every three to four weeks in winter. That's it. When I first started growing this plant, I watered weekly because "the soil looked dry on top." The stem rotted within a month.
Mistake Two: Putting It in the Wrong Light
This plant wants bright, indirect light. A few hours of gentle morning sun is fine. Harsh afternoon sun scorches the stems. Deep shade makes it leggy and weak, which makes it more vulnerable to rot.
I had mine in a north-facing window for a while, thinking "bright indirect" meant "anywhere that isn't dark." The plant stretched out, the stems got thin, and when I finally moved it to a brighter spot, the weak growth collapsed. Light position matters more than most people realize.
Mistake Three: Using the Wrong Pot
The wrong pot is a silent killer. I mean that. A pot that's too large holds too much moisture. A pot without drainage holes is a death sentence. A pot made of non-porous plastic keeps soil wet longer than a terracotta pot would.
I once potted a Ceropegia sandersonii in a decorative ceramic pot with no drainage hole. It looked great. The plant lasted six weeks. When I pulled it out, the bottom of the pot had a standing layer of water and the roots were completely gone.
Use a small pot. Use one with drainage holes. Don't size up "just in case." These plants like being slightly rootbound. That's when they flower best.
Soil Mix and Repotting: What Actually Works
I've tried several soil mixes. The one that works best for me is three parts potting soil, two parts perlite, and one part coarse sand or small pumice. That gives you a mix that holds a little moisture but drains fast.
Some people use a cactus mix straight from the bag. That's fine too. Just check that it feels gritty and loose, not dense and clumpy.
For pot size, small is better. A 4-inch pot is plenty for a young plant. A 6-inch pot is the maximum I'd use for a mature hanging basket. And I always use pots with drainage holes. Always.
Repotting every 12 to 18 months is about right. Do it in spring when the plant is actively growing and can recover quickly. If you've just rescued a plant from stem rot, don't repot again for at least six months. Let it settle.
Watering Guide for Ceropegia Sandersonii
Let me lay this out simply.
Check the soil with your finger or a wooden skewer. Push it two to three inches down. If it's dry, water. If it's even slightly damp, wait.
In summer, that's usually every 10 to 14 days. In winter, every three to four weeks. In spring and fall, somewhere in between.
When you water, water thoroughly until it runs out the drainage holes. Then empty the saucer. Don't let the pot sit in water. Ever.
I bottom-water mine sometimes by setting the pot in a shallow tray of water for 10 minutes, then letting it drain completely. That keeps the top of the soil dry, which reduces the risk of fungus gnats. But top watering works fine too, as long as it drains.
Fertilizer: Less Is More
I feed my Ceropegia sandersonii with a diluted liquid fertilizer — half strength — once a month from spring through early fall. That's it. No feeding in winter. No feeding right after repotting. No feeding a sick plant.
Feeding a plant with stem rot is like giving someone with food poisoning a big meal. It won't help, and it could make things worse. Wait until the plant has recovered and is putting out new growth before you fertilize again.
Seasonal Care: What Changes and What Doesn't
Spring: Recovery and Growth
Spring is when I do the heavy lifting. Repot if needed. Take cuttings if the plant is healthy. Start fertilizing again at half strength.
If the plant had stem rot over winter, spring is the time to do the rescue protocol. The plant has the energy to recover.
Summer: Watch the Heat and Light
Summer is growth season, but it's also when sunburn and heat stress happen. Keep the plant out of harsh afternoon sun. Water a bit more frequently if it's hot and dry, but always check the soil first.
Fall: Slow Down
Reduce watering. Stop fertilizing by mid-fall. Move the plant closer to a bright window if daylight is fading. This is the time to check for any early signs of rot before winter sets in.
Winter: Less Is Everything
In winter, I water maybe once a month. The plant might look a little wilted. That's fine. It's resting. Don't panic-water. Don't fertilize. Keep it in a bright spot away from cold drafts.
Common Problems and How I Handle Them
Yellow leaves usually mean overwatering. Check the soil. If it's wet, let it dry out completely before watering again.
Mushy stems mean rot. Use the rescue protocol above.
Dry, crispy leaf tips often mean underwatering or low humidity. This plant tolerates average humidity, but if your home is very dry, a pebble tray can help.
No flowers? Usually a light issue. These plants flower best with bright, indirect light and slightly rootbound conditions. If yours is in a big pot and a dark corner, you'll get vine growth but no blossoms.
FAQ
Can I save a Ceropegia sandersonii with a completely rotted base? If there's still healthy green stem above the rot, yes. Cut the healthy portions, let them callus, and reroot them in fresh soil. If the entire stem is soft and brown, the plant is too far gone.
How long does it take to see recovery after treating stem rot? New growth usually appears in two to three weeks if the cutting was healthy and the conditions are right. I check for new nodes or tiny leaves at the leaf axils.
Can I use rooting hormone on the cuttings? You can, but it's not necessary. These vines root readily in dry, gritty mix. I've rooted them without hormone multiple times. Just keep the mix barely moist and be patient.