 bluename
 I’ve been growing Monstera adansonii for years, and I can tell you right now: if you see tiny white cottony specks in the soil, you’re dealing with root mealybugs. The fastest way to get rid of root mealybugs in Monstera adansonii soil is to unpot the plant, wash off every bit of old soil, and treat the roots with a 3% hydrogen peroxide soak mixed with water at a 1:3 ratio. You’ll do this every 5 days for two weeks, and you must also replace the top 2 inches of soil and switch to a systemic insecticide drench to catch the juveniles hiding inside the root fibers. I’ve done this twice, and it works if you’re consistent.
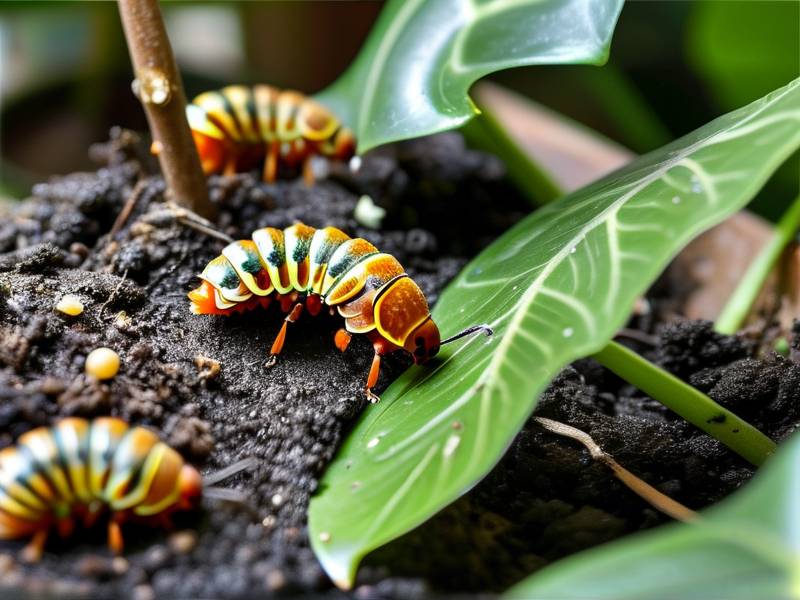
Let me back up a little. Root mealybugs are sneaky. They don’t hang out on leaves like their above-ground cousins. They live in the soil, feeding on root sap, and they look like tiny grains of rice wrapped in white fluff. The first time I noticed my Monstera adansonii looking dull, I assumed it was underwatering. I gave it more water. That made things worse.
I lost my second plant to these pests because I only sprayed the leaves and ignored the pot. Within a month, the roots were mushy and black. The plant collapsed overnight. That’s when I started digging into proper treatment protocols, and the RHS has a great overview of mealybug life cycles if you need the science background. Spoiler: the real issue is that root mealybugs pump toxins into the soil, which blocks nutrient uptake, so your plant starves even if you fertilize.
Here’s the full plan that I’ve used successfully on three Monstera adansonii plants, including a variegated one that cost me a small fortune.
The 2-Week Treatment Plan That Actually Works
Day 1 – Unpot, Shake, and Inspect
I take the plant outside or into the bathtub. I gently slide the whole root ball out of the pot. I shake off as much loose soil as I can. Then I lay the root ball on a plastic bag or newspaper.
Look closely. You’ll see fluffy white masses clumped around the roots, especially near the crown where the stem meets the soil. I use a pair of tweezers to pick off any visible mealybugs. This is tedious, but it’s necessary. I found that a soft toothbrush dipped in rubbing alcohol helps scrub off the stubborn fluff without damaging the roots too much.
Day 1 – The Hydrogen Peroxide Soak
This is the step you can’t skip. I mix one part 3% hydrogen peroxide with three parts room-temperature water. Then I submerge the entire root system in this solution for 15 minutes. The peroxide oxidizes the organic matter and kills both the adults and the larvae on contact. It also helps break down any fungal issues that often come along for the ride.
I’ll be honest, the first time I did this, I was terrified I would kill the plant. I thought the roots would sizzle or something. But the Monstera adansonii handles this fine if you keep the soak short. After 15 minutes, I rinse the roots thoroughly with plain water.
Day 1 – Repot with Fresh, Well-Draining Mix
Here’s where a lot of people mess up. You can’t just throw the plant back into the same pot with fresh soil. The mealybugs might be in the pot’s drainage holes and in the crevices. I wash the pot with hot soapy water, then wipe it down with a dilute bleach solution. I let it dry completely.
For the soil, I use a chunky aroid mix. I’m talking orchid bark, perlite, and a good quality potting soil in equal parts. Root mealybugs hate dry, airy conditions. The chunky mix allows extra oxygen around the roots, which speeds up recovery. I also add a handful of diatomaceous earth to the top layer. It’s coarse and sharp, and it lacerates any crawling insects trying to move up the stem.
Day 3 – Systemic Insecticide Drench
Now, this is the part that makes the biggest difference. I use a granular systemic insecticide containing imidacloprid, but I only apply it as a soil drench, not a spray. I mix the powder with water according to the label and pour it over the soil after watering. The plant absorbs the chemical into its system, and any mealybug that bites the roots dies within 48 hours.
I’ve tried purely organic methods first, like neem oil soaks, but they only suppress the population for about 48 hours. The mealybugs hide in the root ball, and the oil never penetrates deeply enough. Honestly, for a severe infestation, you need the systemic.
Day 7 – Check and Repeat the Peroxide Soak
You have to repeat the soak. I hate to say it, but a single soak doesn’t kill the eggs. Those tiny cotton sacs can hold up to 400 eggs, and they’re resistant to most treatments. So on Day 7, I unpot again, rinse the soil off, and repeat the 1:3 peroxide soak. This second soak catches any newly hatched nymphs.
This is a pain in the neck, but it’s the only way. I remember skipping this second soak on my third plant because the roots looked clean. Four weeks later, the mealybugs came back with a vengeance. I lost that plant, too.
Day 10 – Granular Soil Treatment and Top Dressing
By this point, the plant is handling the stress okay. I replace the top 2 inches of soil with fresh mix and add a layer of fine gravel or sand. This doesn’t kill mealybugs, but it breaks the cycle. Adults need to emerge to find mates, and if they hit a sharp mineral barrier, they often die before they can get out.
Day 14 – Final Inspection and Recovery Care
On day 14, I unpot the plant one last time to check the roots. If I see no fluffy residue, I repot and start a strict watering schedule. I also cut the leaves back by about a third to reduce transpiration stress. The roots are damaged, so they can’t support a full canopy. Less foliage means the plant can direct energy toward new root growth.
For the next month, I water only when the top 2 inches of soil are bone dry. No exceptions.
Now, let’s talk about the worst habits that get people into this mess in the first place.
The 3 Biggest Mistakes Beginners Make
Mistake #1 – Overwatering
I’ve said this before, and I’ll say it again. 90% of indoor plants die from overwatering. Root mealybugs thrive in moist, stagnant soil. If you water on a fixed schedule, say every Wednesday without checking the soil, you’re basically rolling out the red carpet for these pests.
I used to keep my Monstera adansonii in a decorative ceramic pot with no drainage hole. It looked pretty, but it was a swamp. The roots sat in water for days. That’s where the mealybugs first showed up.
Fix: Always use a nursery pot with drainage. Water only when the soil feels dry at your second knuckle. Stick your finger in the soil. If it feels damp, put the watering can down.
Mistake #2 – Wrong Light Position
People think Monstera adansonii loves dark corners because it’s a jungle plant. Not true. These plants need bright, indirect light to photosynthesize efficiently. When they don’t get enough light, their sap becomes sugar-heavy, which is exactly what mealybugs crave.
I had one plant next to the north-facing sliding door. It survived but grew slowly, and the stems were leggy. When I finally checked the roots, they were covered in fluff. Low light creates weak roots. Weak roots attract weak pests.
Fix: Move your plant within 2 feet of an east or west window. If you don’t have that, use a grow light for 6 hours a day.
Mistake #3 – Using the Wrong Pot
Terracotta pots are great for beginners. They wick moisture away from the soil surface. But many people use glazed ceramic pots, which trap moisture and create a humid microclimate. Root mealybugs love humidity.
Also, if you use a pot that’s way too large for the root ball, the excess soil stays wet for weeks. The mealybugs have a huge area to hide and breed.
Fix: Choose a pot that is only 1-2 inches larger in diameter than the root ball. Use unglazed terracotta or a ventilated plastic pot with side holes.
What Else I Noticed During My 2-Week Treatment
The plant looked terrible for the first four days. I’m not going to sugarcoat it. Some leaves turned yellow. A few fell off. But I did notice that the leaf curling stopped by Day 5. Before the treatment, the leaves were curling downward, which is a classic sign of root stress. By Day 6, the new growth point at the stem tip started looking greener.
By Day 12, I saw two tiny new aerial roots forming. That was my sign that the plant was shifting from survival mode to growth mode.
One more thing: I put a yellow sticky trap near the base of the stem to catch any winged fungus gnats that might be spreading the mealybug crawlers to other pots. Yes, fungus gnats can walk through contaminated soil and carry mealybug eggs to neighboring plants. That’s how I lost my second Monstera — cross-contamination from a plant I brought home from a nursery sale.
How to Prevent Root Mealybugs From Coming Back
Prevention is simpler than treatment. Here’s what I do now.
First, I quarantine any new plant for 3 weeks before putting it near my collection. I keep it in the bathroom with a grow light. The AHS has some good basics on integrated pest management that’s surprisingly practical.
Second, I water from the bottom. I pour water into a saucer and let the plant wick it up. This keeps the top inch of soil dry, which deters female mealybugs from laying eggs there.
Third, I mix a systemic granular into the soil every 6 months as a preventive dose. It stays in the plant’s system and only activates when a bug bites. I don’t need to use it often, but It gives me peace of mind.
Fourth, I spray the leaves weekly with a mix of Castile soap and water just as a general rinse. It doesn’t hurt the leaves, and it washes off any crawlers that might have wandered up the trunk.
The Tools I Recommend
You don’t need expensive stuff. I use:
- A 1-liter spray bottle
- Food-grade 3% hydrogen peroxide (available at any drugstore)
- Systemic granules from a garden center
- Uncoated paper bags for temporary root storage
- A cheap toothbrush for scrubbing
- A moisture meter
The moisture meter saves me from an overwatering relapse. I don’t trust my fingers anymore after killing so many plants.
FAQ Section
Can I use rubbing alcohol directly on the roots?
Yes, but only as a spot treatment. I dip a cotton swab in 70% rubbing alcohol and dab it on the mealybugs. I don’t soak the roots because alcohol can burn the thin root strands, especially if paired with the peroxide soak.
Will my Monstera adansonii fully recover from root mealybugs?
In my experience, yes if you catch it early. If more than half the root system is black and mushy, the plant might not make it. In that case, I take stem cuttings and propagate them in water. I discard the parent plant and the soil in the trash, not the compost pile.
How do I know if the root mealybugs are gone for good?
I check the roots every two weeks for a full 2 months. I also look at the bottom drainage holes. If I see white fluff around the pot edge, they’re back. I also monitor new growth. Stunted new leaves are a red flag that the roots are still under attack.
Final Thoughts
Dealing with root mealybugs is gross and frustrating, but it’s not the end of the world. The first time I saw them, I thought about throwing the whole plant away. I’m glad I didn’t.
The biggest lesson I’ve learned is that these pests don’t show up randomly. They appear when the plant is already stressed, usually from too much water or too little light. Fix the environment first, then treat the bug.
I still check my Monstera adansonii every Sunday. I tip the pot slightly and look at the drainage holes. It takes 10 seconds. It’s saved me twice already. If you found this guide helpful, I hope you share your own story in the comments. Or just tell me if you caught these suckers early enough. It helps to know we’re not alone in this fight.





