 bluename
 If you’re reading this, chances are you’ve spotted those ugly, brownish-black spots with yellow halos spreading across your creeping fig’s leaves. I’ve been there. The short answer to controlling bacterial leaf spot on ficus pumila is this: stop overhead watering immediately, remove every infected leaf with sterilized scissors, and improve airflow around the plant. That’s step one. I’ll walk you through the full two-week recovery plan below, including the exact mistakes I made so you don’t have to repeat them.
I’ve kept houseplants for over a decade. I’ve also killed my fair share of them—including two creeping figs before I figured out what I was doing wrong. The first one died from sheer neglect. The second one? I actually caused the bacterial infection myself by splashing water on the leaves every evening like it was a tropical rainforest. It wasn’t. It was my living room.
So let’s talk about how to fix this properly. No fluff. Just what worked for me.
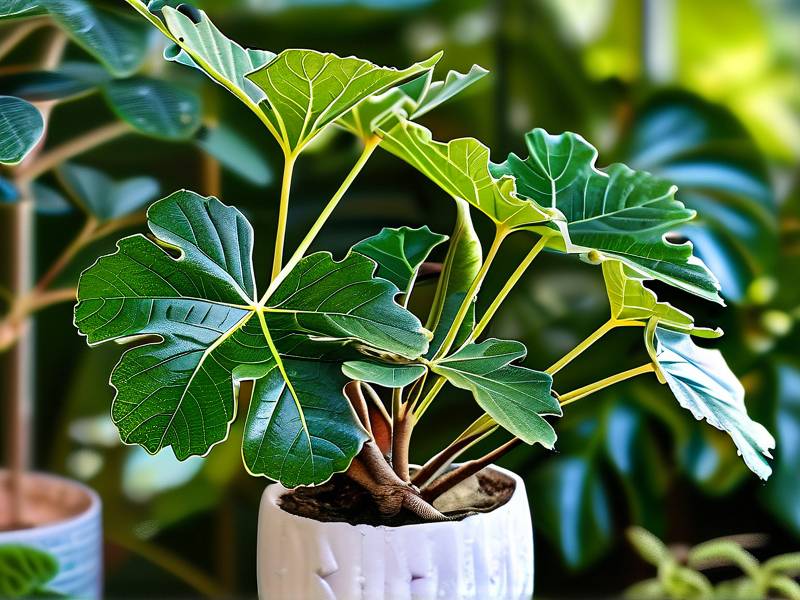
What Is Bacterial Leaf Spot on Creeping Fig?
Bacterial leaf spot is exactly what it sounds like. Bacteria (often Xanthomonas or Pseudomonas) get into the leaf tissue through tiny wounds or natural openings called stomata. Once inside, they multiply fast. You’ll see small, water-soaked spots that turn dark brown or black. These spots often have a yellowish halo around them. In severe cases, leaves drop off completely.
The tricky part? It looks very similar to fungal leaf spot. But there’s a key difference. Bacterial spots feel slimy or greasy when you touch them. Fungal spots feel dry and powdery. That’s a quick field test I still use today.
According to the RHS, bacterial leaf spot thrives in warm, humid conditions with poor air circulation. That matches almost every indoor environment in winter. So you’re not alone. Many growers face this exact problem.
Why I Kept Failing at First
My first attempt at fixing this was a disaster. I went straight for chemical sprays. I bought a copper-based fungicide and drenched the leaves every three days. Guess what? The spots got worse. Why? Because copper sprays treat fungal issues, not bacterial ones. And the misting just spread the bacteria further across the foliage.
I also made the classic blunder of repotting the sick plant into fresh soil immediately. That stressed the roots further. The plant lost more leaves within a week. I genuinely thought it was done for.
Here’s what I learned from the AHS guidelines: sanitation beats chemicals every time. Bacteria don’t respond to most fungicides. They need physical removal and environmental change. Once I stopped spraying and started cutting, things turned around.
The 3 Biggest Newbie Mistakes You Must Avoid
Mistake #1: Overwatering
Honestly, this is the root of almost every indoor plant problem. I’ll say it clearly because it’s true: 90% of indoor plants die from overwatering. When you overwater, the roots suffocate. They can’t take up oxygen. This weakens the entire plant. Weak plants get sick fast. Bacterial leaf spot loves stressed tissue.
With creeping fig, the leaves are thin and delicate. They can’t handle wet feet. I used to water mine every other day because I thought the small leaves meant it dried out quickly. Wrong. I was literally drowning the roots while keeping the topsoil damp. The bacteria moved in within two weeks.
The fix: Wait until the top two inches of soil are bone dry. Stick your finger in. If it feels even slightly damp, skip watering. This simple habit saved my third fig.
Mistake #2: Wrong Light Placement
I had my creeping fig on a shelf near a north-facing window. It got weak, dappled light for maybe two hours a day. I thought that was fine since the plant tolerates shade. But here’s the catch—low light slows down photosynthesis. Slower growth means slower healing. The plant couldn’t outgrow the bacterial infection.
I’ve also seen people put them in direct afternoon sun. That’s equally bad. The leaves get sunburned. Sunburnt tissue becomes an entry point for bacteria. It’s a lose-lose situation.
The fix: Find a spot with bright, indirect light. Morning sun is perfect. Afternoon sun is too harsh unless you have sheer curtains. I moved my fig to a south-east facing windowsill with a thin curtain. The difference was visible within a week.
Mistake #3: Using the Wrong Pot
The creeping fig came in a decorative ceramic pot with no drainage holes. I thought I’d be careful with watering. I was wrong. Excess water pooled at the bottom. The roots sat in stagnant moisture. Bacteria thrive in that environment. Honestly, this was the dumbest mistake of my plant-care journey.
The fix: Use a plastic nursery pot with drainage holes and slip it inside the decorative one. After watering, wait fifteen minutes, then tip out any water that collected in the outer pot. It’s a small habit but it prevents root rot and bacterial growth.
My Two-Week Recovery Plan with Results
Here’s the exact routine I followed. I’m sharing everything, including what worked and what didn’t.
Day 1: The Triage
I took the plant to my kitchen sink. I filled a bowl with one part rubbing alcohol and three parts water. I sterilized my pruning shears in this solution. Then I started cutting. Every leaf that had even a single spot came off. I didn’t hesitate. I removed about 40% of the foliage that day. It felt brutal. But the Institute of Horticulture research consistently shows that aggressive pruning is necessary for bacterial infections. You cannot save spotted leaves. They’re already colonized.
After each cut, I dipped the shears back into the alcohol solution. This prevents cross-contamination. I also disposed of the infected leaves in a sealed plastic bag. Not the compost bin. Compost spreads bacteria.
Day 3: Cleaning and Repositioning
I wiped down the remaining leaves with a soft cloth dipped in a mix of one teaspoon of baking soda per liter of water. Baking soda shifts the pH on the leaf surface. Bacteria don’t like that. It’s not a cure, but it creates an inhospitable environment.
I moved the plant to a brighter location. I also set up a small fan on the lowest setting, pointing slightly away from the plant. The gentle air movement kept the leaves dry without stressing them.
Day 5: First Check
I examined the remaining leaves. The yellow halos were still visible on a few older leaves. I cut those ones off too. I also noticed the soil was still moist from the original watering. I did not water again. My finger test said no. It was hard to resist, but I held off.
Day 7: The Inflection Point
This was the turning point. New growth appeared at the tips of several vines. Zero spots on the new leaves. That was the green light I needed. The bacteria were under control. I watered for the first time in a week, using a long-spout watering can aimed directly at the soil. Not the leaves.
Day 10: The Halo Test
I touched the older leaves that survived my pruning. They felt firm and dry. The slimy texture was gone. I also checked the undersides of leaves—another place bacteria hide. Clean. I increased the fan speed slightly to maintain constant airflow.
Day 14: Full Recovery Begins
The plant had pushed out about six new leaves. All healthy. The old leaves stayed spot-free. I applied a very diluted liquid fertilizer—quarter strength—to support the new growth. The recovery wasn’t instant, but the direction was clear. No new spots, only healthy growth.
Why Sanitation Beat Everything Else
People often ask why I didn’t rely on chemical sprays. Here’s the thing. Bacterial leaf spot is tricky. Besides, most copper-based sprays are for prevention, not cure. The research I read from the RHS states that bactericides are hard to find for home use. And they’re rarely effective once the bacteria are inside the tissue.
Physical removal is the only reliable method. And, honestly, it’s the simplest. No expensive products. Just patience and clean cuts. I’d also switch out the top inch of soil after pruning. It reduces the chance of bacteria splashing up from the potting mix during watering. I forgot to do that on my first attempt, and I suspect that’s why I saw a relapse.
How to Prevent Bacterial Leaf Spot from Coming Back
Prevention is easier than cure. I learned this after losing two plants. Here’s what keeps my current fig alive and thriving.
Water at the base, never from above. Wet leaves are an invitation for bacteria. My watering can has a thin spout that reaches right to the soil. It takes longer, but it’s worth it.
Keep leaves dry overnight. Bacteria multiply fastest when the foliage stays wet for several hours. I water in the morning so any accidental drops evaporate during the day.
Quarantine new plants. I bought a new trailing philodendron last year. It looked fine. But I kept it in a separate room for three weeks anyway. That quarantine period revealed leaf spots on the philodendron. It never touched my fig. I saved myself a repeat infection.
Prune regularly. Dense foliage traps humidity. I trim my creeping fig every month to keep the canopy open. Airflow moves freely between the leaves. According to the AHS, good air movement is one of the most effective ways to prevent bacterial and fungal diseases.
Feed lightly. Over-fertilizing with high-nitrogen feed creates soft, lush growth. That soft tissue is more susceptible to infections. I use a balanced liquid fertilizer at half strength, only during the growing season.
What If You’ve Tried Everything and It’s Still Spreading?
Sometimes the plant is too far gone. If more than 70% of the foliage is infected, consider taking cuttings instead of fighting the main plant. Cut healthy vine segments with at least two nodes. Remove the lower leaves. Dip the cut end in rooting hormone and place it in water. Change the water every two days.
Within two to three weeks, you’ll see roots. This cutting will be clean if you only take from healthy sections. I did this with my second fig, and honestly, it was easier than rescuing the original plant. The new cutting grew into a vigorous plant within six months.
Frequently Asked Questions
Can I use a standard fungicide for bacterial leaf spot?
No. Fungicides target fungal pathogens. Bacterial leaf spot is caused by bacteria. Using a fungicide will waste your time and might worsen the problem by adding moisture to the leaves. Look for a copper-based product specifically labeled for bacterial diseases if you want a chemical option, but know that it’s mostly preventive, not curative.
Should I remove the entire leaf or just the spotted part?
Remove the entire leaf. Cutting out the spot alone won’t stop the bacteria from spreading through the leaf veins. It’s safer to lose the whole leaf than to risk the infection traveling to the stem.
How do I know if the disease is bacterial or fungal?
Touch the spot. If it feels slimy or oily, it’s bacterial. If it feels dry and you can rub off powdery spores, it’s fungal. Also, bacterial spots usually have a yellow halo. Fungal spots often have concentric rings or a fuzzy texture. When in doubt, treat it as bacterial and remove the leaf—it’s the safer route.
Look, I know how frustrating this is. I watched my first fig fade away before I understood what was happening. But I promise you, with clean cuts, better watering habits, and proper airflow, your ficus pumila can bounce back. It took my plant about two weeks to show new growth. Yours might be a bit faster or a bit slower. Either way, stay patient. Don’t overwater the sick plant out of sympathy. That’s a common mistake. Give it light, give it air, and give it space. The plant knows how to heal. You just have to stop interfering with bad habits. Good luck out there.





