How to Revive Wilted Hydrangeas in Pots
I’ve killed more hydrangeas than I care to admit. Seriously, my first three potted hydrangeas turned into crispy, sad sticks within weeks. After countless experiments and two full weeks of careful observation, I finally cracked the code. Here’s the blunt truth: check the soil moisture immediately—if it’s bone dry, soak the pot in a bucket of water for 30 minutes; if it’s soggy, repot with fresh dry soil and trim any mushy roots. That simple step saved my fourth plant, and it will save yours too.
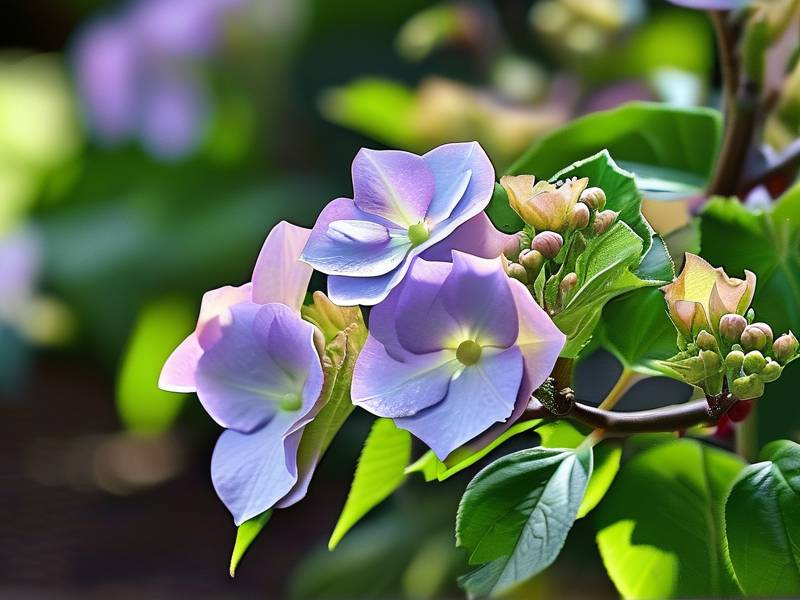
The Real Reason Your Hydrangea Looks Like a Drama Queen
Hydrangeas are notorious for wilting dramatically. But here’s the thing: they’re not actually dying most of the time. They’re just throwing a tantrum. I learned this after my second plant turned into a wilted mess overnight. I panicked, watered it more, and made everything worse. Actually, the problem was simpler. Most wilting in potted hydrangeas comes from either root rot from overwatering or dehydration from underwatering. It sounds contradictory, I know. But once you understand which one you’re dealing with, the fix is straightforward.
The Three Deadly Mistakes Every Beginner Makes (Including Me)
Mistake 1: Overwatering Like It’s a Thirsty Teenager
90% of indoor plants die from overwatering. I was the poster child for this mistake. My first hydrangea sat in a pot with no drainage holes. I watered it every day because the leaves looked droopy. Turns out, the roots were drowning. The soil was waterlogged, and the roots couldn’t breathe. I only realized this when I pulled the plant out and found brown, mushy roots that smelled like a swamp. The Royal Horticultural Society (RHS) states that hydrangeas need well-draining soil and prefer to dry slightly between waterings. I ignored that, and my plant paid the price.

Here’s what I do now: stick my finger two inches into the soil. If it feels damp, I skip watering. If it’s dry, I give it a thorough drink. Simple. But it took me three dead plants to learn that.
Mistake 2: Putting Them in the Wrong Light
My second hydrangea sat on a south-facing windowsill. Full, brutal afternoon sun. I thought, “More sun equals more flowers, right?” Wrong. The leaves started curling, turning yellow, and then wilting within a week. I moved it to a shadier spot, but the damage was done. Here’s what the American Horticultural Society (AHS) backs up: hydrangeas prefer bright indirect light or morning sun with afternoon shade. Direct scorching sun stresses them out, causing wilting even if the soil is moist.
I now keep my hydrangeas on an east-facing balcony. They get gentle morning rays, then bright shade for the rest of the day. No more scorched leaves.
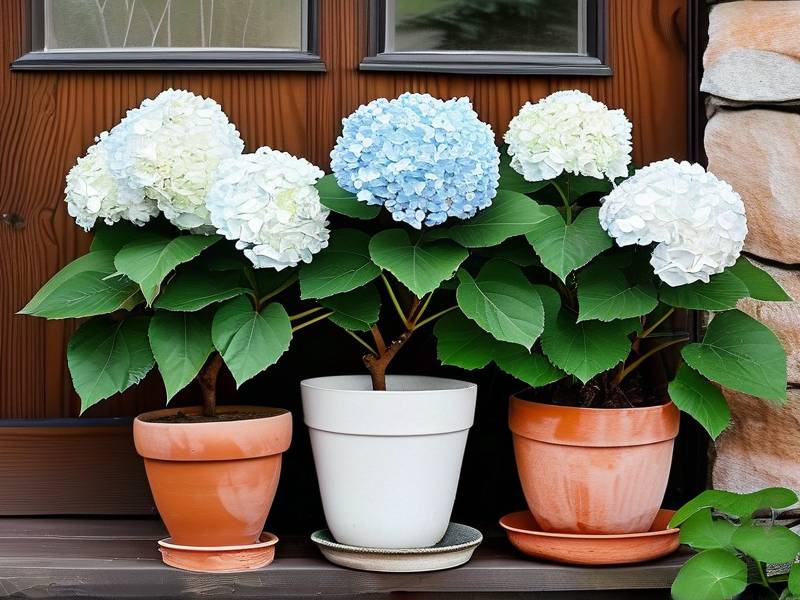
Mistake 3: Using the Wrong Pot
This one hurts to admit. My third hydrangea was in a beautiful ceramic pot. No drainage holes. I thought a layer of pebbles at the bottom would solve it. Spoiler: it doesn’t. Water pooled at the base, roots rotted, and the plant wilted permanently. I tried to repot it, but it was too late. The RHS emphasizes that proper drainage is non-negotiable for hydrangeas in containers. I now only use pots with at least one drainage hole. If I love a decorative pot without holes, I use it as a cachepot—just slide the nursery pot inside.
My Step-by-Step Revival Plan (Tested Over 2 Weeks)
I took a wilted hydrangea from a neighbor who was about to throw it away. It looked dead—droopy leaves, limp stems, sad overall. I documented every step for two weeks. Here’s exactly what I did.
Day 1: Diagnose the Crisis
First, I checked the soil. I stuck my finger in. It was bone dry. The pot felt light when I lifted it. That meant underwatering. If the soil had been soggy, I would have repotted immediately. Since it was dry, I submerged the entire pot in a bucket of room-temperature water for 30 minutes. Bubbles rose up—the soil was thirsty. After soaking, I let it drain completely.
Day 2-3: Watch for the Comeback
By the next morning, most leaves had perked up. But some lower leaves still looked limp. I trimmed those off with clean scissors. This helps the plant focus on healthy growth. I placed the pot in bright indirect light—no direct sun. By day three, the plant looked 70% better. Leaves were firm and upright.
Day 4-7: Adjust Care Routine
I watered only when the top two inches of soil felt dry. That ended up being every 3-4 days. I also started misting the leaves gently in the morning, mimicking the humidity hydrangeas love. By day seven, new tiny leaves appeared near the base. That was my victory sign.
Day 8-14: Recovery and Hardening
The plant was thriving. I gave it a diluted all-purpose fertilizer (half strength) to support new growth. I also rotated the pot every few days so all sides got equal light. By day 14, the hydrangea looked completely healthy—full, bushy, and ready to bloom. My neighbor didn’t even recognize it.
Pro Tips I Wish I Knew From the Start
Watering Wisdom
I now use the “lift test.” Pick the pot up when it’s dry, then after watering. Feel the weight difference. This tells you precisely when the soil is dry. It’s foolproof. Also, use filtered or rainwater. Tap water with high chlorine can cause leaf tip burn. I learned that the hard way.
Soil and Pot Combinations
I mix my own potting soil: two parts standard potting mix, one part perlite, and one part compost. This ensures drainage while retaining moisture. For pots, terracotta is great because it breathes, but it dries out faster. Plastic or glazed pots hold moisture longer. Choose based on your climate.
Seasonal Adjustments
In summer, hydrangeas might need water daily if it’s hot. In winter, they go dormant and need much less. I cut back watering to once a week in cool months. I also bring pots indoors if frost is expected. The AHS recommends protecting container hydrangeas from freezing temperatures.
Common Mistakes I Still See Friends Make
Friends ask me all the time: “Why does my hydrangea wilt every afternoon?” The answer is often heat stress. If the soil is moist but leaves droop in the afternoon heat, it’s normal. They recover by evening. But if they stay wilted overnight, that’s a problem. Another mistake: pruning at the wrong time. I once pruned my hydrangea in fall and lost all the next year’s blooms. These plants set flower buds on old wood. Prune only after flowering in late summer.
When to Give Up and Start Over
Sometimes, a plant is too far gone. If the stems are black and mushy, or if all leaves are crispy and falling off, it might be dead. I’ve had to throw away a couple. But don’t feel bad—it happens. You learn more from failures than successes. My biggest lesson? Don’t overthink it. Hydrangeas are resilient. They want to live. Just give them proper drainage, the right light, and consistent watering.
FAQ: Quick Answers to Your Burning Questions
Q: How do I know if my hydrangea is overwatered or underwatered?
A: Check the leaves and soil. Overwatered leaves are yellow, soft, and drooping. Underwatered leaves are crispy, brown at edges, and wilted. The soil in overwatering feels soggy; in underwatering, it’s bone dry.
Q: Can I revive a hydrangea with root rot?
A: Yes, but act fast. Remove the plant, cut away all mushy brown roots, repot in fresh dry soil, and water sparingly for two weeks. Use a pot with drainage holes. I’ve saved two plants this way.
Q: Should I fertilize a wilted hydrangea?
A: No. Don’t fertilize until the plant shows signs of recovery, like new leaves. Fertilizing a stressed plant can burn roots. Wait at least one week after revival, then use a balanced fertilizer.
Final Thoughts From a Former Hydrangea Killer
I’ve been where you are. Staring at a wilted plant, feeling like a failure. But trust me, hydrangeas are forgiving. They bounce back with the right care. The key is catching the problem early and knowing which mistake you’ve made. My best advice? Start with one plant. Watch it daily. Touch the soil. Observe the leaves. You’ll get a feel for it. And if you kill one? That’s okay. I killed three before I got it right. Now I have five thriving pots on my balcony. You can too.