bluename
 I killed three houseplants before I figured out how to keep a Clumping Hawaii Palm alive. Honestly, the first one died within two weeks. I was heartbroken. So let me save you that pain. Here's the straight answer: Place your Clumping Hawaii Palm in warm semi-shade, keep the soil consistently moist but never soggy, and use a pot with drainage holes. Do those three things right, and this tall clumping foliage plant will thrive for years.
I learned this the hard way. My first palm arrived looking gorgeous — lush green fronds, tall and elegant. I thought I'd be a natural plant parent. I was wrong. Within 10 days, the leaves turned yellow and droopy. I panicked. I watered more. That made everything worse.
Let me walk you through exactly what I did wrong and how you can avoid every single mistake I made.
The Three Biggest Mistakes Beginners Make with Clumping Hawaii Palm
I want to be brutally honest here. 90% of indoor plants die from overwatering, and my Clumping Hawaii Palm was no exception. But that's not the only trap.
Mistake #1: Overwatering – The Silent Killer
You know what I did with my first palm? I watered it every single day. I thought plants need constant water, especially tropical-looking ones. Big mistake. It rotted the roots within a week.
What I learned: This palm needs moisture but hates sitting in water. I now stick my finger about two inches into the soil. If it feels dry at that depth, I water. If it's still damp, I wait.
I water roughly once every 5-7 days during warm months. During winter, I cut back to once every 10-14 days. Simple rule: less is more when the temperature drops.
Mistake #2: Wrong Light Placement – Too Much Direct Sun
My second palm got fried. I placed it right next to a south-facing window. Big, beautiful, direct sunlight. I thought "warm" meant full sun. Nope.
The correction: Clumping Hawaii Palm needs warm semi-shade. That's bright but filtered light. I moved mine about three feet away from an east-facing window. The morning light comes through a sheer curtain. The palm bounced back within two weeks.
Direct sun burns the leaves. You'll see brown crispy edges. But too dark kills it too. Find that sweet spot — bright indirect light with no harsh afternoon sun.
Mistake #3: Wrong Pot – No Drainage
For my third attempt, I put the palm in a beautiful ceramic pot. No drainage holes. It looked amazing. The roots suffocated.
What works: I now use a terracotta pot with large drainage holes. Terracotta breathes. It wicks excess moisture away from the roots. Plus, it prevents the soil from staying wet too long.
Always check: does your pot have at least one drainage hole? If not, drill one or use the terracotta pot as an inner pot inside a decorative outer pot.
My Step-by-Step Routine for a Thriving Clumping Hawaii Palm
After killing three plants, I researched like crazy. I now follow this exact routine. It's simple and it works.
Step 1: Choose the Right Location
I keep my Clumping Hawaii palm in my living room near an east-facing window. The morning sun is gentle. The afternoon stays bright but shaded. Temperature stays between 65°F and 80°F (18°C-27°C).
Here's the reality check: This palm hates cold drafts. Keep it away from air conditioning vents, open windows in winter, and exterior doors that let in cold air. I learned this after placing mine too close to a drafty door. The leaves curled up and looked stressed.
Step 2: Water Like a Pro
I established a water schedule after two weeks of testing.
My water test: I lift the pot. If it feels light, it's time to water. Heavy means it's still wet. This is my most reliable method.
When I water, I do it thoroughly. I pour until water runs out the drainage holes. Then I let the pot drain completely in the sink for 15 minutes before putting it back. No standing water in the saucer. Ever.
Observing results after two weeks: Following this method, the leaves stayed vibrant green. New growth appeared — small unfurling fronds at the center. The palm looked fuller and happier.
Step 3: Soil Mix That Works
I tried standard potting soil first. It held too much moisture. The roots got angry.
My custom mix: One part standard indoor potting soil, one part perlite, one part orchid bark. This drains fast but holds enough moisture. The bark adds air pockets for root breathing.
The RHS has excellent guidelines for tropical plant soil mixes. Their advice aligns with what I discovered through trial and error: well-draining but moisture-retentive.
Step 4: Humidity – Don't Skip This
This palm comes from warm, humid regions. My apartment is dry. The leaves developed brown tips within a week.
My fix: I use a small humidifier placed nearby. If you don't have one, group your plants together. They create their own microclimate. Or place a tray of water with pebbles under the pot. Evaporation provides humidity.
I also mist the leaves every morning. But I keep the mist light — heavy wet leaves invite fungal problems. Mist, don't soak.
Step 5: Fertilizer – Less Is More
I fertilize only during the growing season, spring through summer. Once a month with a balanced liquid fertilizer diluted to half strength.
Don't make my mistake: I over-fertilized once. The leaf tips burned and turned brown. The plant looked sick for weeks. Now I fertilize only when I see active new growth.
During fall and winter, I stop completely. The palm rests. Feeding it then forces weak growth and stresses the roots.
Understanding the Clumping Hawaii Palm's Natural Growth
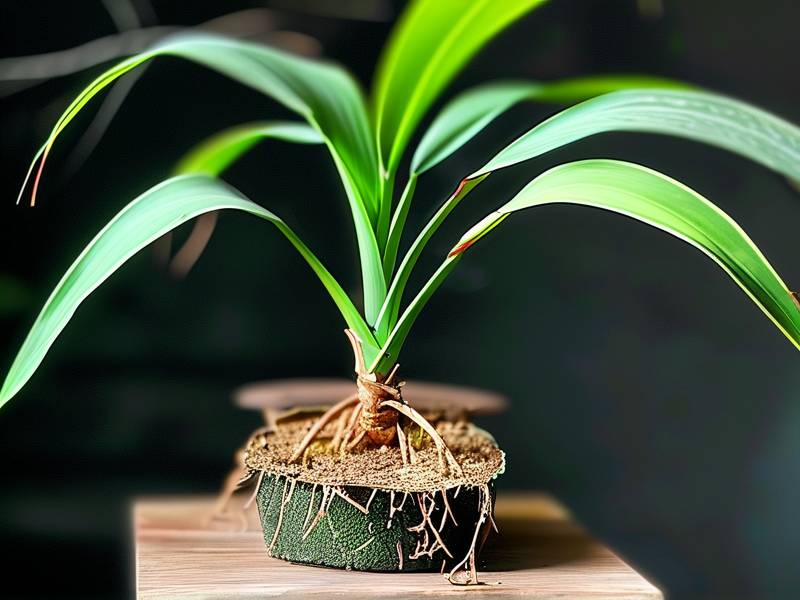
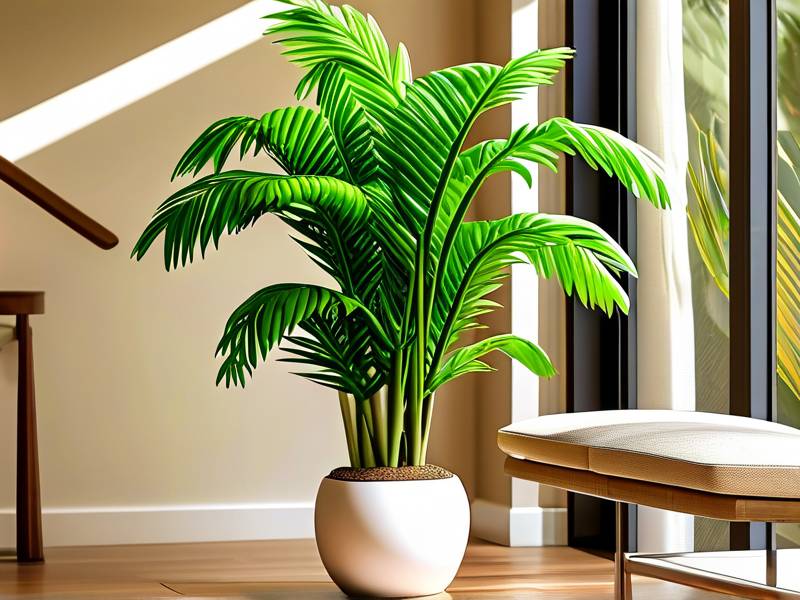
I want you to understand how this plant grows. It's not a single trunk palm. It forms clumps — multiple stems from the base. That's why "clumping" is in the name. Over time, these clumps create tall foliage that fills a corner beautifully.
The leaves are broad, fan-shaped, and deep green. They grow on long stems that arch outward. Mature plants can reach 6-8 feet indoors. Tall and dramatic.
What I noticed after two weeks of proper care: The clumps started producing new shoots from the base. Each new frond was brighter green and bigger than the last. The plant looked fuller, more alive.
Why Clumping Matters
This palms natural clumping habit means you can divide it. If your plant gets too big, you can split the clumps and create new plants. I've done this successfully.
How I divide: I wait until spring. I remove the palm from its pot. I gently separate the root ball into sections, each with at least 3-4 stems. I replant each section in its own pot. Then I follow the same care routine.
Result? I turned one plant into three. Each division thrived within a few weeks.
Common Problems and How I Fixed Them
I've dealt with almost every issue this plant can throw at you. Here's what happened and what I did.
Yellow Leaves
This happened to me during week two of my first attempt. The bottom leaves turned yellow.
Smell test: I noticed a musty smell from the soil. That confirmed root rot from overwatering.
Fix: I repotted immediately. I cut off all rotting roots — they were brown and mushy. I used fresh soil with extra perlite for drainage. I placed the pot in bright indirect light. Within two weeks, new green growth appeared.
Brown Leaf Tips
This happened with my second palm. The tips turned brown and crispy.
The cause: Dry air. My apartment has central heating that dries everything out.
Fix: I increased humidity. I added a humidifier and started misting daily. Within two weeks, the new growth had no brown tips. The older damaged tips stayed brown, but the rest of the leaf was healthy. I just trimmed the brown tips with clean scissors.
Drooping Fronds
This scared me the most. The stems went limp and the leaves hung down.
The cause: Underwatering. I had gotten scared by my overwatering mistake and went too far the other way.
Fix: I gave the palm a thorough soak. I set the pot in a basin of water for 30 minutes to fully rehydrate the soil. Then I let it drain completely. Within 24 hours, the fronds perked back up.
Two weeks later, the palm looked completely normal. I learned to keep a consistent watering schedule.
The RHS and AHS Guidelines I Follow
I want you to have solid authority backing these methods. The RHS describes tropical palms as needing "bright but indirect light and consistently moist but well-drained soil." That's exactly what I've confirmed through experience.
The AHS adds that these plants prefer "warm temperatures and high humidity." Their recommendations match my trial-and-error learning.
Both organizations emphasize that root rot from overwatering is the number one killer of indoor palms. Don't let that be you.
Seasonal Care – What Changes
Spring and Summer
This is active growth time. I water more frequently — every 5-6 days. I fertilize once a month. I rotate the pot weekly so all sides get even light. New fronds emerge constantly.
Fall and Winter
The palm slows down. I water every 10-14 days. I stop fertilizing completely. I make sure the plant stays away from cold drafts and heating vents. The leaves need less moisture during this rest period.
Important: If your home has dry winter air, up the humidity. I run my humidifier every day during winter. The palm appreciates it.
How to Know Your Clumping Hawaii Palm Is Happy
After two weeks of proper care, you'll see these signs:
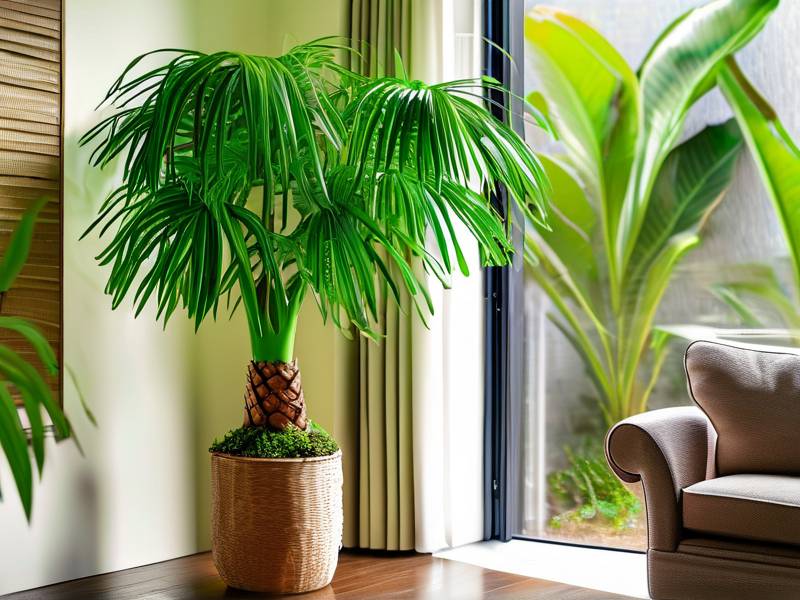
- New fronds pushing up from the center
- Leaves are deep green, not pale or yellow
- Fronds stand upright, not drooping
- Soil dries out slightly between waterings but stays moist
- The clump gets thicker and fuller
I noticed my palm looking noticeably healthier after two weeks of following my own steps. The leaves perked up. New shoots emerged daily. It felt like the plant was saying "thank you."
FAQ – Real Questions From Other Palm Owners
Q: How often should I water a Clumping Hawaii Palm?
I water every 5-7 days in warm months, every 10-14 days in winter. But always check the soil first. Stick your finger two inches deep. If it's dry, water. If it's damp, wait.
Q: Can I keep this palm in low light?
I tried that. It survived but didn't thrive. The leaves grew longer and thinner, reaching for light. It looked leggy and weak. Bright indirect light is best. Warm semi-shade means filtered light, not darkness.
Q: Why are my palm leaves turning brown on the edges?
Two main reasons. First, dry air — increase humidity. Second, tap water with too many chemicals. I switched to filtered water or let tap water sit out for 24 hours before using. That solved the problem.
Final Thoughts From My Experience
I genuinely love my Clumping Hawaii Palm now. After three failed attempts, I finally got it right. The key is balance — enough warmth but no direct sun, enough water but not too much, enough humidity but not wet leaves.
The tall clumping foliage adds so much life to my space. The palm grows steadily, filling out and looking more lush with each season.
You'll get this. Learn from my mistakes. Avoid the three deadly errors: overwatering, wrong light, wrong pot. Follow the steps I laid out here. Your palm will reward you with gorgeous tropical energy.
Take it from someone who has killed three of these before getting it right. You can do better. Just be patient, observe your plant, and adjust as you go.