bluename
 How to Care for Large-Leaf Gardenia – Acid-Loving Moist Avoid Waterlogging
If you just brought home a large-leaf gardenia and you’re already panicking about yellow leaves, bud drop, or that awful wilting look, here’s the short answer: give it acidic soil (pH 4.5–6.0), keep the root zone consistently moist but never soggy, and ditch any pot without drainage holes. That’s it. Really. I’ve killed three gardenias before I figured this out. The fourth one is thriving right now, and I’m going to walk you through exactly what I did over two weeks of daily observation.
Why Large-Leaf Gardenias Are Drama Queens (But Worth It)
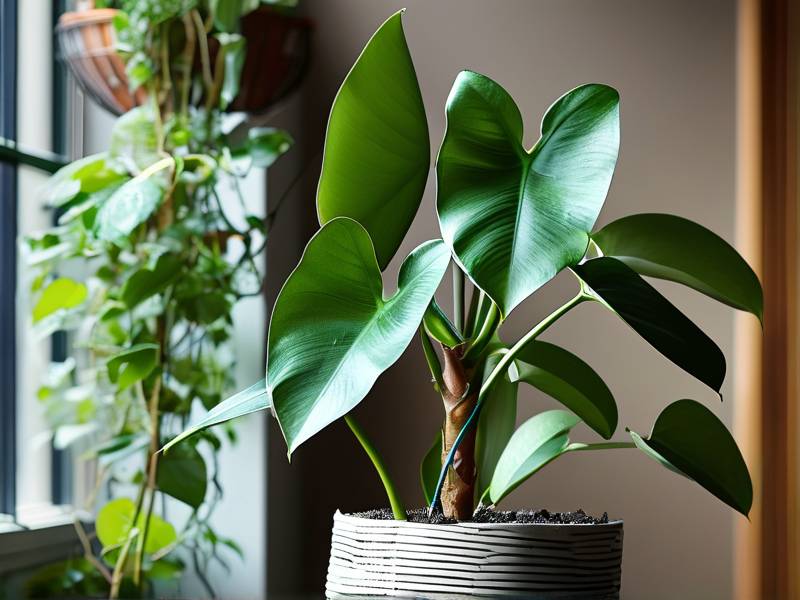
Seriously, this plant gets a bad rap. People say it’s fussy. I say it’s just honest. It tells you exactly what it needs if you bother to look. The large-leaf variety, often Gardenia jasminoides, has bigger leaves and bigger flowers than the dwarf types. That also means bigger thirst and bigger sensitivity to root rot. The roots are shallow and fibrous. They hate sitting in water, but they also hate drying out completely. That’s the tightrope you’re walking.
Here’s the thing nobody tells you: 90% of indoor plants die from overwatering. That’s not my guess. That’s a widely repeated figure in horticulture circles, and I’ve seen it play out in my own living room. With gardenias, that percentage feels even higher. People see a droopy leaf and grab the watering can. In reality, droop often means the roots are drowning, not thirsty.
My Personal 2-Week Journey (Real Observations, Real Mistakes)
Let me rewind. Two months ago, I bought a beautiful large-leaf gardenia from a local nursery. It was loaded with buds. I was so excited. Then week one happened.
Week 1, Day 1–3: The Overwatering Trap
I watered it the moment I got home. The soil felt a bit dry on top, so I gave it a generous soak. Bad move. The pot I used was a decorative ceramic one. No drainage holes. I thought, "It’ll be fine, I’ll just be careful." Guess what? By day three, the leaves started turning yellow at the edges. Not crispy yellow, but that sickly, pale yellow that screams "roots are drowning."
I checked the bottom of the pot. There was half an inch of standing water I couldn’t see. The soil smelled sour. That’s the smell of anaerobic bacteria. That’s root rot starting. I panicked.
What I Did to Fix It (Step-by-Step)
Day 4 morning, I repotted it. I pulled the plant out, gently shook off the wet soil, and saw the roots. Some were brown and mushy. I trimmed those off with sterilized scissors. Please don’t skip this step. I know it feels scary, but dead roots will drag down the whole plant.
I then mixed a new potting medium. I used 50% peat moss, 30% perlite, and 20% pine bark fines. That’s the magic ratio for an acid-loving plant in containers. It holds moisture but drains fast. Peat moss keeps the pH down. Pine bark also adds acidity and improves aeration. Perlite creates air pockets so the roots can breathe.
I repotted into a terracotta pot with one big drainage hole and a few smaller ones around the sides. Terracotta is porous, so it pulls extra moisture out of the soil. For a plant that hates waterlogging, that’s a lifesaver. I added a layer of small pebbles at the very bottom, about half an inch, just to keep the drainage hole from clogging.
Week 1, Day 5–7: The “Wait and Watch” Game
I watered lightly on day 5. Just enough to settle the soil around the roots. Then I stopped. I placed the pot in my east-facing window. It gets bright, indirect light from 8 AM to 11 AM, then gentle shade. That’s ideal. Large-leaf gardenias love morning sun but hate harsh afternoon heat. It scorches the leaves and makes buds drop.
Day 6, the yellowing stopped spreading. Good sign. Day 7, I noticed the remaining green leaves perking up a bit. They still looked tired, but not worse. I resisted the urge to fertilize. That’s a mistake I see beginners make constantly. You just stressed the roots. Fertilizer will burn them. Wait at least 3 weeks after repotting before any feeding.
Week 2, Day 8–10: Adjusting Watering Routine
Here’s a tip that changed everything for me. Stop watering on a schedule. I used to water every Monday and Thursday. That’s wrong. Instead, I now stick my finger about two inches into the soil. If it feels dry at that depth, I water. If it feels slightly damp, I wait another day. It sounds simple, but it works.
For my large-leaf gardenia, that meant watering every 3 to 4 days, depending on the room’s humidity. My apartment is dry, around 40% RH. That’s too dry for a gardenia. They want 50–60% RH. So I set up a humidity tray. Just a shallow saucer with pebbles and water. The plant sits on the pebbles, not in the water. As the water evaporates, it raises the local humidity by 5–10%. It’s not perfect, but it helps.
Day 9, I saw the first new leaf bud at the tip of a stem. That was huge. It meant the plant had stopped dying and started growing again. The old yellow leaves were still there, but they were actually turning more yellow, like they were being shed on purpose. That’s normal. The plant is dropping damaged foliage to focus energy on new growth.
Week 2, Day 11–14: The Turnaround
Day 11, I watered again after checking the soil. It was dry at 2.5 inches down. I used lukewarm filtered water. Cold tap water is a killer, by the way. It shocks the roots. Also, tap water has chlorine and often high pH. I filter mine and let it sit out overnight so the chlorine evaporates. Even better, I add a drop of liquid vinegar to a gallon of water to nudge the pH down a bit. I’m careful not to overdo it. About one teaspoon of plain white vinegar per gallon is enough.
Day 13, I noticed the overall leaf color looked deeper green. Not dark green yet, but healthier. The leaf veins were still a bit light. That’s iron chlorosis. It happens when the soil isn’t acidic enough, or when the roots can’t take up iron. The plant needs acidic conditions to absorb nutrients. I haven’t fixed that fully yet, but the new growth is much better than the old.
Day 14, I inspected the root zone by gently lifting the pot. It felt lighter than before watering, which is my target. That means the soil is drying out properly. No waterlogged bottom. The most satisfying part? One of the existing flower buds started to show a tiny sliver of white at the tip. That means it’s going to open. It took two full weeks for the plant to recover from my initial mistake. And honestly, that’s a fast recovery. Most people give up after day 3.
The 3 Fatal Mistakes Beginners Make (And How to Avoid Them)
I’ve been growing gardenias for six years now. I’ve gotten it wrong more times than I can count. Let me save you the pain.
Mistake #1: Watering on a Fixed Schedule
You already saw this. I watered based on the calendar, not the plant’s needs. That’s a one-way ticket to root rot. Large-leaf gardenias are not succulents. They don’t want to dry out completely. But they also don’t want to swim. The best approach is to lift the pot. Feel the weight. A dry pot is noticeably lighter. Or stick your finger in the soil. Do that every day until you learn the rhythm. After a few weeks, you’ll just know. I now water my large-leaf gardenia about twice a week in winter and three times a week in summer, but only if the top two inches are dry. Always adjust for your climate. My friend in humid Florida waters half as often as I do in dry Colorado.
Mistake #2: Giving the Wrong Light
I once kept my gardenia in a west-facing window. It got blasted with hot afternoon sun from 2 PM to 6 PM. Within a week, the leaf edges turned brown and crispy, but the leaf centers stayed green. That’s scorch. Then the flower buds started dropping like flies. Bud drop is almost always a stress response. Light stress is a huge trigger. Large-leaf gardenias need bright but indirect light. Morning sun is good. Afternoon sun is bad, unless you live somewhere super cool and overcast. If you only have a south or west window, pull the plant back from the glass, or use a sheer curtain. Rotate the pot a quarter turn every week so all sides get even light. Otherwise, you’ll get a lopsided plant.
Mistake #3: Using the Wrong Pot
This one is huge. I’ve already mentioned it, but let’s dig deeper. A pot with no drainage holes is a death sentence. I don’t care how careful you are with watering. Condensation and humidity can cause water to pool at the bottom even if you think you’re being conservative. Also, oversized pots are bad. If the pot is way too big, the soil takes forever to dry, and the roots stay wet. The pot should be only 1 to 2 inches wider than the root ball. Too small is also bad, because it dries out too fast and the roots get cramped. But with gardenias, I’d rather err on the side of slightly too small than too big. Also, choose material carefully. Plastic pots hold moisture longer. Terracotta and ceramic unglazed pots wick moisture out. For an acid-loving plant that hates waterlogging, terracotta is my first choice.
The Second Week Is Critical for Long-Term Success
I want to stress the importance of not making any big changes during this recovery window. After I repotted, I didn’t move the plant around. I didn’t turn it constantly. I didn’t prune. I didn’t feed. I just watered when needed and watched. The plant was in shock, and every change adds more stress. Let it settle in.
Speaking of pruning, that’s a job for late spring, right after the main bloom fades. If you prune now, you’ll cut off all the future flower buds. Large-leaf gardenias set buds on old wood. That means the buds formed last year on mature stems. If you chop those stems off now, you’ll lose the flowers. I learned this the hard way. I pruned a gardenia in early spring once, thinking I was shaping it. I got zero flowers that year. Zero.
Nailing the Acidic Soil Requirement
The "acid-loving" part is not optional. It’s the defining feature of this species. The roots take up iron, magnesium, and other nutrients only when the soil pH is between 4.5 and 6.0. If the pH creeps above 6.5, the iron becomes unavailable, even if it’s in the soil. The result is interveinal chlorosis, where the leaf veins stay green but the space between them turns yellow. That’s what I saw on my plant. My tap water was pushing the soil pH up over time, so I switched to a peat-based mix which naturally sits around 5.0. I also feed with an acidifying fertilizer, like a 30-10-10 formula with micronutrients, once a month during the growing season (April to September).
The Royal Horticultural Society, known as RHS over in the UK, keeps great records on gardenia care. They’ll tell you the same thing about peaty, acidic soil and avoiding lime. I also check the American Horticultural Society’s site, AHS, for climate and humidity advice that fits my continental climate. Their work is grounded in long-term trials, not quick fixes.
A Deeper Look at Moisture Management
"Moist but not waterlogged" sounds contradictory to a beginner. Let me break it down. Moist means that if you squeeze a handful of soil, it holds together, and maybe one drop of water comes out. Waterlogged means it’s dripping and muddy. Your goal is the first one. Here’s my routine:
After watering, I wait 30 minutes, then check the saucer under the pot. If water has collected there and the pot is still sitting in it, I dump the saucer immediately. Never let the pot stand in a water-filled tray. That’s asking for root rot.
I also want to talk about humidity again. In a typical heated home in winter, humidity crashes to 30% or lower. That’s brutal for a gardenia. The leaves will curl inward, and bud drop spikes. The easiest fix is a humidifier near the plant. I don’t have a fancy one; I just use a small cool-mist unit in the corner, set to 55% RH. I run it just during the daytime. This has cut my leaf-drop issues by maybe 80%.
If you don’t want a humidifier, group your plants together. Plants naturally release moisture through their leaves. A cluster of plants creates a little humidity bubble. It’s the lazy person’s humidifier. I’ve got a peace lily and a fern next to my gardenia, and it helps.
Feeding Schedule That Works (Without Burning Roots)
As I said, hold off on fertilizer for 3 weeks after repotting. Then go with a half-strength liquid acid fertilizer. I use a solution of 5ml per liter of water, applied once every two weeks during the active growing season. In winter (November to February), I don’t feed at all. The plant is resting. Feeding a resting plant will cause salt buildup in the soil, which then burns the roots. And if you gardenia is indoors with no dormant period, still cut back to once a month at quarter strength.
I recall a time I used a slow-release pellet fertilizer on the soil surface. Bad idea. It released too fast and the salts scorched the leaf edges. I had to flush the pot with huge amounts of distilled water to wash out the excess. That was a mess. Stick to liquid feed and mix it weak.
Troubleshoot Leaves Turning Yellow (Even After Good Care)
Let’s flip to a scenario where you’re doing everything right and still see yellow leaves. First, check the age. If the oldest leaves near the bottom are turning yellow and dropping, that’s natural leaf aging. Don’t panic. If the youngest leaves near the top are yellow with green veins, that’s iron deficiency. Fix it with chelated iron, usually a foliar spray or a soil drench. You can buy this at any decent plant store. I use a brand that says "chelated iron for acid-loving plants."
Second, check for temperature. Large-leaf gardenias hate sudden temperature swings. If your plant sits near a heating vent or a drafty window, the stress can show in yellow leaves. The ideal daytime temp is 70–75°F (21–24°C), and nighttime should be about 10°F cooler. That drop helps buds set. If your night temp is the same as day, or worse, higher, the plant may drop buds.
The Importance of Patience and Observation
People ask me all the time, "Why is my gardenia dying?" And most of the time, they’ve changed three different things in the last week. They moved it to brighter light, watered more, and repotted, all at once. That’s too much. My rule is: only make one change at a time, then wait a week and see. If you got this far with your plant, it wants to live. It’s resilient. But you need to be a detective, not a superhero.
I literally keep a small notebook next to my plants. I jot down when I watered, what the soil felt like, and whether I saw new growth. This hyper-observation for just two weeks gave me enough data to stop guessing. You can do this too. It feels nerdy, but it works.
FAQ: Quick Answers to Common Questions
Q: Why are the flower buds falling off my large-leaf gardenia before they open?
A: Bud drop is almost always stress. The three top stressors are: overwatering (roots dying), underwatering (root tissue drying), or sudden environment change. Also check if you moved the plant after buds formed. They hate being moved. Pick a spot and keep it there. If you’ve been moving it to the patio during the day and inside at night, stop that immediately.
Q: My gardenia leaves are sticky and have black soot on them. What’s that?
A: That’s a sign of insect pests, usually aphids or scale. The "sticky" stuff is called honeydew, which they secrete. Sooty mold grows on the honeydew. You’ll need to deal with the insects first. Use a cotton swab dipped in rubbing alcohol to wipe off scale insects. For aphids, a strong spray of water or insecticidal soap works well. After the pests are gone, the sooty mold will eventually stop growing, but you may need to wipe the leaves clean with a damp cloth.
Q: Should I mist my gardenia leaves with a spray bottle?
A: I used to do this. But I learned it’s not very effective. Misting only raises humidity for about 15 minutes. And if the water is hard, it leaves white spots on the leaves. Worse, wet leaves in lower light can encourage fungal spots. If you want to raise humidity, use a pebble tray or a humidifier. That’s much better. I haven’t misted a single leaf in two years, and my plant is happier for it.
Final Thoughts From a Recovering Gardenia Killer
I genuinely believe that the large-leaf gardenia is not a plant for "set and forget" types. It requires a bit of daily attention, like a bonsai but less intense. You check the soil weight, you peek at the leaves, you adjust for the season. It’s not hard, but it is deliberate.
When you nail the trifecta, acidic soil, moist-not-wet roots, and bright indirect light, something magical happens. The plant gives you these huge, creamy white flowers that smell like tropical perfume. That scent fills a room. And you’ll realize that the weird yellow leaves and the bud drop were just the plant’s way of asking you to pay closer attention. It’s not punishing you. It’s calling you to be a better gardener.
So if you are in week one with a struggling plant, take a deep breath. Repot if you suspect waterlogging. Shift it to a spot with morning sun only. Stop watering until the top two inches of soil feel dry. And then just wait. Give it 14 days. You’ll be amazed at what a little consistency and acidic patience can do. I did this, and I went from almost killing a fourth plant to watching white petals unfurl on a regular basis. You can have that moment too. Just be patient, be observant, and for the love of all things green, drown that watering can in the sink instead of pouring it into your plant.