bluename
How to Treat Scale-Insect Colonies on Camellia Reticulata Twigs
If you've spotted those little waxy bumps clinging to the twigs of your Camellia reticulata, you're dealing with scale insects — and trust me, you're not alone. The fastest way to treat scale-insect colonies on Camellia reticulata twigs is to physically remove them with a soft toothbrush dipped in diluted rubbing alcohol, then follow up with a horticultural oil spray every 7–10 days for three rounds. I've used this exact routine twice now, and within 2 weeks the twig surface went from crusty and sticky to clean and green again. The key is catching them before the colony spreads to new growth. Let me walk you through everything I've learned, including the mistakes that cost me an entire plant.
Why Camellia Reticulata Attracts Scale So Easily
Camellia reticulata is a stunning species — large, ruffled blooms in deep pinks and reds, glossy evergreen leaves, and a graceful branching habit. It's the showpiece of many home gardens in mild climates. But here's the catch: those dense twigs and thick leaves create perfect sheltered pockets for scale insects to settle in.
Scale insects love slow-growing, woody shrubs with tight branch structures. Camellia reticulata fits that bill exactly. The crawlers (the mobile juvenile stage) find a nice crevice on a twig, insert their mouthparts, and basically never move again. They build a waxy shell and start feeding on sap.
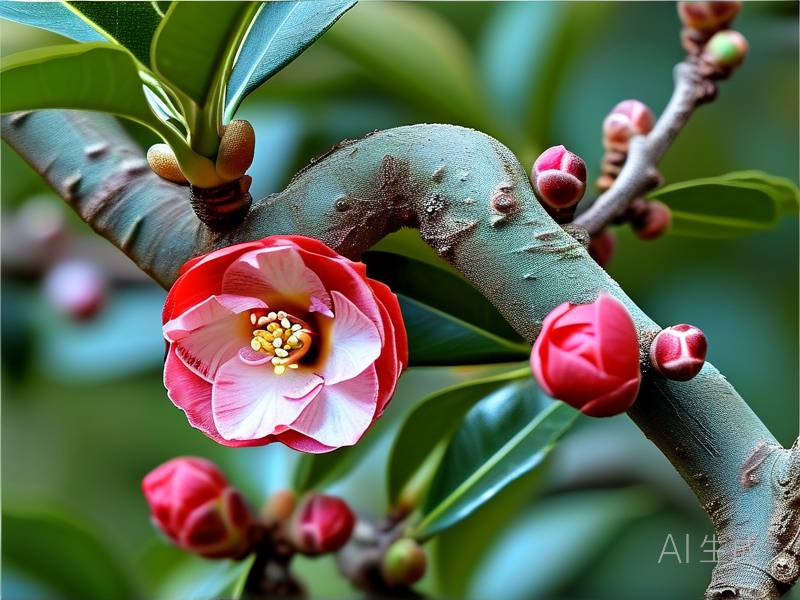
I first noticed them on my three-year-old reticulata in early spring. The twigs looked like they had tiny brown scabs. I thought it was bark damage. Nope — scale colony.
The RHS notes that scale insects on camellias are particularly common in greenhouse and indoor conditions where air circulation is poor. That matches my experience 100%.
What Scale-Insect Colonies Actually Look Like on Camellia Twigs
Before you treat anything, you need to confirm what you're dealing with. Scale on camellia twigs shows up in a few telltale ways:
- Small, dome-shaped bumps (brown, gray, or white) stuck along the stems
- Sticky residue on leaves below the affected twigs — this is honeydew
- Sooty black mold growing on that sticky residue
- Yellowing or premature leaf drop on affected branches
- Ants crawling up and down the stems (ants farm scale for honeydew)
I missed the honeydew stage completely at first. The leaves just looked a bit dull. By the time I saw the black sooty mold, the colony had been there for weeks.
Quick tip: Flip a suspected scale insect with your fingernail. If it comes off easily and leaves a wet spot, it was alive. If it's dry and crumbles, it was already dead (or just the shell).
My Step-by-Step Treatment Plan (What Actually Worked)
Here's the exact sequence I followed. I'm not going to pretend it was glamorous — it involved a toothbrush, a spray bottle, and about 40 minutes of crouching over a pot.
Step 1: Isolate and Inspect
Move the plant away from other camellias or susceptible shrubs. Scale crawlers travel. I learned this the hard way when my nearby Camellia japonica started showing bumps two weeks later.
Check every twig, the undersides of leaves, and even the soil surface around the base. Scale can drop.
Step 2: Physical Removal
Mix 1 part 70% rubbing alcohol with 3 parts water in a small bowl. Dip a soft toothbrush and gently scrub each affected twig. The waxy shells loosen, and you can wipe them off with a paper towel.
Don't press hard — camellia bark is thin. I scrubbed too aggressively on one branch and scraped the bark. That spot took months to heal.
This physical pass removed maybe 60% of what I could see. The rest was tucked into branch forks.
Step 3: Horticultural Oil Spray
I used a ready-to-use neem-based horticultural oil. Spray the entire plant — twigs, leaf tops, leaf undersides — until it drips. The oil smothers scale by coating their shells.
Spray in the early morning or late evening, never in direct sun. Oil plus sunlight equals leaf burn. I made that mistake once on a different plant and the scorched leaves still haunt me.
Repeat every 7–10 days for three applications. This catches newly hatched crawlers that were eggs during the first spray.
Step 4: Two-Week Observation
Here's what I saw over 14 days:
- Days 1–3: Some scale shells turned darker and flaked off. A few live ones remained in crevices.
- Days 4–7: The honeydew stopped accumulating. Ants disappeared.
- Days 8–10: Second oil spray. Almost no new crawlers visible.
- Days 11–14: Twigs looked clean. New leaf buds on affected branches started pushing out.
By the end of week two, I was confident the colony was knocked back. I kept a close eye for another month, but no reinfestation.
The 3 Beginner Mistakes That Make Scale Worse
I've killed my share of plants. Scale isn't always the killer — poor care habits make the plant vulnerable in the first place. Here are the three big ones.
Mistake 1: Overwatering
This is the big one. 90% of indoor plants die from overwatering, and camellias are no exception. Soggy soil stresses the roots, weakens the plant's immune response, and creates humid conditions that scale and fungus love.
I used to water my reticulata on a fixed schedule. Every Sunday, regardless of soil moisture. Bad idea. The roots started rotting, the plant looked droopy, and scale moved in while it was already struggling.
Now I water only when the top 2–3 inches of soil feel dry. Simple finger test. No schedule.
Mistake 2: Wrong Light
Camellia reticulata wants bright, filtered light or morning sun with afternoon shade. Full afternoon sun scorches the leaves. Deep shade weakens growth and invites pests.
I once stuck a potted reticulata in a dark corner of my porch because I thought "camellias like shade." It sulked for months, dropped leaves, and got covered in scale. Wrong call.
The American Horticultural Society (AHS) recommends bright indirect light for container-grown camellias — the kind of light that makes you squint slightly when you look up through the canopy.
Mistake 3: Wrong Pot
Camellias hate wet feet. A pot without proper drainage holes, or one that's too large for the root ball, holds moisture too long. I've made both mistakes.
Overpotting is sneaky. You think you're giving the plant room to grow. Actually, you're creating a huge reservoir of wet soil around a small root system. Root rot follows. Then pests.
Use a pot only 1–2 inches wider than the current root ball. Terracotta is better than plastic because it breathes.
Light and Placement for Healthy Camellia Reticulata
Scale outbreaks are less common on vigorous plants. Get the basics right and you're already ahead.
Best Light Conditions
Morning sun, 4–6 hours, with dappled shade for the rest of the day. That's the sweet spot. East-facing walls and under tall deciduous trees work well.
Indoors, a bright window with sheer curtain protection is ideal. South or east-facing windows in most homes.
Signs of Too Much Light
Leaves develop pale, bleached patches. Leaf edges turn brown and crispy. Blooms fade fast.
Signs of Too Little Light
Slow growth. Leggy stems. Fewer blooms. Pale leaves. And yes — higher pest pressure, because the plant's natural defenses weaken.
Watering Camellia Reticulata Without Drowning It
I'll be blunt: overwatering is the number-one killer of container camellias. Not scale. Not cold. Water.
The Core Rule
Water deeply, then let the top layer dry out before watering again. "Deeply" means water runs out the drainage holes. "Let dry" means the top 2–3 inches of soil feel dry to your finger.
Seasonal Adjustments
- Spring (active growth): Water when the top inch dries. Usually every 5–7 days for a potted plant.
- Summer (heat stress): Check every 2–3 days. Container plants dry fast in heat.
- Autumn: Back off. Every 7–10 days is usually enough.
- Winter: Minimal. Maybe every 2–3 weeks indoors. Camellias rest.
Preventing Root Rot
Use a free-draining mix. Never let the pot sit in a saucer of water. Elevate the pot on feet if needed. And if you smell something sour when you water — that's rot. Act fast.
Soil Mix and Repotting
I use a mix of 2 parts ericaceous (acidic) compost, 1 part pine bark fines, and 1 part perlite. Camellias need acidic soil, pH 5.5–6.5. Regular potting compost is too alkaline.
Repot every 2–3 years, in early spring before new growth starts. Step up one pot size only. Loosen the root ball gently — don't hack at it.
Feeding Without Overdoing It
Camellias are light feeders. I use a slow-release ericaceous fertilizer in spring and a diluted liquid feed every 3–4 weeks during the growing season.
Stop feeding in late summer. Winter feed does nothing and can burn roots.
Never feed a stressed plant. If it's dealing with scale or root issues, fix that first. Fertilizer on a sick plant is like giving a jogger a steak dinner mid-marathon.
Seasonal Care Calendar
Spring
This is when scale wakes up. Inspect twigs weekly. Start your oil spray routine if you see crawlers. Repot if needed. Light prune after flowering to shape and remove infested tips. Feed with ericaceous fertilizer.
Summer
Watch for heat stress. Move pots out of harsh afternoon sun. Keep humidity up by grouping pots or placing them on gravel trays. Check for scale crawlers on new growth — they love soft spring and summer shoots.
Autumn
Reduce watering. Stop fertilizing by early September. Clean up fallen leaves around the base. Do a thorough scale check before bringing plants indoors.
Winter
Indoor plants need cool, bright conditions. Keep away from radiators. Water sparingly. No fertilizer. Inspect twigs monthly — scale can quietly multiply in heated rooms.
Other Pests and Problems to Watch For
Scale isn't the only issue. Spider mites thrive in dry indoor air. Aphids hit new buds in spring. Vine weevil larvae destroy roots in pots.
Yellow leaves usually mean watering issues or wrong pH. Brown crispy edges mean dry air or sunburn. Sudden leaf drop often follows a cold draft or dramatic temperature swing.
Frequently Asked Questions
Can I just scrape scale off with my fingernail?
You can, and I've done it for small patches. But fingernails miss the tiny crawlers in crevices. Follow up with oil spray or you'll be back where you started in two weeks.
Is neem oil safe for camellia buds and flowers?
Neem oil can damage open flowers. Spray when the plant isn't blooming, or spot-treat twigs only. I avoid spraying anything within two weeks of bloom opening.
How do I know if the scale is truly gone?
Look for three signs: no new sticky honeydew on lower leaves, no tiny crawlers visible on new shoots, and no ant activity on the stems. Keep checking weekly for a month after your last spray.
Scale on Camellia reticulata is annoying, but it's beatable. The combination of physical removal, oil sprays, and fixing the underlying growing conditions — light, water, soil, pot size — gets rid of the colony and keeps it from coming back. I've been scale-free on my reticulata for a full season now, and the plant is pushing the best growth I've seen since I bought it. Stick with the two-week observation window. It tells you everything you need to know.