 bluename
 How to Rescue a Dying Pachira Aquatica Money Tree from Crown Rot
If your money tree is wilting, stinking, or turning mushy at the base, you are likely dealing with crown rot. Here is the direct answer: stop watering immediately, unpot the plant, cut away every dark and soft root with sterilized scissors, and repot it in a dry, chunky mix inside a pot with drainage holes. I have done this twice. It works if you act within a week of spotting the first signs. And before you ask—yes, 90% of indoor plants die from overwatering, and the money tree is a prime victim.
I lost my first pachira aquatica to crown rot because I thought it was thirsty. The leaves drooped, so I gave it more water. That was the exact opposite of what it needed. The plant was drowning. I didn't realize the danger until the trunk felt soft near the soil line. That is crown rot. It kills fast. But you can intervene. This guide walks through my own step-by-step rescue process over two weeks, including what I got wrong and what finally saved the plant.
What Exactly Is Crown Rot on a Money Tree?
Crown rot is a fungal infection that attacks the base of the trunk where it meets the soil. It thrives in wet, oxygen-poor conditions. The pathogen loves when water sits on the stem. It enters through tiny cracks and colonizes quickly.
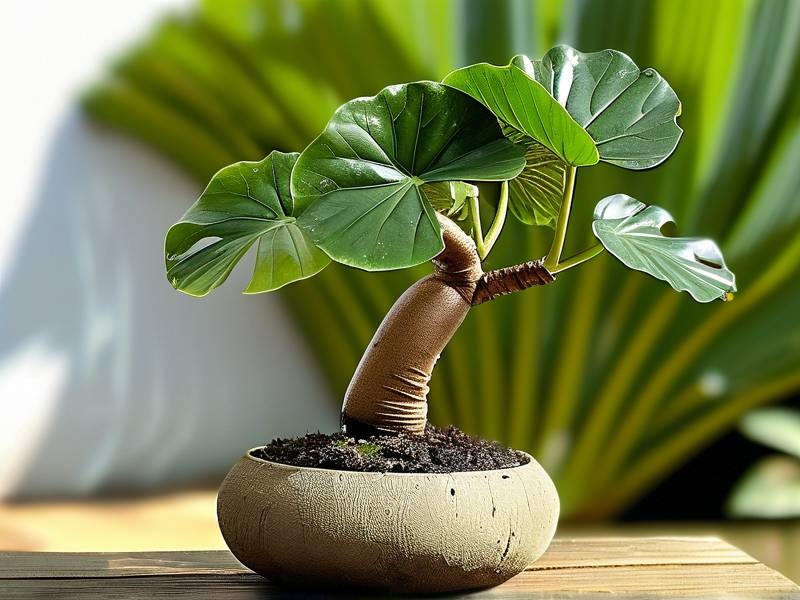
For a money tree, which stores water in its thick trunk, this is catastrophic. You might see the leaves turning yellow, then brown. The trunk feels spongy. The soil smells like rotten eggs. By the time you see that, the infection has already taken hold. But not all hope is lost.
It is worth understanding that pachira aquatica is not a true aquatic plant. It tolerates wet feet for a while but not constantly. The name "money tree" tricks people. I believed it could live in standing water because I read something about swamps. That was a costly myth. In your home, it needs to dry out between waterings. Crown rot is a man-made problem caused by our over-love with the watering can.
How I Diagnosed Crown Rot on My Own Money Tree
The first sign was the smell. I noticed a sour, musty odor near the pot. I ignored it. I thought maybe the soil was just old. Then the lower leaves started drooping. Not crisp. Just limp. The stems sagged like spaghetti. I touched the trunk around the base and it gave way slightly under my finger. That was the smoking gun.
I removed the plant from its pot immediately. The roots were mostly black. A few were orange-brown and mushy. The rest looked like wet strings. The root ball smelled like a swamp. Honestly, it was gross. But I caught it on a Tuesday and by Friday I had a clean cutting in fresh soil. The process took about two hours. Do not delay if you suspect rot. Delay buys time for the fungus.
The Three Deadly Mistakes Nearly Every Newbie Makes
If you are new to money trees, hear me out. I made all three of these mistakes. And most people I coach in gardening groups make them too. Avoid these and your plant has a survival chance.
Mistake Number One: Watering on a Schedule
I used to water every Monday. Rain or shine, the plant got a splash. That habit killed my second money tree. Plants do not drink on calendar days. They drink based on the soil moisture and light levels. In winter, my pachira needed watering once every two weeks. In summer, once a week was fine. But I never checked the soil. I just poured.
Stick your finger two inches into the soil. If it feels wet, walk away. Do not water. If it feels barely damp, wait another day. If it is dry, then water deeply and let it drain. Simple, right? Yet so many of us skip this step. Watering on a timer is a fast track to crown rot.
Mistake Number Two: Keeping It in Deep Shade
The money tree likes bright, indirect light. I had mine in a corner that never saw direct sunlight. I thought tropical means shade. Wrong. The plant slowed its growth, the soil stayed wet longer, and the roots eventually rotted. Light drives the plant to uptake water. Without light, the water sits there.
Move your pachira aquatica near an east-facing window or a few feet away from a southern window. You want filtered light. An hour of gentle morning sun is perfect. What happens if you do this? The soil dries faster. The roots breathe. Crown rot becomes much less likely. Light is your ally in the rescue.
Mistake Number Three: Using a Big Pot with No Drainage
I remember purchasing a beautiful ceramic pot without a hole. It looked stunning. The money tree drowned slowly inside that decorative trap. Water pooled under the soil line with no exit. The roots sat in a puddle for weeks. That is exactly what crown rot fungus wants.
You need a pot with at least one drainage hole. Pot size matters too. A pot that is too big holds excess soil that stays soggy. Use a pot only one or two inches larger than the root ball. If your pot is decorative and has no hole, use it as a cachepot. Put a plastic nursery pot inside. When you water, lift it out and dump the excess water.
My Step-by-Step Rescue Process Over Two Weeks
Let me walk you through exactly what I did. These steps are the result of failing twice and succeeding once. I hope you skip my failures and go straight to the working method. This is not a general theory. This is my hands-on routine.
Day 1: Extraction and Assessment
Take the plant out of the pot. Run water over the root ball to wash off the old soil. I use a gentle spray. You need to see the roots clearly. Healthy roots are firm and white or light tan. Rotting roots are dark, brittle, or slimy. Do not be merciful with the scissors. Trim everything that looks bad.
You must cut back to healthy living tissue. That might mean losing 70% of the roots. I lost about half on my own plant. Do not panic. Pachira aquatica has a thick trunk that stores energy. It can survive with a tiny root system if you give it the right conditions.
Day 2: Cutting and Treating the Trunk
If the rot reached the crown itself, you must cut the whole top off. I know that sounds extreme. But a clean cut above the infected area can save your plant. The fungus cannot be half-removed. It will spread if any dark spot remains.
After cutting, I let the wound air-dry for 24 hours. This step is crucial. A fresh cut sitting in moist soil will just rot again. Once dry, I dipped the cut area in fungicide powder. You can use cinnamon powder if you want a natural option. Cinnamon has antifungal properties and I have used it with good results.
Day 3: Picking the Right Potting Mix
Do not reuse the old soil. It is probably contaminated with spores. I threw mine out. The new mix must be coarse and airy. I made my own with two parts of regular potting soil, one part of perlite, and one part of coarse bark. Drainage is king here.
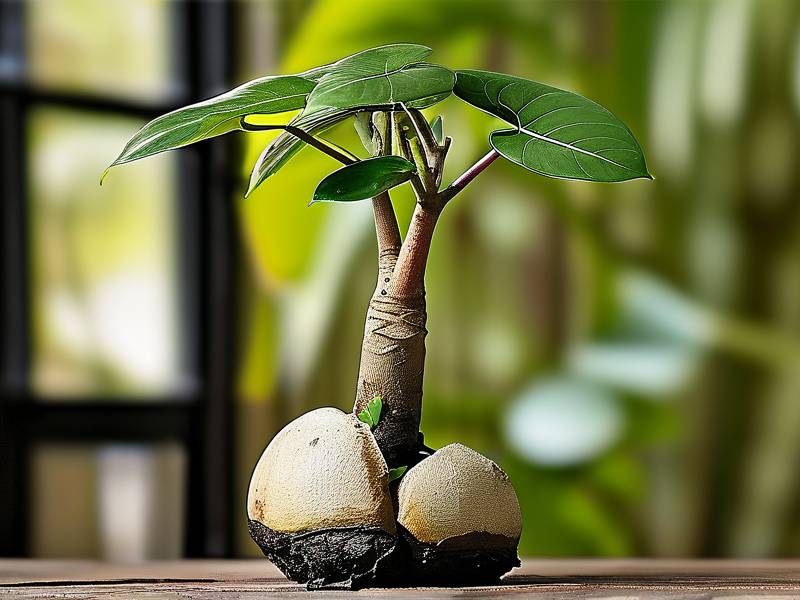
The pot needs to be small. I used a terra cotta pot that was just big enough to fit the remaining roots. Terra cotta helps wick moisture away from the soil. That is a big plus when fighting crown rot. Plastic pots trap moisture. So switch at least for the recovery phase.
Day 4: Repotting and the “Dry Start”
This will sound weird. Do not water right after potting. I repotted and left the plant bone dry for four days. The new soil had a bit of residual moisture from the bag, but that is all. This dry period lets any small wounds on the roots callus over.
I placed the pot on a saucer and kept the plant in semi-shade. No fertilizer. No wetting agents. Just the plant, dry soil, and patience. It looked sad. Some leaves dropped. That is normal. The plant is redirecting energy to root recovery.
Day 5 to 14: The Watchful Waiting Game
On day five, I gave a light sprinkle of water. Not a deep soak. Just enough to moisten the top inch. And then I waited again. The first sign of life appeared on day seven. A tiny green bud at the top of the trunk. I almost jumped for joy. It meant the vascular system was still working.
By day ten, I started watering normally—which means only when the top two inches of soil dried out. The trunk became firm near the base. The mushy spots were gone. By day fourteen, my plant had two new leaves and the crown area felt solid. The rescue lasted two weeks. It was not instant. But the plant made it.
Every day I checked the soil with my finger. Every morning I sniffed the base of the plant for any returning sour smell. When you do this rescue, you need to become a plant detective for a while. Watch the trunk. Feel the soil. Do not rely on a watering schedule.
How to Repot a Money Tree with Crown Rot: Exact Steps
Let me break it down even more clearly because I want you to get this right. Here is my repeatable process.
First, sterilize your scissors or knife with rubbing alcohol. Do this before cutting. Then wash the roots as I said above. Second, remove all brown, soft, or stringy roots. Healthy white roots can stay, even if they are short. Third, identify the rot line on the trunk. It might be dark. Cut above that line. There must be no black or brown tissue left. Fourth, let the cutting rest on a paper towel overnight. This dries the wound. Fifth, dip in fungicide and pot in the dry mix.
Use a pencil to make a hole in the soil and insert the trunk. Gently firm the soil around the base. Then leave it alone. Do not water for three to five days. Keep the temperature between 18 and 24 degrees Celsius. Do not put it in direct sun. A shaded bright spot will do fine. I kept mine in my bathroom because it stays warm and humid but no direct sunlight hits the pot.
What Does Crown Rot Look Like? Visual Indicators
Your money tree might show signs before you even check the roots. Look closely at the base. If the bark is peeling or wrinkled, that is a warning. If there is a dark band around the trunk, act immediately. Sometimes you see white, cottony fungus patches near the soil line. That is a later stage.
Leaves turn yellow and fall off from the bottom upward. But here is the tricky part: overwatering and underwatering both cause drooping. You want to check the trunk. If the trunk is soft, it is rot. If the trunk is firm but the leaves droop, the plant is thirsty. I personally poked the trunk with my finger and found the difference quickly.
Should I Water a Dying Money Tree?
No. Stop all watering. That is the first and hardest step. Your instinct will tell you to save the plant with water. Do not do it. The roots cannot take in water. If anything, extra water will complete the rotting process.
During my first rescue attempt, I watered a rotting money tree out of pity. It died within the same week. From the outside, the soil looked dry. But the inner soil was wet and sticky. The root zone was a swamp. As the RHS explains, most indoor plants fail due to overwatering leading to root and crown decay. Trust the dryness, not your eyes. The visual soil surface lies.
The Role of Light in Rescue Recovery
During the recovery phase, light was my best friend but I also protected my plant from sunburn. I kept it in a room with filtered light. I wanted the plant to photosynthesize without stress. Too much direct sun on a stressed plant can cause leaf scorch. Too little light can slow root regeneration.
Find a sweet spot. Ten feet away from a south-facing window worked for me. The plant got bright light but no direct sun rays. Morning light is gentle—so if you have an east window, that is perfect. Evening west light is also okay if it is not too sharp. If you see new growth within two weeks, your lighting is right.
When to Cut Your Losses: Turning a Rotting Trunk into Cuttings
This is the one thing I got right on my third plant. If the rot runs up the entire trunk, you can still save a part. I sliced off a healthy branch that was green and firm. I stripped off the lower leaves. Then I placed the cutting in fresh, wet sphagnum moss. The moss must be damp, not soaked.
Within four weeks, small white roots formed at the cut node. That is how I propagated a new plan from an otherwise dying parent. It took patience. But it worked. Stem cuttings root reliably if the segment is healthy. Watch for the node—it is where leaves attach to the stem. Roots sprout only from or near these nodes. Cut beneath a node, and you will be lucky.
A Close Look at My Personal Success Story
I want to share the timeline because I have not seen it described elsewhere. My plant had crown rot on a Tuesday. The trunk was soft for two inches above the soil. I chopped off the top eight inches. That meant I threw away two thirds of my plant. It hurts to do that.
I kept a six-inch trunk piece with one healthy branch. I left that piece to dry for 24 hours. Then I dipped it in a rooting hormone powder, even though it was not for propagation but for protecting the wound. I potted it in a dry perlite-heavy mix. Nothing happened for one week. No new growth. No visible change. But the trunk did not get softer. On day nine, the top edges of the trimmed branch looked green. On day twelve, I saw a tiny nub that would become a leaf.
The new pot was in my bedroom where the temperature stays around 20°C. I never misted the trunk. Many people recommend misting, but in this stage, moisture on the stem is a risk. The plant starts pushing new roots fast once the soil dries and warms. Remember that.
Water Quality and Crown Rot
Tap water may contribute to stress. Chlorine and chloramine can harm beneficial soil microbes. This is not the main rot cause, but it adds stress. I switched to collected rain water or filtered water for my money tree after the rescue. The plant seemed to respond with more vigor.
Another thing I do is let tap water sit in an open bottle for 24 hours before using. That allows chlorine to evaporate. Do this if your municipal water treatment uses chlorine. If they use chloramine, sitting water does nothing. So filtered water is safer. The AHS also mentions that stressed plants are more susceptible to fungal infections. Healthy roots start with clean water.
Common Myths That Push Plants into Earlier Death
There are some myths that spread in every forum. I believed them all at one point. Let me name the big ones.
Myth one: drainage pebbles at the bottom of a pot are enough. False. Water still sits in the soil layer above the pebbles. Raise the pot instead and make sure the soil itself is fast-draining.
Myth two: the money tree is a low-light plant. That is wrong. It survives in low light, but it does not thrive. In low light, the plant uses little water, leaving the roots wet and prone to rot. Give it more indirect light.
Myth three: a money tree with braided trunks is one plant. Not always. Braided trunks often hold tiny dead pockets of bark inside the weave. Rot can hide there. When you inspect the base, check the crevices between trunks. I found rot starting in that hidden spot on my first plant.
Tools and Ingredients You Need to Have Ready
Do not start surgery without a plan. I assembled tools while my plant was suffering, and the delay cost me extra root tissue. Buy or collect these items now.
You need sterilized pruning shears or a very sharp knife. You need rubbing alcohol. You need a fungicide—copper-based or sulfur-based works well. Have fresh potting mix with perlite. Get perlite separately in case you need to add more. Have a new pot with good drainage. And keep cinnamon paste ready as a natural emergency sealant.
I keep a small squeeze bottle of 3% hydrogen peroxide too. It is helping in mild cases to kill surface fungus on the soil. Do not pour it directly on healthy roots because it can be harsh. Use it only on suspected infected spots.
How Long Until the Money Tree Recovers?
In my experience, visible recovery takes about two to four weeks for mild cases. My severe case took around three weeks before robust new leaves appeared. The plant will look bare. It will look sad. Keep going. If the trunk remains firm and a new growth point appears, you are winning.
If after three weeks you see no new growth and the trunk is shrinking, then the rot was too advanced. That is when you switch to taking cuttings. Use the top growth as propagation material. Put it in moist perlite and a ziplock bag. The bag creates a mini greenhouse. You should see roots in under a month.
Do not give up without waiting at least a month. Pachira aquatica is stubborn. It has survived seasons in nature with heavy rains and droughts. It is trying to live. Give it the right conditions, and it will cooperate.
Feeding and Fertilizer After Cutting
Do not fertilize right after you cut rot off the plant. The roots cannot absorb nutrients. Fertilizer will add salt stress and possibly burn the remaining root tips. I fertilized at the one-month mark. I used a balanced liquid fertilizer diluted to half strength. That worked fine.
When I finally did fertilize, I made sure the soil was already moist. Fertilizing dry soil burns roots. Water the plant lightly, wait an hour, then water with the diluted fertilizer. This way the nutrients reach the roots without shock.
During the first two months after the rescue, reduce fertilizer use by half or skip it entirely. The focus must be on rebuilding the root system. Foliar feeding—spraying diluted liquid fertilizer on leaves—is an alternative. It delivers nutrients without burdening the roots. I do that now as a booster when the plant looks lean.
Monitoring for Relapse A Month Later
Once a plant gets crown rot, it is more likely to relapse if your conditions do not change. I adjusted three things permanently. First, I use a fast-draining soil mix, not the dense store-bought peat. Second, I water the base only. I never splashed the trunk. Third, I tilted the pot gently after watering to ensure no water pooled in the crown.
You might also want to mulch the top of the surface with small pebbles. That helps keep the trunk base dry, because the pebbles pull moisture away from the bark. This is a trick I picked up from bonsai growers. It is very effective for pachira aquatica.
Once a month, I check the soil with a moisture meter. The probe is cheap and takes away guesswork. I only water when the meter reads dry in zone 2 or 3 out of 10. This has prevented any future drowning episodes.
The Psychological Side of Plant Rescue
I will be honest, this process scared me. You would look at this bare trunk and think you bought a dead branch. I questioned every step. I almost threw the plant away on day eight. That would have been wrong.
Anyone who keeps houseplants will eventually kill something. But that pain is how you learn. The second plant that I lost taught me more than any guide. When you revive a plant with your own hands, you gain a kind of confidence nothing else gives you. My current money tree is eight months post-rescue and healthy. It has doubled its height.
Growers will tell you that a plant that survived a rescue becomes resilient. There is some truth to it. It has adapted to your environment. It has stronger scars. Keep a routine that works, and you will be rewarded.
My Final Words to You
Rescuing a dying money tree from crown rot is not a miracle. It is a series of correct actions done in the right order. Remove the rot. Let it dry. Repot in shallow, coarse soil. Wait for new growth. Do not drown it with love. I have given you step-by-step instructions and the timeline that worked for me over two weeks. Follow those steps, and you stand a strong chance.
If you have caught the rot early, act today. Every day you wait allows the fungus to travel higher. If you have moderate rot, cut higher. If the rot is severe, take cuttings. Never water your money tree without checking the soil first. Your plant will live as long as you respect its need for dry periods between waterings. That is the simple way to keep your pachira aquatica standing tall for years.
Frequently Asked Questions
Can a Money Tree Survive Crown Rot?
Yes, it can survive if you catch it early and act firmly. The plant stores energy in its trunk. Cutting away rotted tissue and providing dry conditions will stop the infection. My own plant survived a severe case after I removed most of the root system. It took several weeks to recover. But survival is absolutely possible.
How Do I Know It Is Crown Rot and Not Underwatering?
Check the trunk and the soil. Crown rot makes the trunk soft and sometimes smelly. Underwatering makes the trunk feel firm, while leaves turn crispy and dry. If the soil is wet and the trunk is mushy, that is rot. If the soil is bone dry and the trunk is hard, that is thirst. These are two different problems, and you must not water a rotting plant out of panic.
Should I Remove All the Rotten Roots?
Yes, you must remove every root that is soft or dark, because any infected part left behind will spread and defeat all of your work. Use sterilized scissors and cut until the remaining tissue is white and firm. When in doubt, cut a little more. A healthy money tree needs fewer roots than you think, because the trunk stores water and most of its energy, helping it recover from a trimmed root system.





