 bluename
 Saving a root‑rotting parlor palm is simply a race against decay. Do not rush to repot it. Start with one critical step: take the entire plant out of its pot, trim away every black, soft root that oozes water when squeezed, until you reach firm, healthy off‑white rhizomes. Soak the roots in a carbendazim solution for 30 minutes. Get a terracotta pot with drainage holes, one size smaller than the original container, and replant using a 1‑to‑1 mix of coarse sand and peat moss. Hold off on watering for the next 48 hours, and place the plant in a spot with bright, indirect light away from direct sunlight. This rescue sequence came from trial and error, when I saved my third struggling specimen.
90% of indoor plants die from overwatering. I refused to believe this when I killed my very first parlor palm. I kept blaming poor lighting instead. It was not until I dug into the soil and caught the sour, rotten stench rising from that waterlogged root ball that I finally understood the truth.
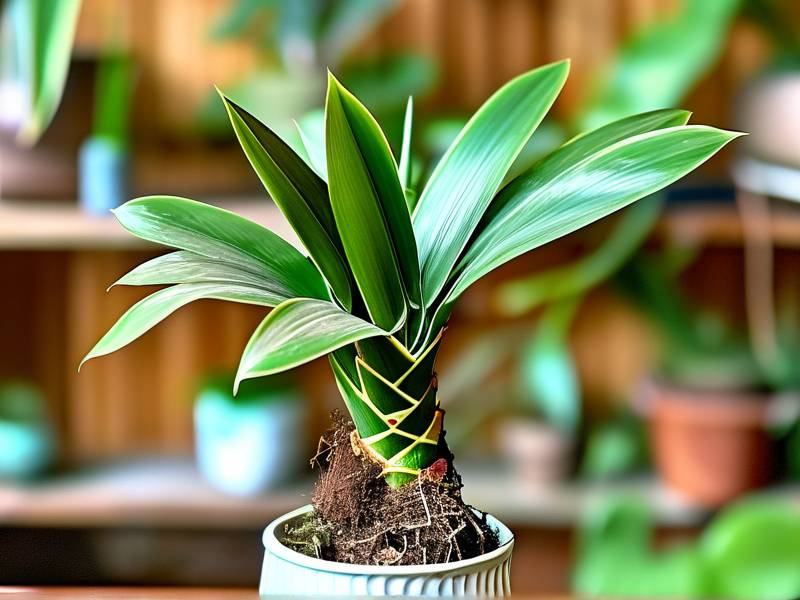
Let’s go over the common mistakes gardeners tend to make. Many home plant lovers choose oversized pots when buying containers — I was once guilty of this too. For my second parlor palm, I deliberately picked a deep ceramic pot two sizes larger. I thought the extra room would let the roots spread freely and save me from repotting the following year. Less than three weeks later, its leaves started drooping. An overly big pot holds far more soil; after one watering, the medium stays wet for half a month. Roots sitting in constant dampness are doomed to rot sooner or later. Now whenever I see someone planting a small palm in a deep container, I honestly advise against it.
Delays are the biggest enemy when dealing with root rot. When leaves turn yellow and develop curled edges, most people immediately assume the plant is thirsty. I used to react the same way, drenching the soil right away. The next day, the yellowing only got worse. The real issue is that damaged roots can no longer absorb water. Extra watering only speeds up the rotting process.
There is another hidden pitfall: watering timing. I used to water my plants in the evening, believing slower evaporation overnight would give the plant more time to soak up moisture. I later learned that cooler night temperatures trap damp soil for longer, creating perfect conditions for mold to grow. Once I switched to watering early in the morning, rot cases dropped noticeably.
You have probably experienced this scenario yourself: a newly purchased parlor palm sits in your living room for a few days, and its leaf tips begin to turn brown and crispy. Too little light causes problems, yet harsh light does even more harm. This plant loves bright indirect light but cannot stand intense sunlight filtered through window glass. I once kept one on a south‑facing windowsill, and the leaf edges burned dry and brittle. It only recovered after I moved it two metres away from the window.
When treating root rot, the first step is always to remove the plant from its pot for inspection. Once you take it out, do not rush to wash the roots. Shake off large clumps of soil first and assess the overall condition. Healthy roots are firm, pale yellow or white. Rotten roots are limp, dark brown or black; their outer skin crushes easily, releasing watery mush inside. You need to be bold during pruning. The first time I trimmed rotten roots, I hated cutting them. I only removed the obviously decayed strands, yet the partially damaged roots rotted completely soon after. On my second attempt, I cut the root mass back to only one‑third of its original size — and the plant survived.
A huge mistake many gardeners make is repotting right after root trimming. Fresh wounds need air‑drying and disinfection. Dust the cut surfaces with carbendazim powder, or soak the roots in a fungicide solution for 20 minutes. My third recovering plant survived exactly because of this fungicide soak. If you do not have fungicide on hand, diluted hydrogen peroxide works as a substitute. Use 3% hydrogen peroxide mixed with an equal amount of water, and keep the concentration mild.
Breathable pots matter far more than visual appeal. My first glazed ceramic pot looked beautiful, yet it acted almost like a sealed container. After switching to porous terracotta pots with tiny visible pores on the surface, water evaporated faster, oxygen levels in the soil rose, and the whole root environment improved dramatically. Remember this rule: pots do not need to be large; they need to breathe. Always sanitise reused pots. I usually pour boiling water over them, or soak them in a potassium permanganate solution for 30 minutes, letting them dry fully before replanting.
Change your mindset about watering. Do not water on a fixed schedule. Judge when to water by the pot’s weight and soil texture. Lift the pot; a light weight means most moisture has dried out. Stick your finger two centimetres deep into the substrate — only water if the soil feels dry. Humidity and temperature change the plant’s water needs. In summer, watering twice a week may be suitable, while once every two weeks might still be too frequent in winter. I eventually bought a soil moisture metre to take the guesswork out of watering.
After repairing the roots and repotting, keep the plant out of direct sunlight. New absorbing root tissue has not yet grown, yet the leaves continue losing moisture through transpiration. Strong sunlight creates a fatal water imbalance. Place the rescued plant in a shaded, well‑ventilated spot for a five‑day hardening period so it can focus energy on growing new roots. From my experience, new shoots usually emerge in the second week. At that point, you can gradually increase light exposure.
Sometimes the rot is too severe for a full rescue. If the entire root ball turns mushy and water‑soaked, and even the base of the stem becomes black and soft, stop trying to save the whole plant. Snip off the healthy top cuttings, dip them in rooting powder, and plant them in damp perlite for propagation. I have tried this method several times with around a 40% success rate, which is better than watching the whole plant die.
Many people ask how to prevent root rot from coming back after the plant recovers. By my fourth parlor palm, I no longer stressed over watering. The simple trick is to ask yourself one question before watering: does this plant really need water right now? If you are unsure, wait a little longer. Houseplants are far more drought‑tolerant than most people realise. Root rot rarely happens because plants are thirsty; it happens because they drown in excess water.
Here is a small detail about this species that most gardeners overlook: parlor palms are sensitive to water quality. Chlorine from tap water builds up over time, making the soil alkaline and limiting nutrient uptake. Once I switched to tap water left standing for one or two days, the foliage turned a richer green. If your local tap water is hard, rainwater or purified water will deliver noticeable improvements.
Temperature is another common trap for new growers. I keep my plants in a heated northern home during winter. When indoor heating pushes temperatures above 25°C, indoor air becomes extremely dry. Brown leaf tips are almost always caused by low air humidity. Place a humidifier nearby, or set the pot on a gravel tray filled with water. Make sure the pot base never sits directly in the water. This simple trick works well to stop leaf‑tip browning.
Fertiliser timing and dosage trip up plenty of beginners. Never fertilise a recently rescued root‑damaged plant for the first month. Its recovering roots are fragile, and fertiliser will only add unnecessary stress. Once three or four new leaves unfurl, feed it a weak fertiliser solution at half the manufacturer’s recommended strength. Slow‑release fertiliser granules mixed into the topsoil are a low‑effort alternative I prefer.
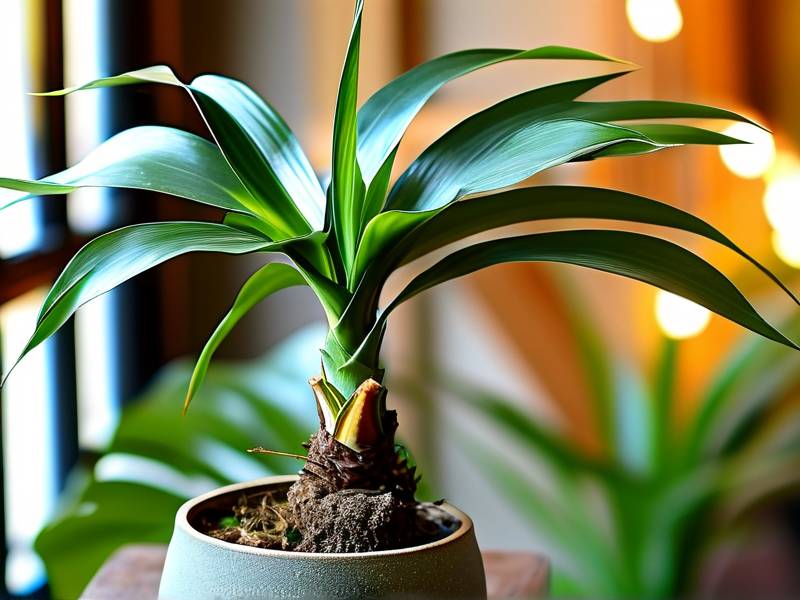
If you struggle to judge the severity of root rot, run a simple drainage test. Two hours after watering, tilt the pot and watch how quickly water drains away. Water pooling on the surface with slow drainage signals compacted soil or overcrowded roots — an early warning sign of trouble. Poke small holes around the pot rim with a chopstick to push oxygen deep into the root zone, a trick I use regularly.
You may come across gardening guides suggesting a layer of charcoal at the pot bottom. I have tested this myself. Charcoal absorbs unpleasant odours, yet it cannot prevent root rot. Root health ultimately depends on air pockets between soil particles. A bottom drainage layer cannot fix poor aeration if your growing medium lacks coarse, chunky material. My current reliable soil mix consists of three parts peat moss, one part perlite, one part coarse sand, plus a handful of composted pine bark. It balances water retention and air circulation perfectly.
Resources from rhs.org.uk state that indoor palm varieties require very little water in winter. Reducing watering frequency offers better protection than raising room temperatures. This professional advice matches my personal observations. In winter, I generally wait roughly 15 days between waterings. With good ventilation and stable warmth, the root system stays much healthier.
Many gardeners speculate that dark‑coloured pots absorb heat and overheat plant roots in summer. I tested black plastic pots on a west‑facing balcony. The pot walls grew burning hot in the afternoon sun, and high root‑zone temperatures harmed plant vigour. Switching to pale terracotta pots fixed the issue. If you must keep dark‑coloured containers, use a decorative outer pot or add shade to reduce heat absorption.
Numerous online gardening tips claim bark mulch on top of the soil locks in moisture. I have experimented with surface bark mulch. It does prevent the top layer of soil from cracking, yet it slows surface water evaporation. Mulch is unsuitable during the root‑recovery phase. Once the plant stabilises, a thin top dressing of pine bark works well for decoration and stops soil from washing away during watering.
Nursing a dying plant back to life feels like caring for an old friend. With careful attention, it gets a second chance. I lost several specimens before working out this reliable routine. Friends often send me photos asking if yellow leaves signal disease. Leaf colour alone rarely gives a definitive answer. I always tell them to dig down and check the roots. Roughly eight or nine out of ten yellowing plants suffer from overwatering damage.
One overlooked variable is blocked drainage holes. Brand‑new store‑bought pots sometimes carry sticker labels or plastic bases sealing the drainage openings completely, leaving nowhere for excess water to escape. My very first root‑rot disaster happened for exactly this reason. Now whenever I buy a new pot, I flip it over first and confirm the drainage holes are fully open.
Statistics published by ahsgardening.org show root‑related decline is the top reason homeowners replace potted houseplants. Their official recommendations promote chunkier, aerated potting mixes and breathable containers — advice fully aligned with my rescue method.
Let us also talk about the best time for repotting. Avoid midday heat and rainy, gloomy days. Choose a sunny early morning with stable temperature and humidity. Root activity peaks at this time, helping pruning wounds heal faster. My most successful plant rescue took place on a weekend morning in April, and that small plant now stands as tall as my dining table.
Do not skip regular leaf cleaning in daily care. Thick dust covering leaves reduces photosynthesis and weakens the plant’s ability to recover. Wipe the foliage gently with a damp cloth once a week. This method cleans leaves better than misting water, which risks trapped moisture at the centre of the crown.
Finally, abandon the rigid rule of “water until fully saturated”. Moisten the growing medium all the way to the bottom, and stop watering once water starts dripping out the drainage holes. I used to keep pouring extra water with every watering, a habit that only encouraged root rot. The correct technique is slow, repeated watering rounds to spread moisture evenly, avoiding rushing streams that create hollow pockets and trapped water layers in the soil.
Observe more, intervene less. My simple gardening philosophy is this: most houseplants do not die from neglect. They become damaged from excessive human care. Give plant roots breathing room, and no magic remedy will ever be more effective. If you currently own a parlor palm suffering from root rot, stay calm, resist the urge to water it, remove the pot and inspect the roots, then follow these step‑by‑step instructions. The plant still has a strong chance of recovery.
Frequently Asked Questions
Q: How far should I trim rotten roots? A: Cut away every soft, dark‑brown root strand. Retain only firm, pale‑yellow or white root sections. Even if only one‑third of the original root mass survives, the plant can regenerate new roots as long as the stem base remains healthy. Soak the trimmed roots in carbendazim solution for 20 minutes before repotting.
Q: How long will it take to confirm the plant survives rescue treatment? A: Recovery signs appear within two to four weeks. New shoots or fresh leaves emerging in the second week confirm active root regrowth. If leaves keep yellowing and stems shrivel after four weeks, the stem base is most likely infected. Take tip cuttings to try vegetative propagation.
Q: Should I add fertiliser right after saving the plant? A: Never apply fertiliser during the healing phase. Delicate regenerating roots easily suffer chemical burns from plant food. Start feeding with half‑strength water‑soluble fertiliser once at least three brand‑new leaves develop, around six weeks later, once a month.





