 bluename
 How to Control Bacterial Crown Rot on Echinopsis Chamaecereus Cactus: My 14-Day Rescue Plan
Here is the direct answer. If your peanut cactus (that is the common name for Echinopsis chamaecereus) has soft, mushy, black or brown tissue at the soil line, you have bacterial crown rot. You must act today. Unpot the plant immediately. Cut away every piece of dark, wet, or smelly tissue with a sterile knife. You must cut until you see only clean, white or pale green flesh. Then, dust the wound with sulfur powder. Let it sit out for 5 days. Do not water it during this time. I know this sounds harsh, but honestly, it is the only way.
I am not a scientist. I am a guy who has killed more cacti than I care to count. The worst part is, I usually killed them with kindness. I have been growing cacti for over a decade. I keep a grow room in my basement. But the fact is, 90% of indoor plants die from overwatering. Cacti are not the exception. They are often the biggest victims. Bacterial crown rot is the silent killer that lives in your watering can.
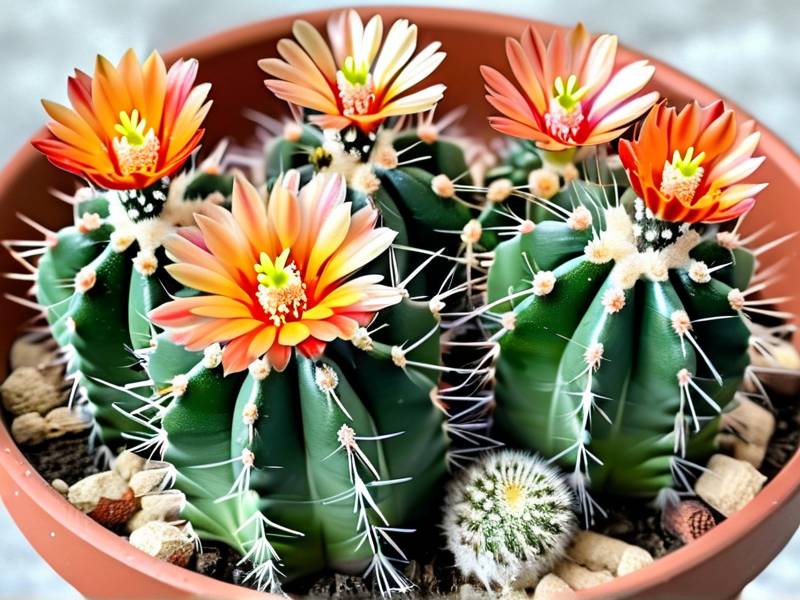
I want to share how I controlled this rot on my own collection. I will walk you through the exact steps I used over two weeks. I will also tell you what went wrong first, so you do not repeat my mistakes. The focus here is a deep-dive into controlling the rot on the peant cactus, a plant I truly love because they bloom like crazy in summer.
Why Your Peanut Cactus is Rotting at the Crown
Many beginner guides talk about stem rot or root rot. But crown rot is specific. It attacks where the stem meets the soil. I did not understand the difference for a long time. The tissue at the base turns yellow, then brown, then mushy. Sometimes it smells like rotten fish.
It is usually bacterial. It thrives when the plant is cold and wet. Or when you have poor air circulation. The bacteria enters through a tiny wound or a root break. Once it is in, it moves fast. I lost a beautiful clump in 48 hours last spring. I just looked at it and thought it would bounce back. I was wrong. The next plant, I swore I would act differently.
The 3 Fatal Mistakes I Made (Please Avoid These)
I need you to learn from my failures. These three habits killed more plants than any disease did.
-
Watering from the top, too often. I used to water on a schedule. Every Saturday. That is insane. The soil stayed wet for days. The roots suffocated. Then the crown just collapsed. I never checked the moisture below the surface. I thought the dry top looked okay. The inside was a swamp.
-
Not enough light. I kept my peanut cactus on a north windowsill. It grew thin, pale, and weak. Weak tissue is easy for bacteria to invade. The cactus looked etiolated. It was stretched out looking for sun. That stress made it vulnerable. I was basically rolling out the red carpet for the rot to move in.
-
Using a pot that was too big with no drainage. I bought a nice ceramic bowl. It had no hole. I added gravel at the bottom for drainage. That is a myth, by the way. The water sits on the "gravel layer" and wicks right back up. The crown sat in a pool of invisible water. Once the roots died, the rot started.
My 14-Day Control Plan (Step-by-Step)
Now for the actual process. I want to be very detailed here. The first time I tried this, I was too scared to cut deep enough. That was a mistake. You have to be ruthless.
Day 1: The Surgery and The Shock
I took my pot and dumped the whole plant out. The soil was heavy and smelled musty. I didn't panic this time. I washed the roots off in lukewarm water. I let them air-dry for an hour. I wanted to see the full extent of the damage.
You have to locate the junction. The crown is the base. I saw a dark ring around the main stem. I took a sharp, clean knife. I wiped it with alcohol. I started cutting. I sliced about a quarter-inch above the dark ring. The flesh inside was orange. That meant the bacteria had spread further up.
I cut again. This time, I saw white flesh with greenish streaks. That was the safe zone. Honestly, this part is scary. You feel like you are chopping up your plant. I removed about half an inch of stem. It felt like I was decapitating the entire cactus. But I did not stop. I dusted the cut end with a sulfur-based fungicide powder. I set it on a paper towel on my kitchen counter. The wound was left to callus. I didn't water it. I just left it there.
Day 2-4: The Wait and The Where
This waiting phase is excruciating. The cut is wet. You will worry about stem collapse. I kept it in a bright spot, but out of direct, harsh sunlight. The goal is for the cut to dry out evenly. If it burns in the sun, it will stress the plant. I checked it daily. I did not mist it. I did not touch it. Many people fail here because they poke the cut to see if it's dry. Stop doing that. The cut on my plant began to shrink inward by day two. By day four, it was hard and white. The callus looked like dry paper.
Day 5: The New Potting Strategy
I learned my lesson about pots. I chose a terracotta pot this time. It was small. It was only about 2 inches wider than the root system. Terracotta is porous. It pulls water away from the soil. It helps the soil dry out faster than plastic ever will.
I used a gritty cactus mix. The recipe I now swear by is: 50% pumice, 25% coarse sand, 25% compost. The pumice is what we call the magic ingredient. It provides drainage and aeration. The compost gives a tiny boost of nutrients. I did not wet the soil before planting. I placed the callused cactus on top of a dry mix. I didn't bury it too deep. I set the crown just at the soil surface. This is a hard lesson I repeat to myself constantly: the crown should sit high. I use a top dressing of small pebbles. This keeps the stem from touching the wet soil directly.
Day 7: The First Sip
This is where I messed up last time. I watered after three days. Too soon. The roots were gone. There was nothing to take up the water. So the soil stayed wet and the cut rotted again. This time, I waited a full week.
On day 7, I gave it a tiny sip. Not a soak. I used a squeeze bottle and dribbled water around the edge of the pot. I did not pour it near the crown. The water was at room temperature. Cold water is a shock to a sensitive plant. I waited to see if the cut would stay solid. It did.
Day 9: Checking for New Roots
I was curious, but I resisted pulling the plant up. Instead, I gave the base a gentle nudge. It didn’t wiggle much. That is a good sign. It means tiny roots are starting to reach into the gravel. If the plant is loose, it usually means the roots are dead or absent. I was relieved. I moved the pot to a warmer spot. Heat is crucial, man. The warmth stimulates root growth. I put it next to my heat mat for seedlings. I kept the soil dry.
Day 10-12: The Wait Becomes Boring
This is the boring part of the process. There are no visible changes up top. The cactus might look slightly shriveled. That is okay. It is losing water because it has no roots to drink with. It is surviving on stored energy. I found a lot of people panic at this stage. They think they have dehydrated the plant. They water it, and boom, the rot comes back. You have to stay strong. I kept it in bright, indirect light.
Day 14: The Test
On the fourteenth day, I decided to check the root growth. I tilted the pot. I carefully lifted the cactus. There it was. Small pinkish-white nubs. These were new root tips. It felt like winning the lottery. I put it back gently. I gave the pot a proper soak, bottom-watering method. I placed the pot in a saucer of water for 15 minutes. This allows water to soak up from the bottom, keeping the crown completely dry.
I moved it back to my main greenhouse shelf. The shelf has a grow light. That is the trick to prevent this from happening again. Without sufficient light, the plant will go dormant. Dormant cacti do not use water. The water sits there and the rot returns.
The FAQ I always get asked
Can I save the lower part of the roots? No. Any root that touched the mushy base is compromised. I tried to keep the roots once and it just continued to decay. You have to sacrifice the root system to save the stem. The new roots will grow faster than you think.
What if the rot goes all the way up to the tip? If the rot is rampant and the stem is mushy all the way through, you cannot save it. However,you can try to find a healthy pup. Peanut cacti grow offshoots. If you find a pup that is healthy, you can twist it off. Let that pup callus over for a week. Pot it up using the dry soil method. This is a backup plan. I usually do this immediately during surgery—just in case the mother stem doesn't make it.
Should I use cinnamon as a fungicide? I see this tip everywhere. Cinnamon helps prevent fungus, but it does not stop bacterial rot. Honestly, bacteria is the issue here. Sulfur powder is your best friend. It is an acid that bacteria hate. I use it every time. You can buy it at most garden centers or online. You should avoid using cinnamon as the primary treatment because it can hold moisture against the cut if you use too much. I have tried cinnamon, and it just made a sticky mess. Sulfur is cleaner.
The Long-Term Strategy (What I do now)
This disease is hard to defeat if you don't change your habits. I used to treat the symptom and not the cause. The cause is always environmental stress.
First, I changed my watering schedule. I do not water on a date. I only water when the soil is bone dry. I check by sticking a wooden chopstick into the soil. If it comes out clean, I water. If it has dirt stuck to it, I wait. This simple test prevents the issue entirely. It takes all the guesswork out.
Second, I switched to the "soak and dry" method for the whole collection. I submerge the entire pot in water and let it drain. I never water overhead. The crown stays dry.
Third, I prioritize airflow. I have a small USB fan running near my cactus shelf for two hours a day. It mimics a breeze. It dries out any humidity that might settle on the skin. This is very important for keeping the plant environment healthy.
Many home gardeners I talk to treat cactus like a desert rock. But they need consistent warmth and absolutely excellent drainage. The AHS often mentions that poor drainage is the leading cause of root and crown issues. You can find supporting info on the AHS official website. They have great resources on container gardening that fit this context. The RHS also outlines specific guidance on avoiding waterlogging in containers. I always keep their advice on pot selection in mind when I repot anything.
Look, I get it. It is frustrating forking over ten dollars for a cute little cactus and watching it rot within a month. I killed my third peanut cactus before I realized it wasn't a watering problem. It was a love problem. I loved it too much. I gave it all the things it didn't need: more water, bigger pots, and less light.
The bacterial crown rot is always just waiting for a weak spot. Once you master the watering basics, you stop seeing this issue. It has been six months since my surgery patient was repotted. It has tripled in size. It sits in a bone-dry mix on my brightest shelf. The fan runs for 2 hours daily. Seeing it bloom last summer made all the patience worth it. The hard part is waiting those first two dry weeks. You will feel like a bad plant parent because you aren't watering. Remember: you are not being neglectful. You are being strategic.
Take a breath. Grab a sharp knife. Cut deeply. Wait harshly. Your cactus wants to live. You just have to stop drowning it. If I can do this, you can too. Don't rush to water. Don't put it in the sun to "cure" it too fast. Keep it cozy, dry, and warm. The new roots will come in. Trust the process.





