 bluename
 How to Eliminate Spider-Mite Webbing on Cissus Antarctica Foliage
If you’re staring at fine, silky webs clinging to your Cissus antarctica (Kangaroo Vine) and wondering where they came from, here’s the direct answer: those are spider-mite webbing, and you need to act within 48 hours. I’ve dealt with this exact mess on my own vine, and after two weeks of consistent treatment, the foliage came back clean and glossy. The fix that worked for me: isolate the plant, rinse every leaf with lukewarm water, then apply a neem oil and mild soap spray every three days. But before you grab any spray bottle, let me walk you through what actually works—and what will make things worse.
I’ve been growing Cissus antarctica for years now, and I’ll be honest—I didn’t get it right the first time. In fact, I nearly lost a beautiful vine to these tiny pests because I ignored the early signs. The webbing looks like harmless dust at first, but it spreads fast. The tricky part is that spider mites thrive in dry, warm indoor air, which is exactly what most homes have during winter. So let’s break this down step by step, starting with the basics you might be getting wrong right now.
Why Spider Mites Love Your Kangaroo Vine
Spider mites aren’t actual spiders, but they do produce webbing to protect their colonies. They feed by piercing leaf cells and sucking out chlorophyll, which leaves behind stippled, pale spots on the upper surface of leaves. Over time, the foliage takes on a dull, bronzed look. If you see fine, silken threads stretching between stems and leaf undersides, you’re dealing with a full-blown infestation.
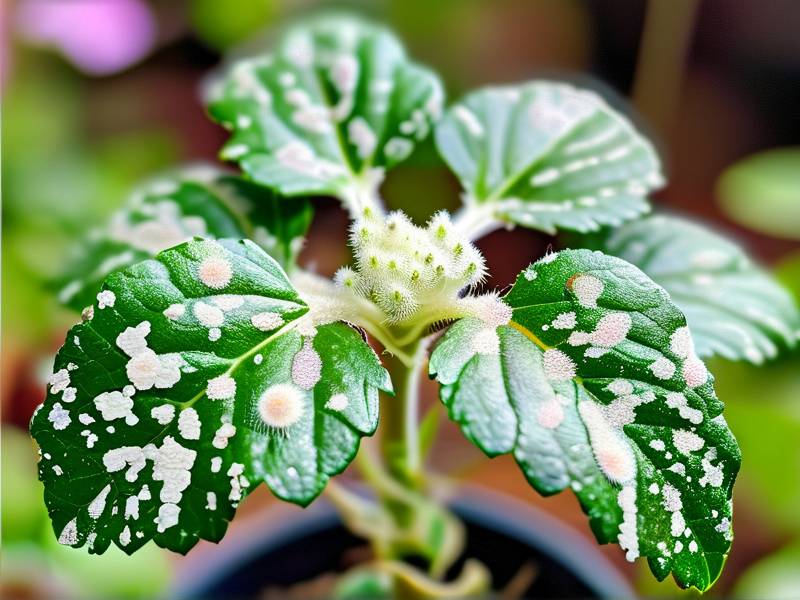
The Cissus antarctica is particularly vulnerable because its dense, climbing growth habit creates sheltered microclimates where mites can hide. I’ve noticed that mites tend to start on the lower leaves near the soil line. They love warmth above 70°F (21°C) and low humidity below 50%. Many homes in the US, Canada, UK, and Australia sit right in that danger zone during heating season.
The real kicker? These pests reproduce fast. A single female can lay dozens of eggs in her two-week lifespan. That’s why waiting even a few days before treatment can set you back weeks. The good news is that once you understand the conditions that encourage them, you can flip the environment in your favor.
My Two-Week Battle Plan: Step by Step
I want to share exactly what I did to clear spider-mite webbing from my Cissus antarctica. It took a full 14 days to see completely clean new growth, but the webbing started disappearing after the first thorough wash. Here’s the routine I followed.
Day 1: Immediate Isolation and Inspection
The very first thing I did was move the affected vine away from my other houseplants. Spider mites spread like gossip—one plant touches another, or you use the same watering can, and suddenly everything’s infested. I placed the vine in my bathroom because it had good light and higher humidity.
Then I grabbed a magnifying glass and checked the undersides of leaves. You’ll see tiny, speck-like mites moving slowly. They might look like reddish or pale yellow dots. I also gently tapped a leaf over a white sheet of paper. Any mites that fall off will look like moving specks on the paper. This confirmed my suspicion before I started any treatment.
Day 2: The Shower Rinse That Changed Everything
I filled a spray bottle with lukewarm water—not cold, because cold shocks the plant. I then added one teaspoon of mild dish soap (the kind without degreasers or fragrances) to a quart of water. I tested it on a single leaf first to make sure the soap didn’t burn the foliage. After 30 minutes with no damage, I sprayed the entire plant, focusing on leaf undersides and crevices.
Here’s where I made my first mistake the initial time: I sprayed lightly, just misting the top surfaces. That doesn’t work. You need to hit the undersides thoroughly. The webbing is water-resistant, so I used my fingers to gently rub the webs away while the soap solution was wet. This breaks the protective barrier and exposes the mites to the spray.
After waiting 10 minutes, I rinsed the plant in the shower with lukewarm water. This physically washes off a large portion of mites and their eggs. I let the vine drip dry in the bathroom for a few hours before moving it back to a brighter spot.
Day 3 to Day 5: Neem Oil Application
Once the foliage was completely dry, I mixed a neem oil solution: 1 teaspoon of cold-pressed neem oil and 1/2 teaspoon of mild liquid soap into 1 liter of water. The soap acts as an emulsifier so the oil mixes properly. I shook the bottle vigorously and sprayed every leaf, top and bottom, until the solution dripped off.
Neem doesn’t kill mites instantly. Instead, it disrupts their feeding and reproduction cycle. You might still see live mites for a few days, which is normal. I initially panicked because I expected immediate results. Patience is key here. I reapplied the same neem solution every three days—so on Day 6, Day 9, and Day 12.
One thing I learned: don’t spray neem when the plant is in direct sunlight. The oil can magnify light and cause leaf burn. I always applied it in the evening or early morning. Also, keep pets away during application, and ventilate the room well.
Day 7: Checking Progress and Re-Rinsing
About a week in, I noticed the new growth at the vine tips looked healthy—no stippling, no webbing. But some older leaves still showed faint webs near the leaf axils. I repeated the soap-and-water rinse from Day 2 to remove any remaining debris and mite residue. This also helps dislodge eggs that may have hatched.
I also started wiping down the larger leaves with a soft, damp cloth. This is tedious, but it makes a huge difference. The Kangaroo Vine has smooth, waxy leaves that respond well to physical wiping. It also gives you a chance to inspect every leaf carefully.
Day 10: Introducing Beneficial Predators (Optional)
If you’re in the UK or Australia, you might have access to beneficial insects like Phytoseiulus persimilis, a predatory mite that eats spider mites. I tried this once on a particularly stubborn infestation on another plant, and it worked brilliantly. For the Cissus antarctica, I decided to rely on the neem routine, but if you prefer a biological approach, this is a solid option.
Just remember that predatory mites need humidity above 60% to thrive. So if you’re releasing them, don’t let the air get too dry. You can also increase humidity by placing a tray of wet pebbles under the pot. Which brings me to the next section.
Day 14: Final Assessment
After two weeks, my vine had fresh, unblemished leaves. The older foliage still showed some scars from the mite feeding, but no new damage appeared. The webbing was completely gone. I kept the plant in a slightly more humid location and continued monitoring with a sticky trap placed near the pot.
The key takeaway from my experience? Consistency beats intensity. A single strong spray won’t do it. You have to repeat treatment based on the mite’s life cycle, which is roughly 5 to 7 days from egg to adult. That’s why I spaced my applications every three days—to catch newly hatched mites before they could lay more eggs.
The 3 Biggest Mistakes I Made (And You Should Avoid)
I’ve killed my fair share of houseplants, and honestly, the Cissus antarctica almost joined that list. But through trial and error, I’ve narrowed down the top three mistakes that doom most indoor vines. Here they are, straight from my painful experience.
Mistake #1: Overwatering the Vine
90% of indoor plants die from overwatering, and I’m convinced this is true for spider-mite infestations too. When I first noticed the webbing, my instinct was to flood the soil to “flush out” the pests. That was wrong. Overwatered roots become stressed, which makes the plant more susceptible to pest damage.
With Cissus antarctica, the soil should dry out slightly between waterings. Stick your finger about an inch into the soil. If it feels dry, water thoroughly. If it’s still damp, wait another day or two. During my two-week treatment, I actually reduced watering frequency by about 20% because the plant was already stressed and couldn’t absorb as much moisture.
You might also want to check your pot’s drainage. If the pot doesn’t have holes, excess water accumulates at the bottom, leading to root rot. That weakens the plant and makes it a magnet for pests. I’ve had to repot vines that were sitting in soggy soil for weeks, and believe me, it’s not pretty.
Mistake #2: Giving It the Wrong Light
I used to think that all vines love bright, direct sun. Wrong. Cissus antarctica prefers bright, indirect light. Direct afternoon sun can scorch the leaves, causing them to yellow and drop. When leaves are stressed from too much light, they produce less protective wax, and that makes them easier for mites to attack.
What’s more, too little light is also a problem. In low light, the plant produces softer, thinner leaves that mites can pierce more easily. So the sweet spot is a spot near an east-facing window or a few feet away from a south-facing window. If you’re in the UK or northern US, where winter light is already weak, consider adding a grow light for a few hours a day. I did this during my treatment and saw faster recovery.
Mistake #3: Using the Wrong Pot
Here’s a mistake that took me three dead plants to understand: pot material matters more than you think. I used a decorative ceramic pot without drainage holes because it looked gorgeous on my shelf. Big mistake. Water pooled at the bottom, roots stayed wet, and the plant became a breeding ground for fungus gnats and mites.
For Cissus antarctica, you need a pot with drainage holes. Terracotta pots are great because they wick moisture away from the soil. Plastic pots retain moisture longer, which can be useful in dry climates but dangerous if you’re heavy-handed with watering. I switched my affected vine to a terracotta pot and noticed the soil dried more evenly, reducing root stress.
Also, think about pot size. If the pot is too large, there’s excess soil that stays wet and encourages root rot. If it’s too small, the roots get crowded and the plant can’t absorb nutrients properly. I aim for a pot that’s about 1 to 2 inches larger in diameter than the root ball. That’s enough room to grow without drowning.
Creating an Environment That Mites Hate
Once you’ve cleared the webbing, the next challenge is keeping spider mites from coming back. I’ve learned that prevention is all about environment. Mites love dry, warm, stagnant air. So break that cycle.
Raising Humidity Around the Foliage
I keep a small humidifier near my Kangaroo Vine during the dry months. It runs for a few hours each day, keeping humidity around 55% to 65%. If you don’t have a humidifier, place the pot on a tray filled with pebbles and water. Just make sure the pot isn’t sitting directly in the water—that brings back the overwatering problem.
Misting is a controversial topic. Some experts say misting doesn’t raise humidity enough and can spread disease if water sits on leaves. But I’ve found that a light misting in the morning, when the plant has time to dry before evening, helps reduce mite populations. The RHS actually recommends increasing humidity around houseplants to deter spider mites, so I’m not alone in this.
Cleaning Leaves Regularly
Every two weeks, I wipe the leaves of my Cissus antarctica with a damp cloth. This removes dust, which can block stomata and reduce photosynthesis. Dust also provides a hiding place for mites. A clean leaf surface is less inviting to pests.
For larger leaves, you can gently use a soft brush if wiping is too tedious. The key is to do it regularly, not just when you see pests. I think of it as brushing your teeth—you don’t wait for a cavity to start.
Avoiding Heat Stress
Keep your vine away from heating vents, radiators, and drafty windows. Hot, blowing air dries out the foliage and lowers humidity. In winter, I move my vine to a spot that’s warm but not directly above a radiator. If you live in Queensland or California where summer heat spikes, move the plant to a cooler room during heatwaves.
I remember one summer where I left my vine near an air conditioning vent, thinking that the cool air would help. Instead, the constant air movement dried out the leaves and created the perfect low-humidity zone for mites. That was a hard lesson. Air movement is good, but not directly on the plant.
Expert Views on Spider-Mite Management
I’m not a scientist, but I’ve read quite a bit from the Royal Horticultural Society (RHS) and the American Horticultural Society (AHS) on this topic. The RHS points out that spider mites are not true insects, which is why many common insecticidal sprays don’t work on them. You need a miticide or an oil-based product that smothers them.
The RHS specifically recommends checking the undersides of leaves for mites and their eggs, since that’s where they mostly live. They also suggest keeping the foliage cool and moist, which aligns with what I’ve experienced. In contrast, the AHS emphasizes integrated pest management, which means combining cultural practices (like cleaning) with biological controls (like predatory mites) before reaching for chemicals.
What I’ve found useful is alternating between neem oil and insecticidal soap. Overusing one product can lead to resistance. The University of California’s Integrated Pest Management program also backs this approach. They state that rotation is key to preventing mites from building up immunity. So don’t stick to one product for months on end.
Another point that experts make is that neem oil works best when the temperature is between 68°F and 80°F (20°C to 27°C). If it’s too hot, neem can burn leaves. If it’s too cold, it won’t be effective. I always check the weather forecast before applying. If a hot day is coming, I wait until the evening when temperatures drop slightly.
Long-Term Care for a Healthy Kangaroo Vine
Once your Cissus antarctica is free of webbing and mites, you want to keep it vigorous. A healthy plant is the best defense against pests. Here’s how I maintain mine after the two-week recovery period.
Fertilizing Smartly
I feed my vine with a balanced liquid fertilizer at half strength once a month during the growing season (spring and summer). Too much fertilizer can cause rapid, soft growth that mites love because it’s easier to pierce. That’s why I go with a weaker dose. In fall and winter, I stop fertilizing entirely because the plant rests.
Pruning Damaged Growth
After a mite infestation, some leaves might be too damaged to recover. Don’t hesitate to prune them off. This redirects energy to healthy growth. I use clean, sharp scissors to cut stems just above a leaf node. It’s also a good chance to shape the vine if it’s getting leggy.
Supporting the Vine
Cissus antarctica is a climber. It naturally wants to attach to something. I provide a moss pole or trellis for support. This helps air circulate through the foliage, reducing the humid, stagnant pockets where mites like to hide. If you let it hang freely, that’s fine too, but you’ll need to be more vigilant about checking leaf undersides.
Monitoring with Sticky Traps
I keep a small yellow sticky trap near my vine year-round. This catches adult mites and fungus gnats. It also acts as an early warning system—if I see tiny specks on the trap, I know to inspect the plant immediately. It’s a simple trick, but it saves me from dealing with full-blown infestations.
Common Questions I Get About Spider-Mite Webbing
Can I just wipe the webbing off and skip spraying?
Honestly, wiping alone won’t cut it. The webbing protects mites and their eggs. You need a contact spray to actually kill them. Wiping helps physically remove the webs, but you must follow up with neem oil or insecticidal soap. I tried wiping only once and ended up with a rebound infestation a week later.
Will spider mites spread to my other plants?
Yes, they can spread quickly, especially if plants are touching or if you use the same tools between plants. When I found mites on my Cissus antarctica, I treated all nearby plants preventively. It’s better to be safe than sorry. Mites can also hitch a ride on your clothing, so wash your hands and change clothes if you’ve handled an infested plant.
How do I know if the mites are gone for good?
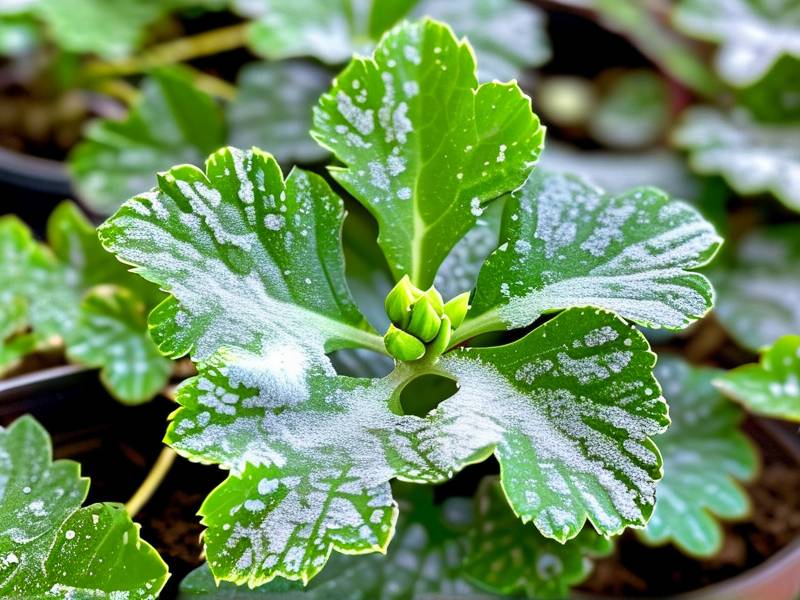
You need to see no new webbing or leaf damage for at least two consecutive weeks. I recommend checking leaf undersides with a magnifying glass every two days. Once you see fresh, clean growth unblemished by stippling, you’re likely in the clear. But keep monitoring—spider mites can come back if indoor humidity drops or if you bring in a new infested plant.
Putting It All Together
I know dealing with spider mites on your Cissus antarctica feels overwhelming—I’ve been there, staring at those silky threads and wondering if I should just toss the plant. But trust me, recovery is totally possible with a structured, consistent approach. Start with physical removal, then treat with neem oil every three days for two weeks, and adjust your care routine to raise humidity and reduce stress.
The biggest thing I want you to remember is that spider mites aren’t a sign that you’re a bad plant parent. They’re simply a symptom of an environment that’s too dry and warm. Fix the environment, and you fix the problem long-term. So don’t panic, don’t overwater, and don’t reach for harsh chemicals without trying gentler methods first.
One last thought: buying plants from a reputable source, whether it’s a local nursery or a known online shop, can drastically reduce the chances of bringing mites home in the first place. I learned to quarantine new plants for about two weeks before placing them near my collection. It’s a bit of extra work, but honestly, it saves me from exactly the kind of heartbreak I went through with my Kangaroo Vine.
If you’re in the middle of fighting spider mites right now, hang in there. Stick to the routine, stay patient, and you’ll see fresh leaves unfurling before you know it. And when that first clean leaf appears, you’ll feel a small victory worth celebrating.





