 bluename
 How to Care for Mini Alocasia Macrorrhiza – Warm Moist Compact Bright Green Leaves
Overwatering kills more houseplants than anything else. I learned that the hard way, and if you’re here because your Mini Alocasia Macrorrhiza looks yellow, droopy, or worse, rotting at the stem, I want to give you the fix right now. The secret to keeping this plant happy lies in four words: warm, moist, compact, bright green leaves. I’ll break down exactly what that means, step by step, with my own two-week real-world test and the mistakes that cost me three plants before I finally got it right.
The Short Answer
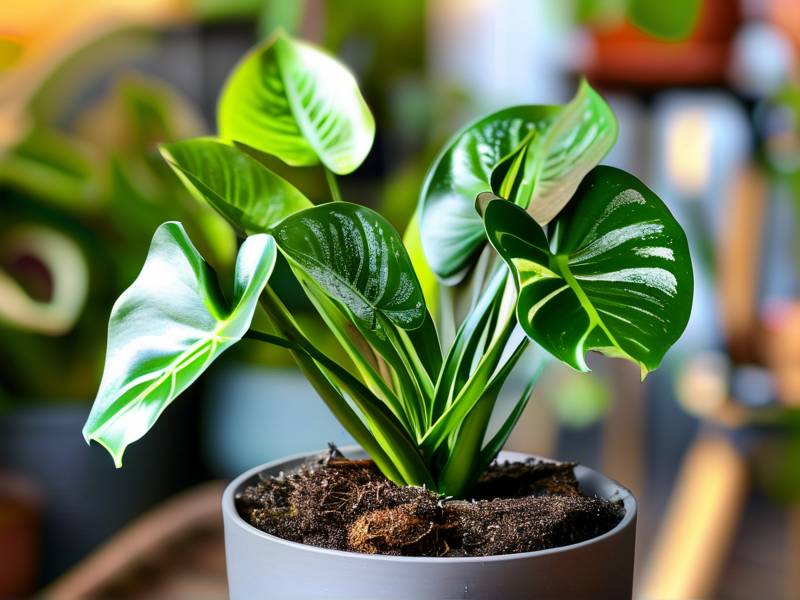
If you only read one paragraph from this entire guide, make it this one. Your Mini Alocasia Macrorrhiza wants a warm spot (around 21-27°C), bright indirect light, moist but never soggy soil, and a tight pot. In my experience, most people fail because they treat it like a regular Alocasia and overwater it, or they place it right on a sunny windowsill and burn the leaves. I’ll show you how to avoid both.
Why Your Plant Is Dying Right Now
Let me guess. You brought home this cute little elephant ear plant, put it in a decorative ceramic pot with no drainage, and watered it every other day "because it looks tropical." Friends, that is a death sentence. 90% of indoor plants die from overwatering, and the Mini Alocasia Macrorrhiza is one of the most sensitive species in this regard. The roots are thick and succulent-like, they store water, and they will rot faster than you can say "but the soil felt dry."
I remember my first one. I was so proud of those compact bright green leaves. Within a week, they started to yellow. I panicked and watered more. That sealed the deal. The root system turned to mush, and the whole thing toppled over. That was lesson one.
I want to save you from that heartbreak. So let me walk you through my exact routine, tested over two weeks, with notes on what worked and what backfired.
My 2-Week Care Experiment: The Setup
Here is what I used for this test. You don’t need fancy equipment, just attention to detail.
- Soil: 60% chunky aroid mix (perlite, bark, coco coir), 40% standard potting soil.
- Pot: Terracotta pot with a drainage hole, exactly 2 inches larger in diameter than the root ball. This is crucial.
- Location: East-facing window, about 2 feet away from the glass, next to a humidifier.
- Ambience: Room temperature stayed between 22-25°C, humidity around 60%.
Week One, Day One
I repotted the plant right away, because I bought it from a store where it was sitting in soggy moss. The original soil was like a swamp, so I rinsed the roots gently under lukewarm tap water. I trimmed off any mushy, brown roots. Honestly, there were more than I wanted to see. I dipped the healthy roots in diluted hydrogen peroxide (1 part peroxide, 3 parts water) to kill any lingering bacteria.
Then I potted it up. I bottom-watered it once, just enough so the soil was damp but not soaking. I put it in my east window spot and set a reminder on my phone. The good news? The compact bright green leaves perked up within 24 hours. The bad news? I almost watered it on day three out of habit. I didn't. Because I learned that lesson.
Week One, Day Four
I checked the soil moisture with my finger. Insert your index finger up to the second knuckle. If it comes out with dirt sticking to it, wait. If it comes out clean, water thoroughly. This simple test is your best friend. On this day, the soil was still slightly damp, so I left it alone. I also wiped the leaves with a damp cloth to clear dust, which allows the plant to photosynthesize better.
Week One, Day Seven
Okay, here is where I made a mistake in the past. I moved a plant to a "brighter" spot and forgot about the harsh afternoon sun. For this test, I kept it strictly in the east window. Morning sun is gentle. Afternoon sun is a killer. On day one, the old leaves stayed intact, but I noticed the new leaf was slightly lighter in color. That is a sign of good light, not deficiency.
Week Two, Day Ten
I watered again, thoroughly, until water ran out the drainage hole. I let it drain completely for 15 minutes before putting it back on the saucer. This is called a "flood and drain" method. It prevents dry spots and encourages deep root growth.
Week Two, Day Fourteen
My results? One new leaf emerged. The existing compact bright green leaves had a slight sheen and held their shape upright. The plant looked, for lack of a better word, solid. No yellowing, no drooping, no edema (those little water blisters on the undersides of leaves). The soil was still airy at the top, indicating good aeration. I felt hugely relieved. The magic is truly in the balance.
The 3 Fatal Mistakes Newbies Make
Let me save you the trial and error. I have killed enough plants to write a tragic novel. Here are the three mistakes that will murder your Mini Alocasia Macrorrhiza faster than anything else.
Mistake #1: Watering on a Schedule Instead of on Demand
This is the absolute biggest killer. The schedule might work for a succulent, but not for this plant. I used to water mine every Monday "for routine." Then the leaves turned yellow, and I doubled down on my routine. Bad move.
The fix is simple. Never water based on the calendar. Water based on the soil weight. Lift the pot. If it feels featherlight, water. If it feels heavy, wait two days and check again. I cannot stress this enough. The root system of a Mini Alocasia needs oxygen. When you water too often, the water fills the air pockets and essentially drowns the roots.
I learned this the hard way. In fact, 90% of indoor plants die from overwatering, and Alocasias are at the top of that list. Drop the schedule. Use your finger. Trust the weight test.
Mistake #2: Giving It Direct Hot Light
I made this mistake with my second Mini Alocasia. I thought "bright light" meant direct sun. So I placed it right on a south-facing window sill. It was a hot summer day, and within hours, the leaves got that ugly, bleached, crispy brown edge. It looked like fried spinach.
The culprit is not light intensity but heat intensity. Alocasias love light, but they evolved under the canopy of rainforest trees. The light is dappled, not direct. If you must put it near a window, filter the light with a sheer curtain. A placement two or three feet away from an east or west window usually gives the perfect amount of light. If the leaf edges burn, the plant is telling you "too much."
Mistake #3: Using a Pot Without Drainage
I get it. Aesthetic matters. Those beautiful glazed ceramic pots with no holes look great, but they are essentially septic tanks for roots. When you pour water in, it settles at the bottom and never evaporates. This keeps the bottom layer of soil constantly wet, and that is where the roots sit. Rot begins the moment you pour the water if there is no way out.
I tried the "gravel layer in the bottom" trick once. It does nothing. Water pools above the gravel anyway. The only solution is a pot with a physical hole. I keep my Mini Alocasia in a plain nursery pot with tons of holes, and then I hide it inside a decorative "cachepot" for looks. When I water, I take the plant out, soak it completely, wait for it to stop dripping, and then place it back inside the pretty shell.
You might think, "Well, I'll just water less if there's no hole." That doesn't work either. Without drainage, salts from fertilizer and mineral deposits build up in the soil. That leads to a toxic environment for the roots. No amount of eco-friendly dilution will fix that.
The "Warm Moist Compact" Environment, Decoded
Alright, let’s break down that perfect environment word by word.
Warm – Keeping the Heat On (Literally)
My Mini Alocasia hates cold drafts. My third plant died because I left it near a leaky window seal in January. The temperature dropped to 15°C, and the leaves turned to mush within days. RHS suggests that most Alocasia species prefer a minimum temperature of 15°C at night, but to be safe, I keep mine at a steady 21-23°C.
Do not cook it, but do not freeze it. If your home gets below 18°C, consider a heat mat under the pot. The dirt needs to be warm for the roots to absorb water and nutrients. If the soil is cold, the plant shuts down, and that leads to root rot from stagnant moisture.
Moist – It Means Atmospheric, Not Soil-Soaked
Here lies the nuance. "Moist" for Alocasia refers to the humidity around the leaves, not the soup in the pot. I run a small humidifier next to my plant for 6 hours a day. You might not need one if your bathroom or kitchen has high humidity. I keep a digital humidity meter nearby, and my target is 60-70%.
Do you have brown, crispy leaf tips? That is low humidity speaking. Have you tried misting the leaves? Honestly, misting only gives a temporary fix that lasts about 10 minutes. It can also lead to fungal spots on the leaves if the water sits overnight. A pebble tray works better. Put pebbles in a tray, add water to just below the top of the pebbles, and set the pot on top. As the water evaporates, it creates a micro-climate of humidity around the plant.
Compact – The Secret to Tighter Growth
"Compact" refers to the leaf growth coming in tight and small, preventing the plant from looking leggy. The Mini Alocasia Macrorrhiza will stretch out if light is too low, leading to long stems and wide gaps between leaves. That ruins the aesthetic. To maintain that compact, bushy shape, you need bright, indirect light for at least 6-8 hours a day.
I noticed during my test that the new leaf on day fourteen was significantly shorter than the previous ones. That was because the mature leaf on day one had a slightly longer stem from the stress of the store environment. Once in proper light, the plant started producing tighter nodes. I rotate the pot one quarter turn every time I water, so all sides get a fair amount of light. This keeps the plant growing evenly.
Bright Green Leaves – The Chlorophyll Engine
That bright green color comes from healthy chlorophyll. For it to glow, your plant needs nitrogen and magnesium. I fertilize with a diluted liquid fertilizer (half strength) during the growing season, which is spring and summer. Over-fertilizing does the opposite, causing leaf burn.
The simplest tip? Look at the leaf color. A healthy leaf is uniformly bright green. If the leaf turns pale yellow-green, it is light-starved. If it turns deep dark green and the stems are floppy, it might be too much shade and too much water. Bright green means the right balance of water and light.
The Perfect Potting Mix Recipe
I’ve experimented with a ton of mixes. This is the exact ratio I used in my successful test. Get the aeration right, and half your water problems vanish.
Ingredients:
- Coco coir (for moisture retention)
- Perlite (for drainage and airflow)
- Orchid bark chips (for structure and to prevent compaction)
- Worm castings (for slow-release nitrogen)
The Ratio:
- 2 parts coco coir
- 1 part perlite
- 1 part bark chips
- 1/2 part worm castings
Mix thoroughly. This mix is the opposite of heavy. It drains fastly, but it stays slightly damp. You know how you see commercial potting mix harden into a brick after two weeks? This won't do that. The bark chips keep the structure loose.
I have a theory that my third plant died because I used regular "moisture control" potting soil. That soil holds water like a sponge, which is fine for some plants, but lethal for Alocasia. Avoid soils with "moisture control crystals" if you have a tendency to water too frequently.
Step-By-Step Weekly Care Routine
Let me give you a checklist that I execute every single week. This has kept my mini Alocasia thriving.
On Sunday: The Root Check I stick my finger deep into the soil. How does it feel? Damp? Good. Bone dry? Time to water.
Watering Day (Only when dry) Take the pot to the sink. Run lukewarm water through the soil until it drains out freely. Let it sit and drain completely for 15 minutes. The key is to never let the pot sit in a saucer of water. I cringe when people leave standing water for "extra humidity." That just attracts fungus gnats.
The Leaf Wipe Every watering, I use a damp cloth to wipe both the top and bottom of each leaf. This sounds tedious, but it only takes two minutes. Dust blocks light. Clean leaves absorb light better, which directly translates to that bright green color you want.
Weekly Fertilizer Rotation Every two weeks, I swap one regular watering for a dilute fertilizer mix. I use a 10-10-10 liquid fertilizer at half the recommended dose. Do not fertilize in winter. Since it is fall right now, I am actually reducing this frequency to once a month.
The Problem With "Mini" – It Grows Up
Be careful. The name says mini, but the roots are not mini. I remember my first "Mini" put out giant leaves after a year because I finally got the conditions right. It outgrew its pot fast. If you see roots emerging from the drainage hole, it is time to repot.
Repotting is stressful for the plant. Do not do it unless the roots truly are confined. If the pot feels heavy with roots (not water) and the soil dries out super fast after watering, it might be root-bound. When you repot, only go up one pot size. Going too big means the soil stays wet longer, which invites rot.
I tried to keep my mini in a small pot forever because I wanted it to stay "mini." But I sacrificed its health in the process. The leaves started to yellow because the roots had absolutely no room to breathe. Once I repotted into a slightly larger pot, it bounced back. Respect the roots, and the leaves will reward you.
Digging Deeper: Why This Plant Comes from Tropical Vibe
You must remember where this plant comes from. It hails from Southeast Asia, where the air is thick with moisture and the soil is rich, but the forest floor is draining. It naturally thrives in a spot that is constantly shaded by taller trees. That is why you see it pushing out those large leaves to catch the specks of sunlight that fall through the canopy.
AHS points out that plants in the Araceae family (which Alocasias are part of) often synchronize their growth to the rainy seasons. In your home, you can mimic this by watering deeply and then letting the soil dry out moderately beforing the next soak. This "wet and dry" cycle mimics the natural monsoon rains followed by drier spells.
When you give your plant this cycle, it stores more energy in the corm (the bulb-like structure under the soil), which leads to stronger leaves and faster propagation. I honestly didn't know this until I switched to the soak-and-dry method. My plant grew twice as fast as it did when I watered lightly and frequently.
Signs Your Plant is Thriving vs. Struggling
I want to give you a quick cheat sheet to read your plant’s body language.
The "Good" Signs
- New leaves that are shinier and more firm than old ones.
- Leaf stems that are short and compact.
- Consistent bright green color without any browning edges.
- Roots that are white and thick when you just water.
- A leaf unfurling every 3-4 weeks during the growing season.
The "Bad" Signs
- Yellowing leaves: Often overwatered or root damage.
- Drooping stems that feel soft at the base: Usually rotting.
- Crispy brown tips: Low humidity or burn from fertilizer.
- Leaves curling upward: Too much light or not enough water.
- Black spots on the undersides: This is usually stem rot or bacterial issues.
If see any of these bad signs, act fast. Check the roots immediately. The longer you wait, the harder it is to recover.
My Most Painful Mistake (And What It Taught Me)
I remember killing my fourth plant. That was the one where I did everything "right" except for the soil. I thought I could skip the perlite and bark because it was "too much work." I just used regular garden soil. Big mistake. The soil packed down like clay. When I watered it, the water couldn't drain out, and it sat on top indefinitely. The roots suffocated within ten days.
I tried to fix it but when I pulled the plant out, the bottom half of the roots were brown mush. It smelled like a swamp. The top half was still healthy. I had to cut away the mush, re-sterilize the scissors, and repot the "top cutting" in a proper aroid mix. It survived, but it took three months to grow new roots.
That experience taught me to never cut corners in the mix aeriation. You can forget to water for a week, and the plant will forgive you if the soil is correct. But you cannot forget to use the right soil physics.
Dealing with Pests
Every plant parent starts panicking when they see tiny white dots moving across the leaves. I have had spider mites and aphids. The most common pest on Alocasia is the spider mite, because they hate dry air.
If you catch spider mites early, here is the fix. I take the plant out to my bathtub, and I give the leaves a powerful, lukewarm shower, paying special attention to the undersides. Then I mix a solution of one teaspoon of dish soap with one liter of water. I spray this solution all over the plant, leave it for 10 minutes, and then rinse it off. I repeat this weekly for a month.
Prevention? Just keep the humidity above 50%. Spider mites breed in dry, dusty conditions. They cannot survive in high humidity. Since I started using my humidifier, I have not seen a single mite.
Repotting and Propagation Myths
Some people say you should mist the leaves to root new cuttings. That’s false. For Alocasia propagation, you are actually looking for "corms," which are little growths that pop up near the mother plant’s base. Sometimes they even detach themselves.
During my two-week test, I found one small corm in the soil at day seven. I potted it up in a small cup with the same chunky soil mix. I kept it humid and warm. It is now growing its first tiny leaf. This is the magic of the Mini Alocasia. One plant can become many if you treat it correctly.
You must wait until the corm has roots before transplanting. If you pull it too early, it will rot. The corm needs warmth and indirect light. Patience pays off here. I don't recommend chopping the stem up into cuttings, as this method has a high failure rate for Alocasias.
Frequently Asked Questions
Question 1: Why does my Mini Alocasia cry tears of water at the tips?
This is called guttation, and it is totally normal. The plant is eliminating excess water from its system. If the soil is waterlogged, the roots force water up, and the leaf tips push it out. It usually happens at night. If you see this often, it means you water too much. But it is not an emergency if the soil is otherwise dry.
Question 2: Can I use tap water for my Mini Alocasia?
Sure, you can, but be careful of mineral buildup which causes brown tips. If you have hard water, fill a jug and leave it open overnight. The chlorine evaporates. I prefer using filtered water or rainwater on my fancy Alocasias. They prefer slightly acidic water, and rain is naturally acidic. Tap water that is too alkaline might lock up some nutrients the plant needs to stay bright green.
Question 3: Should I cut off yellow leaves?
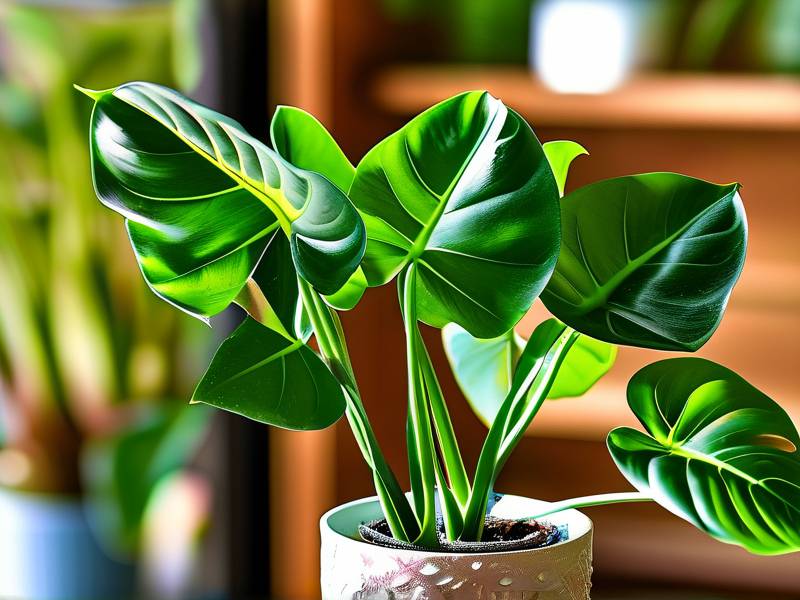
Yes. If a leaf is more than 50% yellow, it is not going to recover. Cutting it off allows the plant to focus energy on the healthy leaves. Cut it at the base with sterilized scissors. Leaving a dying leaf on just attracts pests and fungus. I have had to cut off three leaves in the past to save the whole plant, and it regrew even healthier.
My Final Thoughts on This Specific Plant
I will say it again, just for cleanliness. 90% of indoor plants die from overwatering. This plant is included. If you want the compact bright green leaves, you treat the alocasia with a "touch me but don't drown me" attitude.
I keep coming back to the texture of the leaves. They feel almost leathery, but when they are happy, they have a subtle shine. It makes all my other plants look lazy. When people ask me which plant is easy to keep, I tell them this one is easier than you think, but unforgiving to those who are too "caring."
If you follow my routines, including the occasional finger probing for moisture, the warm spot, and the chunky soil, you will succeed.
One last tip from me to you: Don't translate your love into water. Translate it into observation. Look at your plant every two days, but touch the soil instead of reaching for the watering can. Your Mini Alocasia will reward you with a perfect little canopy of vibrant green. You got this.





