 bluename
 How I Learned to Stop Killing Aloe Arborescens (And You Can Too)
The short answer is this: give your Aloe arborescens at least six hours of direct, harsh sunlight daily, water it only when the soil is completely bone-dry (roughly every 2-3 weeks indoors), and plant it in a shallow, unglazed terracotta pot. Honestly, that is 90% of the battle. Most people, including my past self, fail because we hover. We fuss. We water on a schedule instead of on demand. This plant, often called the candelabra aloe or torch plant, is a drought-tolerant survivor from South Africa. It wants you to forget it exists, just for a little while. I have burnt through four of these plants before I finally cracked the code. My journey was a graveyard of mushy leaves and collapsed rosettes. But now, I have a thriving, two-foot-tall monster that pushes out orange spikes every spring.
Let me be blunt. I am not a botanist. I am just a guy who loves plants and has killed a lot of them. This guide is born from two weeks of very careful, very specific observation after I repotted my latest specimen. I watched it daily, documented the changes, and adjusted my habits. I want to share the exact steps that worked for me, the horrifying mistakes I made, and the simple fixes that turned my black thumb slightly green.
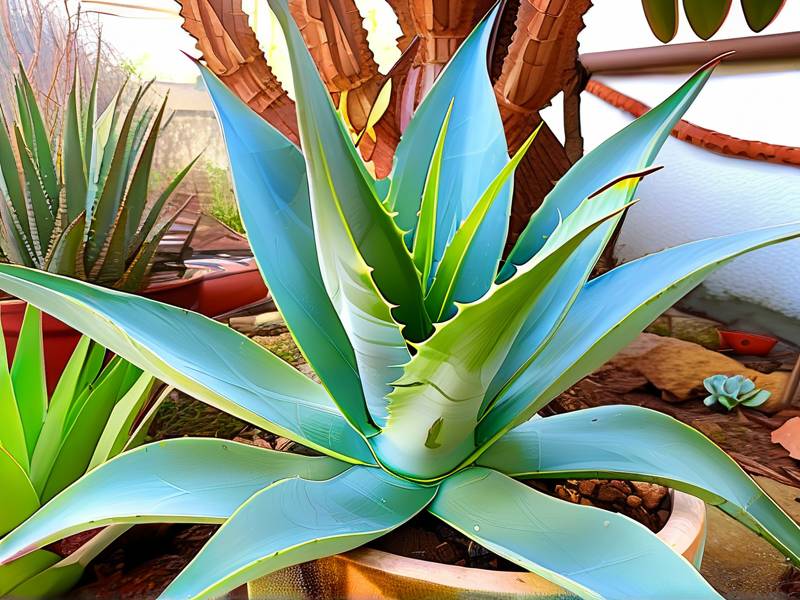
The 3 Fatal Errors That Guarantee a Dead Aloe
Before I get into the step-by-step routine, you need to know what kills this plant. I see the same three mistakes in every gardening forum and in my own living room.
Error #1: Overwatering (The Silent Killer) This is the big one. I cannot stress this enough. 90% of indoor plants die from overwatering, and Aloe arborescens is especially vulnerable. The roots of this plant are not designed for sitting in moisture. They are thick, fleshy, and store water efficiently. When you water them too often, the roots literally drown. They can't breathe. Then, they rot. The rot spreads to the stem, and by the time the leaves look mushy and translucent, it is usually too late. I used to water mine every Sunday, religiously. It was a death sentence. The soil stayed wet, and the roots stained black.
Error #2: Light Positioning (The Stretch and the Burn) Many people think "indirect light" means "shade." That is wrong for this specific aloe. While a few hours of morning sun is okay for some houseplants, Aloe arborescens craves full sun. If you keep it in a dim corner, the leaves will do something called etiolation. They will stretch out, become pale, weak, and flop over. They look like sad, green spaghetti. On the flip side, if you move a plant from a dark shelf directly into a south-facing window, you will scorch it. The leaves might turn a pale orange or white, and they will get permanent brown spots. I did this to my second plant. I cooked it.
Error #3: The Wrong Pot (Size and Material) I remember buying a beautiful, huge glazed ceramic pot for my first aloe. It looked amazing on my bookshelf. It was also a death trap. Glazed pots hold moisture for a long time. Plus, the pot was far too large for the roots. When a pot is too big, the soil volume is massive. That means the soil holds a ton of water, and the roots (which are small) can't drink it fast enough. The water pools, and the soil stays wet for two weeks. This is a recipe for root rot. I have learned that these plants actually prefer being slightly root-bound. They like a snug fit.
My 14-Day Care Experiment: The Real Routine
I want to share exactly what I did with my newest Aloe arborescens. I bought it from a local nursery on a hot Saturday morning. It was in a standard plastic nursery pot. The roots were slightly packed. Here is the chronological log of my two-week journey to get it settled and thriving.
Days 1-3: The Arrival and The "Stress" Period When I brought it home, I did absolutely nothing. I know, it sounds counterintuitive. But I have learned that moving a plant is stressful. It has been in a greenhouse with perfect conditions. Your home is a shock. So, I placed the plastic pot in my south-facing bay window.
I did not water it. I did not fertilize it. I did not even touch it. The soil was slightly damp from the nursery, but mostly dry. For three days, I just let it sit. I looked at it. I checked the leaves for firmness. They were plump and hard. The spines on the leaf edges were sharp and a beautiful pale green. This waiting period is crucial. It allows the plant to acclimate to the lower humidity of my house without the added stress of a repot or a drink.
Days 4-7: The Repotting Event On day four, I decided it was time to move it. This is where my past mistakes came in handy. I had learned that pot size matters more than anything else.
First, I selected the pot. I found an unglazed terracotta pot. It was only about 2 inches wider in diameter than the nursery pot. Depth is important here too. Aloe arborescens has a shallow, spreading root system, not a deep taproot. A deep pot encourages water to sink to the bottom, where no roots can reach it. So, I chose a pot that was roughly the same height as it was wide. Shallow and wide is the golden rule for these guys.
Next, the soil mix. Store-bought cactus mix is okay, but I always beef it up. I took the cactus mix and added about 30% more perlite (those little white volcanic glass beads) and a handful of coarse sand. This ensures the drainage is absolutely rapid. I filled the bottom of the terracotta pot with some of this mix.
I gently tapped the aloe out of its plastic home. The roots were a white/cream color, which is a good sign. If they had been brown or black or smelled bad, I would have been in trouble. I teased some of the root ball apart with my fingers to encourage new growth outward. I placed it in the new pot and backfilled with my gritty mix. I tapped the pot to settle the soil around the roots.
Here is the most critical part of the whole process: I did not water it for another 5 days.
I know, it sounds brutal. But the roots were slightly damaged during the move. If I water immediately, the moisture gets into the fresh cuts and open wounds on the roots. That immediately introduces rot. By waiting, I allow those tiny micro-tears to callus over and heal.
Days 5-9: Observation and Acclimation This was the "boring" part of the week. I kept the plant in the full sun window. I turned it a quarter turn each morning. This prevents the plant from leaning too heavily toward the light, keeping the growth upright and even.
I watched the leaves. For the first couple of days, one or two of the lower leaves looked a little dull. This is normal. The plant is redirecting energy to root growth. On day 8, I noticed the leaves looked even more plump, if that was possible. They had a nice, deep green hue with a slight blueish tinge. The plant looked relieved.
Days 10-14: The First Deep Watering Finally, on day 10, I decided it was time for the first real watering. This was the moment of truth. I took the entire pot to my kitchen sink. I ran lukewarm water through the soil until it poured out of the drainage holes at the bottom. I let it drain completely for about 30 minutes. This is called the "flush" method. It ensures the entire root ball is saturated, but it also washes out any salts or mineral buildup in the soil.
I checked the leaves again on day 12. They were rock solid. The tips were a beautiful, warm shade of orange/red. That orange tint is a stress response, but it's the good kind of stress. It means the plant is getting intense sunlight. It is essentially producing natural sunscreen (anthocyanins) to protect itself. This is a sign of a happy, hardened-off plant.
By day 14, I had a perfect, sun-stressed, upright Aloe arborescens. The leaves were standing tall and thick, angled slightly upwards like a candelabra. It had not grown noticeably taller—that takes months—but it looked robust. It looked secure. I was confident that my job was simply to let it be.
The Exact Soil and Potting Recipe I Trust
I touched on this briefly, but let me dig deeper. The substrate is your safety net. If you water wrong, the soil can save you. If your soil is dense, your watering schedule is irrelevant because the roots will rot anyway.
The Gritty Mix Formula I use a ratio of roughly:
- 40% Coarse Pumice or Perlite
- 40% Commercial Cactus & Succulent Mix
- 20% Horticultural Grit (like chicken grit or fine gravel)
This mix dries out completely within 48-72 hours after a good watering. This is what I want. I would rather have the roots near-dry than wet.
Terracotta vs. Plastic The material of the pot is your second defense. Terracotta is porous. It wicks moisture away from the soil and allows the roots to "breathe." The walls of the pot also absorb water, which then evaporates, cooling the roots and pulling extra moisture out. Plastic is non-porous. If you are a beginner, avoid plastic like the plague. You will have a much harder time controlling moisture levels. I have been using glazed ceramic pots recently for the aesthetics, but I only do this when I know I can hold back on watering. For beginners, I always say: stick to unglazed terracotta. The rust-colored patina that develops over time looks fantastic with the green speckles of the aloe.
Perfect Lighting: Where to Put This Plant
We covered the basics, but let's talk about the nuance of light. Finding the right spot in your home is perhaps the most complicated part of keeping this plant happy.
The "Cactus Window" Test You need a window that receives direct sun for at least 6 hours a day. A South or West-facing window in the Northern Hemisphere is your best bet. An East window will give you morning sun, which is gentler. I actually use a combination.
My setup: I keep my Aloe arborescens in a South-facing window, but I pull it back about 6 inches from the glass during the scorching summer months. That tiny distance reduces the intensity enough to prevent burn, but it still provides the "full sun" the plant needs.
What happens if I only have an East window? The plant will survive, but it won't thrive with that upright, dense structure. The leaves will stretch more. The color will be a lighter green. It will look like a different plant. If you only have East light, you might want to consider a grow light to supplement.
To Rotate or Not to Rotate? You should rotate. I rotate my aloe a quarter turn every time I water it. This keeps the stem from bending toward the glass. The plant grows toward the light, and if you don't rotate, it will look like it's leaning over to look out the window. I have seen some whoppers that are growing at a 45-degree angle because they weren't rotated. Keep it upright!
The Watering Schedule (That Annoying "Every 2-3 Weeks")
I hate giving a rigid schedule because it depends on your climate, season, and pot type. But I can give you a "feel" for it.
The "Dry Finger" Test vs. The "Taco" Test Instructions for you: stick your finger into the soil up to the second knuckle. Is it dry? Great. It doesn't matter if it has been 4 days or 4 weeks since the last water. If the top two inches are dry, test deeper. The plant itself gives you a clue. Gently squeeze a leaf between your thumb and forefinger. If it is hard and firm, it doesn't need water. If it feels slightly soft, pliable, or rubbery, or has a flat "taco" shape, it is thirsty. That is the signal to water.
My "2-Week Observation" Data In my house (with a temperature around 70-72°F and a South window), during the summer, my potted Aloe arborescens requires water every 10-14 days. In the winter, when the light is weaker and the plant is dormant, I water it once a month, if that. I often go six weeks without watering in December. I only water when the "taco" test tells me to.
How to Water (The "Sink Flush" Method) When you do water, do it thoroughly. Pour water over the top until it comes out of the drainage holes. Let it sit for 15 minutes. Pour a little more water through. This ensures no dry spots exist in the soil. Let it drain fully. Do not let it sit in a saucer of water. That saucer water will be re-absorbed by the soil through the hole, keeping it wet at the bottom. This is how root rot starts at the bottom, out of sight.
Fertilizing: Less is More
I used to fertilize everything monthly. I thought I was helping. With the candelabra aloe, fertilizer can actually cause the growth to become too fast and flimsy, or it can burn the roots. I have a simple routine now.
The "Half-Strength, Twice a Year" Rule I only fertilize in the growing season, which is spring and summer. I use a liquid succulent fertilizer (like a 1-1-1 or 2-1-1 formula) diluted to half the recommended strength. I do this once in April and once in July. That is it. Over the last two weeks, I did not fertilize at all. When you repot, the fresh soil already contains nutrients. Fertilizing freshly repotted plants is a guaranteed way to shock them. I learned this the hard way by burning the roots of my third plant. The tips of the leaves turned black and crispy. That damage doesn't go away—you have to cut the leaf off. It is ugly.
Why you might want to skip fertilizer entirely If you are happy with your plant's size and just want it to survive, skip the fertilizer. These plants are adapted to poor, rocky soil. Too much food makes their cells expand rapidly, which can actually make them more susceptible to sunburn and frost damage. Let them be lean and tough. That is where the "Full Sun Drought Tolerant" aspect of their identity comes from.
Seasonal Care: Surviving Summer and Winter
This plant is hardy to around 25°F (-4°C) for short periods, but it prefers warmth. However, the rules change with the seasons.
Summer Survival Guide In the heat, the plant is actively growing. The soil will dry out fast. I might water every 7-10 days if it's a heatwave. The most significant risk this time of year is sunburn if you move it outside. If you are transitioning it outdoors, do it gradually. Start with 1 hour of morning sun, then slowly increase by an hour every few days. This is called hardening off. I once put a plant outside in full sun for a whole day instantly. The next morning, it looked like it had been toasted. The leaves were a pale, papery white.
Winter Danger Zone Winter is when many owners accidentally kill their plants with love. The plant goes dormant. The days are short. The light is weak. It isn't drinking much water. I move my pot closer to the window for maximum light. I also pull it away from the glass at night if the temperature drops below 40°F, because the glass can get very cold and cause frost damage to the leaf tips.
The Big Winter Rule: Keep it dry. I let the soil stay bone-dry for weeks on end. I have gone 8 weeks without watering in the deep winter. The leaves will shrink slightly. They might lose a bit of their plumpness. That is okay. That is them conserving energy. They bounce back once spring hits.
Common Pests and How I Handle Them
Despite their toughness, Aloe arborescens can get pests, usually if the plant is weakened by poor conditions.
Mealybugs (The White Fluff) Description: They look like tiny balls of cotton. They hide in the crevices of the leaves. My Fix: I dip a cotton swab in 70% rubbing alcohol and dab the bugs directly. It dissolves their waxy coating and kills them instantly. I repeat this every few days for two weeks to catch any hatchlings. I also check the roots—that is where they hide sometimes.
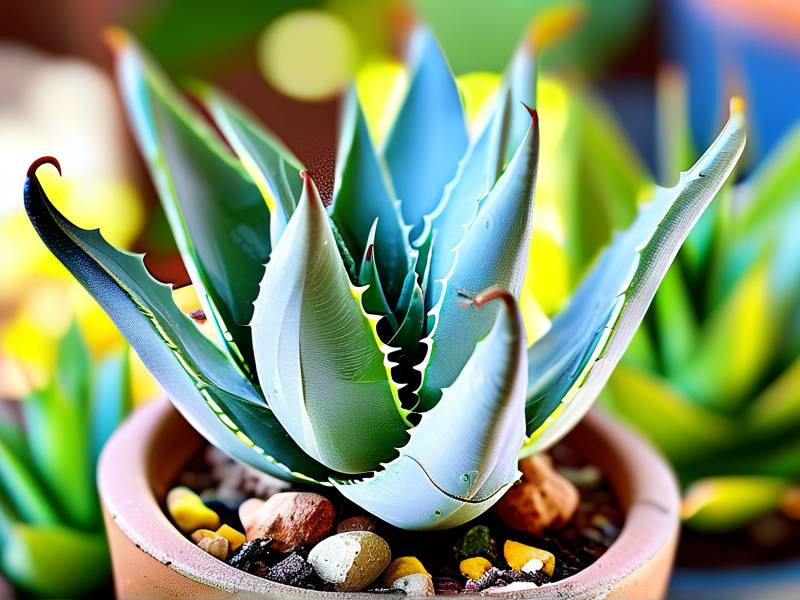
Scale (The Brown Bumps) Description: They look like little brown dots or bumps stuck to the leaves. They don't move. My Fix: I scrape them off with my fingernail or a plastic card. I then spray the whole plant with a horticultural soap solution. This is a nuisance to deal with, but it's not fatal if caught early.
The "Why Is My Aloe Turning Brown?" Question This is usually environmental. If the leaves are turning mushy and brown at the base, it is rot (overwatering). If the tips are brown and crispy, it is sunburn or underwatering. If the whole leaf is turning a pale tan color, it's likely a fungal issue (too much humidity). In my two-week observation period, I saw a slight bronzing of the leaf edges, which was just the sun stress. That is healthy. Don't confuse that with a problem.
My Final Thoughts for Beginners
Look, I have been where you are. I have spent money on plants, watch them wither, and felt a personal failure. I have learned that with Aloe arborescens, success comes down to doing less. It sounds too simple, but it's true. The people who grow these enormous, flowering specimens outdoors in California or Arizona don't water them. They literally ignore them. Rain rarely falls there. The aloe thrives on neglect.
If I could distill this entire guide into one final "start here" list for the next two weeks, it would look like this:
- Buy a terracotta pot that is small for the plant.
- Mix gritty soil (more perlite than normal).
- Repot and then leave it.
- Wait for the leaves to feel soft before you even think about water.
- Place it in the brightest window you have.
- Turn it once a week.
- Do not fertilize for at least 6 months.
I promise you, if you stick to that minimum, you will have a happy plant. It might not grow a foot in a year, but it will stay upright, tough, and alive. And that is a win.
FAQ: Quick Answers to Your Burning Questions
Is Aloe arborescens the same as the medicinal Aloe vera? No, they are different species. Aloe vera has a more horizontal, rosette growth habit. Aloe arborescens grows upward on a central stem and forms a candelabra shape. Both have medicinal gel in the leaves, but arborescens is generally considered to have higher concentrations of certain compounds, though it is most commonly used externally.
Can I keep it outdoors in the rain? If you live in a temperate climate with dry summers, yes. But if you get a lot of rain (like I do), keep it under a roof overhang. The key is the soil drying out quickly. Rain can flood the pot and leave it saturated for weeks, which is death. If it does get soaked, you must move it to a sheltered spot with high airflow immediately.
How do I propagate my Aloe arborescens? I noticed little "pups" growing at the base of my plant. This is the easiest way. When the pup is about 2-3 inches tall, I slide it out of the pot. I cut it from the mother plant with a sharp, clean knife. I let the cut callus over for 2-3 days in a dry, shady spot. Then, I pot it a tiny pot with my gritty mix. I don't water it for a week. That is it. It roots in about a month.





