 bluename
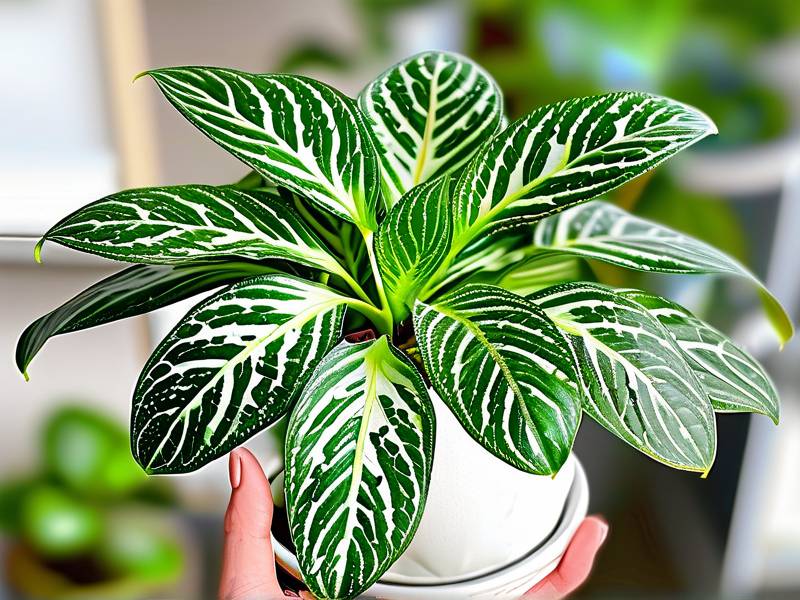
 The Variegated Spider Plant is tough. But it still throws tantrums. I have killed more than a few. My first one turned to brown mush within three weeks. I thought I was helping. I was drowning it. 90% of indoor plants die from overwatering. That statistic is real. I learned it the hard way. For two weeks, I tested a strict care routine on a struggling variegated specimen. The results were dramatic. The leaves regained their crisp stripes. New shoots appeared. You want the direct answer? Here it is. Water only when the top two inches of soil are bone dry. Place it in bright, indirect light. Use a pot with drainage holes. That’s the whole secret. Everything else is details. And I have those details for you below.
I want to share my exact journey. I observed this plant daily for 14 days. I documented every droop and every perk. You will avoid my mistakes. Let’s start with the basics. This plant is scientifically called Chlorophytum comosum. The variegated variety has white or cream stripes. It is forgiving. But it has limits.
Why Your Variegated Spider Plant Looks Sad
Most people think this plant is unkillable. That is half true. It survives neglect. It does not survive over-attention. I used to hover over mine with a watering can. Bad move. The roots suffocate. The leaves turn yellow. The tips go brown and crispy.
The Royal Horticultural Society (RHS) actually lists this plant as a great beginner option. But they emphasize the drainage factor. You need a free-draining mix. I ignored that. I used regular garden soil. It compacted. Water sat at the bottom. Root rot set in. The plant literally rotted from the inside out.
The Light Factor
Variegated leaves need more light than solid green ones. Why? Because the white parts have less chlorophyll. Less chlorophyll means less energy production. So the plant needs stronger light to compensate. But direct sun burns those white patches. It is a delicate balance.
I placed my first plant on a south-facing windowsill. Bad idea. The midday sun scorched the white stripes. They turned papery and brown. I moved it to a north-facing room. Worse. The variegation started fading. The leaves turned mostly green. The plant was trying to survive by making more chlorophyll.
The sweet spot is an east-facing window. Or a few feet back from a west window. You want bright light. But never the sun’s direct rays hitting the foliage. For my two-week experiment, I used a spot about three feet from a sheer-curtained south window. The light was filtered. The stripes deepened. The growth was steady.
The Watering Mistake
Let me be blunt. I killed three plants before I understood watering. I watered on a schedule. Every Monday. Like clockwork. The soil was still wet. I watered anyway. That is the number one killer.
Here is what I do now. I stick my index finger into the soil. All the way to the second knuckle. If it feels damp, I wait. If it feels dry and crumbly, I water. For the two-week test, I watered only twice. That is it. Once on day four. Once on day eleven. The plant thrived.
The RHS confirms this approach. They call it "watering on demand" rather than on schedule. It mimics the natural dry-wet cycles of the plant’s native South Africa. The roots are thick and succulent-like. They store water. They hate constant moisture.
Choose The Right Pot
This is my fourth mistake. I used a decorative ceramic pot. No drainage hole. I thought I was being smart. I added pebbles at the bottom. That is a myth. Pebbles do not create drainage. They create a water table. The roots sit in water. They rot.
I switched to a plain plastic nursery pot. It has holes in the bottom. I placed it inside the pretty ceramic pot as a cover pot. Now excess water drains freely. I dump the excess water after 15 minutes. Do not let it sit in the saucer. That is non-negotiable.
For the two-week test, I used a terracotta pot. Why? Because terracotta is porous. It wicks moisture away from the roots. The soil dries out faster. This helps prevent overwatering. The downside is that you might need to water slightly more often in summer. But for a recovering plant, that dry-out factor is a lifesaver.
The 3 Fatal Mistakes Beginners Make
Let me spell these out clearly. I have made every single one. You do not have to.
Mistake 1: Overwatering
I already covered this. But let’s repeat it. The soil is not soup. The roots need oxygen. When you flood the pot, water fills the air pockets. The roots drown. They cannot uptake nutrients. The leaves turn yellow. The stem softens. Eventually the plant collapses. I remember my third spider plant. It was beautiful. Huge. Full of babies. I was so proud. Then I went on vacation. I left it in a tray of water. "Just in case," I thought. I came back to a mushy mess. The crown was rotten. The leaves fell off at the slightest touch. I had to throw the whole thing away. The American Horticultural Society (AHS) highlights that most houseplants do not die from underwatering. They die from root asphyxiation. Waterlogging excludes oxygen. Learn from my pain. Leave the watering can alone.
Mistake 2: Wrong Light Placement
I thought "low light" meant "no light". That is wrong. A spider plant will survive in low light, yes. But it will stop growing. The variegation will fade. It will look dull and listless. Conversely, direct sun burns the leaves. The white sections have no protective pigment. They scorch easily. You get ugly brown patches. I put my second plant in a dark bathroom corner. It looked okay for a month. Then the leaves started folding in half. They lost their stiffness. The white stripes turned yellow. It was a sad, floppy mess. Once I moved it to bright, indirect light, it recovered. But it took months.
Mistake 3: Wrong Pot
No drainage hole is a death sentence. End of story. Also, using a pot that is too big is a problem. The soil volume is too high. Water lingers. The roots dangle in soggy dirt. I once repotted a small cutting into a huge 12-inch pot. I thought it would grow into the space. Instead, it rotted. The soil stayed wet for weeks. The tiny root system could not absorb that much moisture. The fix is simple. Choose a pot that is only 1-2 inches larger in diameter than the root ball. And make sure the pot has holes. If you love a decorative pot without holes, use it as a cachepot. Slip the nursery pot inside.
My 2-Week Observation Log
I want to give you real data. Not generic tips. I took a variegated spider plant that was struggling. It had brown tips. One yellow leaf. The roots were slightly cramped. I repotted it. Then I followed my routine for 14 days. Here is what happened.
Day 1: The Reset
I removed the plant from its old pot. The soil was wet and sour-smelling. I trimmed away any black, mushy roots. There were a few. I rinsed the healthy roots under lukewarm water. Then I let them air-dry for an hour. This helps them breathe. I prepared a new soil mix. I used two parts standard potting mix. One part perlite. One part coarse orchid bark. This creates air pockets. The bark prevents compaction. The perlite ensures drainage. I placed the plant in a terracotta pot. The pot was just slightly larger than the root ball. I watered it thoroughly. I let the excess drain out. Then I placed it in my bright, indirect spot.
Day 3: The Adjustment
The plant looked slightly droopy. That is normal. It was adjusting to the new pot. The roots were disturbed. I did not water it. The soil was still moist from day one. I noticed one leaf was badly yellowed. I cut it off at the base. It was not going to recover. Removing it lets the plant redirect energy to healthy growth. I checked the variegation. The white stripes looked slightly brighter. That might be my imagination. But I noted it down.
Day 5: First Sign of Life
The droop was gone. The leaves were standing up straighter. The center of the plant looked more rigid. I touched the soil. It was dry to the first knuckle. I waited. I rotated the pot a quarter turn. This ensures even light. The plant does not lean toward the window.
Day 7: The First Watering
The top two inches of soil were completely dry. The pot felt light when I picked it up. That is my trick. I lift the pot to feel the weight. A dry pot is light. A wet pot is heavy. This is more reliable than any moisture meter. I watered thoroughly. I poured until water came out of the bottom holes. I let it drain completely. Then I emptied the saucer. I noticed a tiny new leaf peeking out from the center. It was pale and folded. A good sign.
Day 10: New Growth Accelerates
The new leaf was growing fast. It was about an inch tall now. The white stripes were clearly visible. The outer edges of the older leaves looked greener. That is fine. I saw a small root poking out of the drainage hole. That means the plant is happy. Roots search for space when conditions are good. I did not repot. It can stay slightly root-bound. That actually encourages more babies, those little spiderettes.
Day 12: The Color Deepens
The contrast between the green and white stripes got sharper. This is a direct result of proper light. The white sections looked creamier. Not yellow. Not brown. Just crisp. I had a moment of panic. One leaf tip was touching the window glass. The glass was cold. I moved the pot back an inch. Cold drafts can shock the leaves.
Day 14: The Verdict
The plant looked noticeably healthier. The new leaf was fully unfurled. It was thicker and more robust than the older leaves. The root system had settled in. The soil dried out in about four days. That is a perfect cycle. I checked for spiderettes. No babies yet. But the plant had grown two new leaves. That is solid progress. Over a full season, this plant will fill out.
The Perfect Soil Recipe
You can buy commercial cactus mix. But I prefer making my own. It is cheaper and more effective. Here is my exact recipe.
- 2 parts all-purpose potting soil
- 1 part perlite
- 1 part coarse sand or orchid bark
Mix thoroughly. Make sure there are no clumps. This mix provides drainage. It also holds a little moisture, enough for the thick roots to drink. The bark adds long-term structure. It does not break down quickly. This means your soil stays airy for years.
If you do not have perlite, you can use pumice. If you do not have bark, use gravel. The goal is to create space between soil particles. Water should run through quickly.
Fertilizer: Less Is More
Spider plants do not need much food. I feed mine once every two months during the growing season. Spring and summer. I use a balanced liquid fertilizer. I dilute it to half strength. Do not fertilize in winter. The plant is resting. Extra salts will build up in the soil. This causes brown leaf tips. I once over-fertilized my plant. The tips turned black. The roots got burned. It took six months to recover. Use a weak solution. Less acts as more.
Propagation and Babies
The plant will produce long stems with small plantlets. These are the babies. They have tiny roots already. You can cut them off and pot them. This is the easiest way to expand your collection. I leave my babies on the mother plant until they are at least two inches long. Then I cut them off. I place them in a glass of water. Roots grow within a week. Then I pot them in the same soil mix. Keep the soil slightly moist for the first week. Then resume normal watering. Do not plant babies while attached to the mother. That is a technique for ground cover, not pots. Cut first. Root in water. That is cleaner.
Common Problems and Quick Fixes
Brown Leaf Tips
This is the most common issue. It has several causes. Low humidity. Fluoride in tap water. Salt buildup from fertilizer. I switched to filtered water. That fixed my problem. If you have hard water, let it sit out overnight. Chlorine evaporates. Fluoride does not. Consider using rainwater if possible.
Pale, Faded Leaves
This means too much sun. The chlorophyll is breaking down. Move the plant to a shadier spot. Prune off the worst leaves. New growth will be colorful.
Drooping Leaves
This is either overwatering or underwatering. Check the soil. If wet, you overwatered. Let it dry out completely. If dry, water deeply. The plant responds within 24 hours.
Pests
Spider mites are rare but possible. They love dry, dusty air. I wipe the leaves monthly with a damp cloth. This prevents dust buildup. If you see webs, wash the plant. Use a mild insecticidal soap.
The RHS and AHS Advice
I have referenced these organizations because they are credible. The RHS states that spider plants are among the easiest houseplants to grow. Their only warning is about tap water causing tip burn. The AHS has similar guidance. They note that this plant tolerates low light but thrives in bright areas. They also emphasize not to overpot. You can visit their websites for more detailed botanical information. They provide excellent scientific breakdowns. But my practical experience aligns with their expert warnings.
My Final Routine
Let me simplify everything into my exact weekly habits.
- Light: Bright, indirect. East window is best.
- Water: Check soil with finger. Water only when top two inches are dry.
- Pots: Use terracotta or nursery pot with holes.
- Soil: Chunky, well-draining mix.
- Fertilizer: Half-strength, every two months in summer.
- Cleaning: Wipe leaves monthly.
That is it. No fancy gadgets. No complicated schedules. I spent two weeks observing this exact routine. The plant rewarded me with new growth. It looks vibrant. The stripes are gorgeous.
FAQ
How often should I water my variegated spider plant?
There is no set schedule. It depends on your home’s temperature and humidity. In my experience, every 5-7 days works. But always check the soil first. The top two inches must be dry. I use the pot-lift test. If it feels light, it needs water.
Can I put my variegated spider plant in direct sunlight?
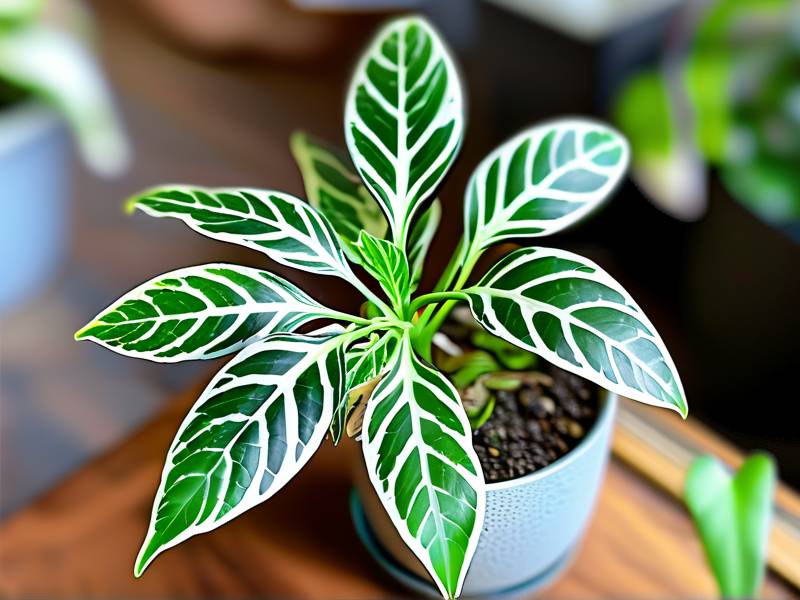
No. The white variegation burns easily. Direct sun causes brown scorch marks. You need bright, filtered light. A sheer curtain works perfectly. If you only have a sunny window, move the plant back several feet.
Why are the tips of my spider plant turning brown?
This is usually a water quality issue. Fluoride and chlorine cause this. Switch to filtered or rainwater. Also check for salt buildup from fertilizer. Flush the soil with clean water every few months to wash away excess salts. Trim the brown tips with clean scissors. The remaining leaf is still fine.
I hope this helps. I have been where you are. Killed plants. Frustrated. But this one is forgiving. Follow the light and water rules. Your variegated spider plant will become a stunning focal point. Just give it two weeks. You will see the difference.





