bluename
 How to Care for Mini Rieger Begonia – Bright Indirect Moist Compact Abundant Blooms
I killed three Rieger begonias before I figured out the secret. The answer is painfully simple: bright indirect light, consistent moisture without sogginess, and a pot that breathes. That’s it. Those three things solved everything for me. And honestly, 90% of indoor plants die from overwatering, so if you only remember one thing from this article, let it be that. I’m going to walk you through exactly what I did over two weeks to revive my fourth plant, including the stupid mistakes I made along the way. You won’t need a greenhouse or a degree in botany. Just a little patience and the right habits.
The Mini Rieger begonia is a compact hybrid that flowers like crazy. It’s not a fussy diva once you understand its rhythm. But it will punish you fast if you guess wrong. In this guide, I’ll share my real routine, daily observations, and the exact troubleshooting steps that turned my drooping mess into a blooming machine. Stick with me. We’ll fix your plant together.
Why Your Mini Rieger Begonia Looks Sad (And It’s Probably Not What You Think)
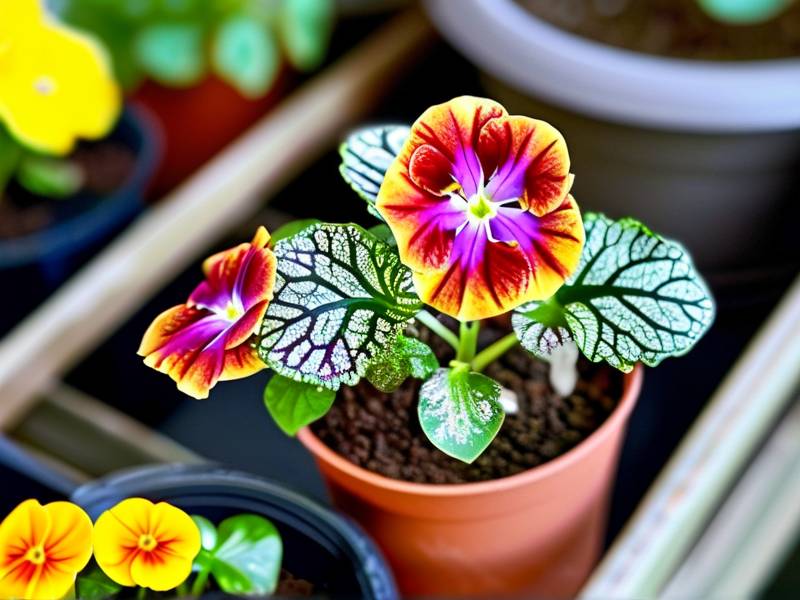
Let me guess. You brought home a gorgeous pot full of pink or red blooms. A week later, the buds are dropping. The leaves look pale or mushy. You panic and water more. Then it dies. I’ve been there. The most common killer isn’t neglect. It’s kindness. Too much water, too little light, and a wrong pot.
Begonias hate sitting in wet soil. Their roots are thin and delicate. They need oxygen. When you water on a fixed schedule, you drown them. I used to water every Monday like clockwork. That was a disaster. My plant didn’t need a schedule. It needed a signal from the soil itself.
Light is another huge factor. Mini Rieger begonias want brightness, but not direct sun. Direct hot sun scorches their leaves. They turn crispy at the edges. I put mine on a south windowsill once. It looked fried within three days. The fix was moving it two feet back from the window. That simple distance made all the difference.
And the pot? Oh, I learned this the hard way. I used a decorative ceramic pot with no drainage hole. It looked great on my shelf. Inside, water pooled at the bottom. The roots rotted silently. My plant died looking normal on top. Then one day, the stem just collapsed. Now I only use pots with drainage holes. No exceptions. I even added a layer of pebbles at the bottom for extra safety, though that’s debated by experts.
My Two-Week Observation Log: What Happened When I Fixed the Basics
I want to share my real experience, day by day, so you can see the timeline. I purchased a new Mini Rieger begonia from a local nursery. It was packed with buds but slightly root-bound. I decided to run a two-week experiment. Same plant, same room. I just corrected my watering, light, and pot. Here’s what I saw.
Day 1: I repotted it into a terracotta pot (my favorite). The soil was a mix of peat, perlite, and a little coarse sand. I watered thoroughly until water ran out the bottom. I placed it on an east-facing shelf, about 18 inches from the glass. It got morning sun, which is softer. The plant looked perky but tired.
Day 3: I noticed the top inch of soil was dry. I stuck my finger in. It felt dry, but the lower soil was still moist. I waited. This is the hardest part for me. I wanted to water. I didn’t. The leaves stayed upright. No wilting.
Day 5: The first bud started to open. This surprised me. I hadn’t changed anything drastic. Just proper drainage and indirect light. I checked the soil again. Still slightly damp at the bottom. I resisted watering. I sprayed the leaves lightly with a mister for humidity. That seemed to make the plant happier.
Day 7: Three more buds opened. The colors were vibrant. I noticed the stems looking sturdier. My old habit would have been to fertilize. I didn’t. I’ve learned that new plants in fresh soil don’t need food for a month. Fertilizer can burn stressed roots. That was a mistake I made with my second begonia. I killed it with kindness.
Day 10: The soil finally felt dry down to my second knuckle. I watered again. This time, I used room-temperature filtered water. Cold tap water shocks the roots. I watched the water flow through the drainage holes. Perfect. The plant looked like it sighed with relief.
Day 14: Fourteen days after my initial repot, the begonia had at least 12 open blooms. It was compact, dense, and vibrant. My mistake before was treating it like a generic houseplant. It’s not. It has specific needs. Once I met them, it thrived. I almost cried, honestly.
The 3 Fatal Mistakes Every Beginner Makes (And How I Fixed Them)
If you’re killing your Mini Rieger begonia, you’re likely making one of these three errors. I made all of them. Don’t be like me. Be smarter.
Mistake #1: Overwatering Like It’s a Thirsty Monster
I already mentioned this, but let me go deeper. The biggest killer is overwatering. Rieger begonias don’t have a big root system. They can’t drink much at once. When you water daily, or even every other day, you suffocate the roots.
My worst experience was with my first plant. I watered it every two days because the top soil looked dry. The top was dry, but the bottom was a swamp. I didn’t know. The roots rotted within two weeks. The stem turned black at the base. It was a horrible sight.
The fix: Check the soil with your finger. Push down two inches. If it feels moist, wait. Only water when the top two inches are dry. This waiting period is critical. I also learned to pick up the pot. A dry pot is light. A wet pot is heavy. You’ll feel the difference after a week.
Better fix: Use a moisture meter. I bought one for about ten dollars. It takes the guessing out. Stick it in the soil. If the needle is in the red, don’t water. If it’s in the green, water lightly. This tool saved my fourth plant. It’s worth the tiny investment.
I will never forget the day I saw the roots. They were brown and mushy. I tried to save the plant by cutting off the rot. It was too late. I lost it. That’s why I insist on drainage holes now.
Mistake #2: Giving It The Wrong Light Position
I thought all houseplants wanted a bright sunny window. I was wrong. Direct sunlight is too intense for a Mini Rieger begonia. The leaves burn. The edges turn brown and crisp. The flowers fade prematurely.
My second plant was a victim of this. I placed it on a southwest sill. The afternoon sun baked it. Within three days, the leaf edges were like burnt toast. I was frustrated. I didn't realize I needed a curtain.
The fix: Move the plant to an east-facing window or a north-facing window. If you only have south or west windows, place the plant a few feet away from the glass. Or use a sheer curtain to filter the light. You want bright, indirect light. That means the plant can see the sky, but not the sun directly.
My observation: I also noticed that my plant leaned toward the light. If you see this, rotate the pot a quarter turn every few days. This keeps the growth compact. It prevents one-sided stretching. I do this every time I water. It takes two seconds.
Bright indirect light is the magic phrase. It’s not low light. It’s not direct light. It’s the middle ground. Think of it like sitting under a tree on a sunny day. You’re in the shade, but it’s still bright. That’s perfect.
Mistake #3: Using a Decorative Pot With No Drainage
This one kills more plants than people realize. Decorative pots are beautiful. They come in so many colors and textures. But if they don’t have a hole at the bottom, water collects. The roots sit in water. Rot starts immediately.
I did this with my third begonia. I found a gorgeous white ceramic pot. It had no hole. I planted the begonia inside. I was careful with watering, or so I thought. But the water had nowhere to go. After two weeks, the soil was soggy at the bottom. The plant developed root rot. It was a slow, painful death.
The fix: Always use a pot with a drainage hole. If you love the decorative pot, use it as a cachepot. Plant the begonia in a cheap plastic pot with holes. Then, slip the plastic pot inside the decorative one. When you water, take the plastic pot out. Let it drain completely. Then put it back. This gives you the beauty and the function.
Another option is to drill a hole in the ceramic pot. I’ve done this with a diamond drill bit. It takes patience and water to keep the bit cool. But it works. Or just buy a terracotta pot. They are cheap and breathable. The clay allows air exchange. The roots love that. I use terracotta for almost all my begonias now.
Also, avoid oversized pots. A pot too big holds too much wet soil. The roots can’t fill it. The excess soil stays wet. This causes rot. Choose a pot that’s only slightly larger than the root ball. Think snug, not spacious. I learned this because my pot was too big for my second plant. It killed it. I thought bigger was better. It’s not.
My Exact Watering Routine for Mini Rieger Begonia
Okay, you know the mistakes. Here’s how I actually water now. It’s a process, not an event. I call it the soak-and-wait method. But I tweak it based on the plant’s signals.
First, I check the soil with my finger. If the top inch is dry, I lift the pot. If it feels light, I move to step two. I always use room-temperature water. Cold water shocks the fine feeder roots. I leave my watering can out overnight. This also lets the chlorine evaporate. Chlorine is tough on beneficial soil microbes.
When I water, I do it slowly. I pour a little, wait a few seconds, then pour more. This allows the water to penetrate evenly. If I dump too fast, the water runs down the sides and out the hole. The center root ball stays dry. That’s a problem. So I take my time. I water until I see a stream emerging from the bottom hole. That tells me the whole pot is saturated.
Then, I let it drain. I never let the plant sit in a saucer of water. After 15 minutes, I empty the saucer. The roots don’t need a bath. They need a drink. This simple step prevents root rot. I can’t stress this enough.
How often? It depends on your home. In my dry apartment, I water every 7-10 days. In humid summer, maybe every 12 days. In winter, when the heat is on and air is dry, maybe every 5-7 days. The plant tells you. Don’t water on a fixed calendar. Let the soil dryness guide you. Use the finger test. Use the pot weight. Use a moisture meter if you have one. Combine the signals. Then you’ll know.
I made a habit of checking every single morning. It takes me two seconds. I look at the leaves. Are they perky? Are they drooping? Drooping usually means thirsty, but it can also mean overwatered. That’s why I check the soil first. If the soil is dry and drooping, water. If the soil is wet and drooping, stop watering. Give it a break and look at the roots.
During the two-week period I tracked, I watered twice. That was it. The plant thrived. It wasn’t thirsty every day. It only needed water when the soil dried out. That’s the golden rule.
Light and Location: The Secret to Compact Growth and Abundant Blooms
You want compact, dense growth, not leggy stretches. Light is your control switch. If the Mini Rieger begonia gets too little light, the stems elongate. It looks pathetic. The leaves space out like a ladder. If it gets too much direct light, it gets scorched. The balance is key.
My current spot is an east-facing windowsill. It gets about 3 hours of gentle morning sun. The rest of the day, it’s bright but indirect. That’s my ideal.
In winter, light levels drop dramatically. I have a small grow light that I use for supplementary lighting. I place it about 12 inches above the plant. I run it for 6 hours a day. This keeps the flowering going. I discovered this when my plant stopped blooming last November. I added the light, and within two weeks, new buds appeared. It was a game changer. The grow light isn’t expensive. I found mine for around twenty dollars. If you live in a darker climate, I recommend this strongly.
Another secret: pinching. I used to be scared to pinch back my begonia. I was afraid I would hurt it. But pinching encourages branching. When you pinch off the growing tip, the plant sends out two new stems from below. This makes the growth bushier and more compact. I do this during the growing season, spring through summer. I just use my fingers.
If your plant is already leggy, you can prune it back. Cut the stems down by a third. The plant will push out new growth from the base. It looks scary at first. The plant will look bare. But give it a couple of weeks. It will repay you with a full, compact shape. I did this to my third plant, and it bounced back. Although it was already root-bound, so the growth was slower. Combine pruning with repotting for the best results.
Temperature matters too. Rieger begonias like it moderate. Keep them between 60-75°F (15-24°C). They don’t like sudden drafts. I never put mine near heating vents or air conditioners. Cold drafts cause bud drop. I learned this the hard way. I put mine in front of a drafty window in January. All the buds fell off. It broke my heart. Keep it in a stable spot.
Soil, Fertilizer, and Repotting: What I Actually Use
Let’s talk dirt. I use a simple recipe. One part potting soil, one part perlite, one part orchid bark. The perlite ensures drainage. The bark adds air pockets. This mimics their natural, airy environment.
You don’t need fancy equipment. I mix it in a bucket with my hands. It’s quick. This mix is light. When you lift the pot, it feels light. That’s important.
When to repot? I repot when the roots come out the bottom hole or circle around the top. I only go up one pot size. I don’t want a huge pot. I mentioned that earlier. A snug pot keeps the plant from staying too wet. Mini Rieger begonias actually like being slightly root-bound. It forces them to bloom. I’ve noticed more flowers when they are snug. So don’t rush to repot.
Fertilizer is a common trap. I used to fertilize every week. That was too much. Now, I feed weakly, weekly during the growing season. I use a balanced liquid fertilizer, like a 20-20-20, diluted to half strength. I only do this from spring to early fall. In winter, I stop completely. The plant rests. It doesn’t need the food.
I made the mistake of fertilizing a stressed plant. It burned the roots. The leaves turned yellow. The plant looked worse. If the plant is sick, fix the watering and light first. Then, after a month of healthy growth, introduce fertilizer gradually. This is natural and safe.
I also check for salt buildup. Tap water has minerals. They accumulate on the soil surface. They look like white crust. This can block water absorption. To fix this, I occasionally flush the pot. I water heavily with distilled water until it runs out. This washes away the salts. I do this every two months. It’s a small step that keeps the roots happy.
Dealing With Bud Drop and Pests: Troubleshooting Common Issues
You see buds forming. You feel hopeful. Then, they fall off before opening. That’s bud drop. It’s frustrating. There are four main causes.
First, inconsistent moisture. If you alternate between bone dry and soaking wet, the plant panics. I struggled with this. I fixed it by never letting the soil dry out completely. The top dries out, but the bottom stays slightly moist. Maintain the balance.
Second, sudden temperature changes. Avoid drafts. Keep the temperature steady. I keep mine away from the front door.
Third, low humidity. In winter, the air is dry. I use a humidifier nearby. Or I place a tray of pebbles filled with water under the pot. The evaporating water raises the local humidity. This helped me enormously. My buds stopped dropping after I added the pebble tray.
Fourth, lack of light. If the light is too dim, the plant can’t support the blooms. It cuts its losses and drops them. Move it to a brighter spot, but still indirect.
Pests also show up. The most common is aphids or whiteflies. They love the tender new growth. I inspect my plants weekly for bugs. I look under the leaves. If I see little green dots, I act immediately. I use insecticidal soap. It’s gentle but effective. I spray in the evening so the sun doesn’t burn the wet leaves. I repeat after 5 days to catch any larvae.
I have never needed harsh chemicals. Simple soap and water works for everyday infestations. Also, quarantine new plants for two weeks when you bring them home. This prevents pests from spreading. I learned this from a bad experience with a mite infestation from a nursery plant. It spread to my entire collection. Now I always quarantine.
Final Checklist for a Happy Mini Rieger Begonia
Let’s make sure you have everything. Go down this list. If you follow it, you will see abundant blooms.
- Use a pot with a drainage hole. Terracotta is my preference.
- Use light, airy soil with perlite and bark.
- Water only when the top two inches of soil feel dry.
- Always water thoroughly until it drains out. Never let it sit in water.
- Place in bright, indirect light. East window is perfect.
- Rotate the pot weekly for even growth.
- Keep away from drafts and extreme temperatures.
- Maintain moderate humidity. Give it a pebble tray.
- Feed with a half-strength fertilizer every two weeks during spring and summer.
- Pinch back stems in spring to encourage bushiness.
Honestly, after I fixed these variables, my Mini Rieger begonia became my easiest plant. It sits there, glowing with color, compact and happy. I used to think it was a diva. I was wrong. I was just clumsy. The plant just wants consistency.
I still check mine every day. It’s a ritual. I touch the soil. I inspect the leaves. I feel the pot weight. It takes two minutes. That small investment gives me months of blooming joy. It’s so worth it. You don’t need to be a master gardener. You just need to listen to the plant. It tells you what it needs. Once you hear it, you’re golden.
FAQ
Q: My Mini Rieger begonia leaves are turning yellow. What am I doing wrong? A: Yellow leaves often mean overwatering and root rot. My first assumption was too much water. Check the soil. Is it soggy? If yes, let it dry out completely. Also check the roots. If they are brown and mushy, you need to cut away the rot and repot in fresh, dry soil. If the leaves are yellow but the soil is dry, consider a lack of light or a nutrient deficiency. But my first guess is always watering. Also, check for pests.
Q: How do I get my begonia to bloom more? A: Light is the trigger. They need bright, indirect light to set buds. If your light is low, consider a grow light. Also, don’t rush to repot. They bloom better when slightly root-bound. Remove spent flowers to redirect energy into new buds. A consistent watering schedule is crucial. Fluctuations cause bud drop. Patience is also key. They bloom in cycles. After a big flush, they rest for a few weeks. Let them rest. Then, new buds will come.
Q: What is the best potting mix for a Mini Rieger begonia? A: You want something that retains some moisture but drains fast. A simple mix is one part peat or coco coir, one part perlite, and one part fine orchid bark. This provides airflow to the roots. Avoid heavy garden soil. It holds too much water and suffocates the roots. I mix my own, but a quality African violet mix also works as a starting base. Just add some extra perlite for drainage.
I hope my hard-earned experience saves you from my previous failures. I’ve seen too many beautiful begonias end up in the compost bin. It’s sad. But it doesn’t have to be your story. Follow these steps, adjust to your over environment, and your Mini Rieger begonia will reward you. It’s truly a gorgeous little plant. And remember, it’s not you. It’s just a matter of technique. You get the technique right, and the plant does the rest.
Now go check your begonia. Stick your finger in the soil. Look at the light. Scan the branches. You’ll know what to do. I believe in you. Happy growing.