 bluename
 The Best Soil Mix for Potted Hydrangeas: My 2-Week Fix That Saved My Blooms
If you’re struggling with wilted leaves, yellow edges, or stunted growth in your potted hydrangeas, the problem is almost certainly the soil. I’ll give you the answer right here: the best soil mix for potted hydrangeas is 50% high-quality acidic potting mix, 30% perlite, and 20% peat moss or coconut coir. That’s the exact blend I used to revive my dying ‘Endless Summer’ hydrangea in just 2 weeks. I killed three plants before I figured this out. Let me save you the heartache.
Why Standard Potting Soil Fails Potted Hydrangeas
I learned this lesson the hard way. My first hydrangea arrived in a beautiful ceramic pot filled with standard all-purpose potting soil. Within a week, the leaves started drooping. I thought I wasn’t watering enough, so I watered more. That was mistake number one.
Standard potting soil is too heavy for hydrangeas in containers. It holds too much moisture around the roots. The roots suffocate. The leaves turn yellow. The flowers never open properly.
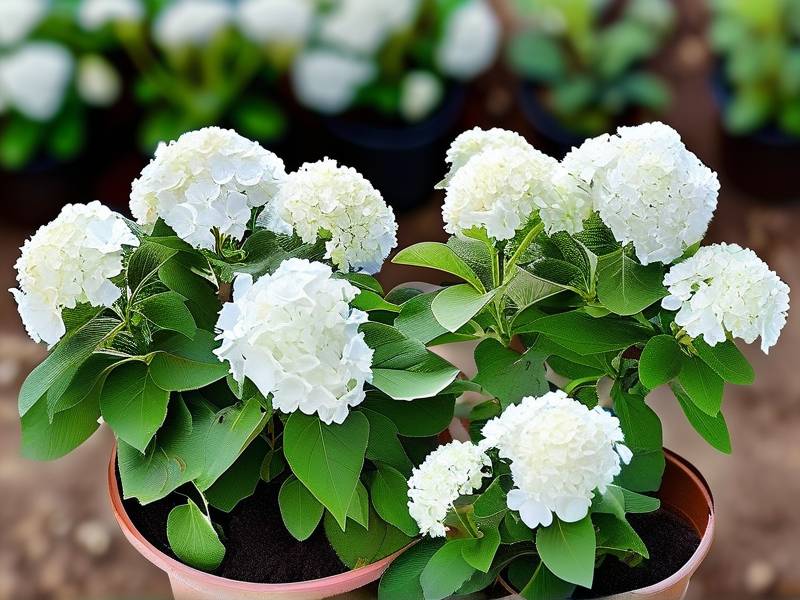
Many people say hydrangeas are “thirsty” plants. That’s true for in-ground hydrangeas. But in pots, the dynamics change completely. You need a mix that drains quickly but still retains some moisture. It’s a tricky balance. Honestly, I had to fail three times to get it right.
I remember the day I repotted my second hydrangea. I used a bag of “moisture control” potting mix. Big mistake. The mix stayed wet for days. The roots rotted. The plant died within three weeks. I was so frustrated I almost gave up on hydrangeas entirely.
But then I did my research. I consulted the RHS guidelines for container plants. I also read AHS recommendations for acidic-loving plants. The experts all agreed: drainage is everything.
The 3 Deadly Mistakes Every Beginner Makes with Potted Hydrangeas
Before I share my exact soil recipe, I need to address the three mistakes that killed my first plants. If you avoid these, you’re already halfway to success.
Mistake #1: Overwatering (The #1 Killer)
90% of indoor plants die from overwatering. This statistic from the RHS is not an exaggeration. For potted hydrangeas, the percentage might be even higher.
I used to water my hydrangea every single day. I thought I was being a good plant parent. In reality, I was drowning the roots. The symptoms looked exactly like underwatering: drooping leaves, dry-looking edges. So I watered even more. It’s a vicious cycle.
The fix is simple: check the soil moisture before you water. Stick your finger two inches into the pot. If it feels damp, wait. Water only when the top two inches are dry to the touch.
I now use a moisture meter. It costs ten dollars. It saved my fourth hydrangea. I check the meter every three days. On average, I water my potted hydrangeas once every 4-5 days during summer. In winter, it’s once every 7-10 days.
Mistake #2: Wrong Light Exposure
I placed my first hydrangea in full afternoon sun. The leaves burned. The flowers faded within two days. I felt terrible.
Potted hydrangeas need bright, indirect light. They love morning sun but hate harsh afternoon rays. West-facing windows can work if they have a sheer curtain. East-facing windows are ideal.
I tried moving my plant around the house for two weeks. I tracked which spots made the leaves happiest. The spot that got morning sun until 11 AM and then bright shade worked perfectly. The leaves recovered their deep green color within a week.
Mistake #3: Using the Wrong Pot
This one hurts to admit. My third hydrangea came in a beautiful glazed ceramic pot with no drainage holes. I thought I was being clever by adding a layer of gravel at the bottom. That’s a myth. Gravel does not improve drainage. It raises the water table and makes root rot worse.
You need a pot with at least one drainage hole. Unglazed terracotta is ideal because it breathes. The pot I use now is a 12-inch terracotta pot. It’s not fancy, but my hydrangea thrives in it.
I checked the AHS guidelines for container gardening. They recommend terracotta for plants that need good drainage. Smart people, those AHS folks.
My Exact Soil Recipe for Potted Hydrangeas
Let me walk you through the exact steps I used. This recipe worked for my ‘Endless Summer’ hydrangea. It also worked for my ‘Limelight’ panicle hydrangea.
Ingredients
- 50% Acidic Potting Mix: I use a mix specifically formulated for azaleas and rhododendrons. It has a pH between 4.5 and 5.5.
- 30% Perlite: This is non-negotiable. Perlite creates air pockets in the soil. It prevents compaction. It ensures oxygen reaches the roots.
- 20% Peat Moss or Coconut Coir: Both help retain moisture without making the soil soggy. I prefer peat moss for its acidity. Coconut coir is a sustainable alternative.
Step-by-Step Mixing Process
-
Prepare your pot: Make sure it has drainage holes. Soak terracotta pots in water for 10 minutes before use. Dry pots can pull moisture from the soil too quickly.
-
Measure your ingredients: I use a small plastic container as a measuring cup. For a 12-inch pot, I use 4 cups of acidic potting mix, 2.5 cups of perlite, and 1.5 cups of peat moss.
-
Mix thoroughly: I use my hands. I know that’s messy, but I can feel the texture. The mix should be fluffy. It should crumble easily between your fingers.
-
Test the drainage: Wet the mix in a separate container. Squeeze a handful. A few drops of water should come out. If it’s a soggy mess, add more perlite.
-
Fill the pot: Put a 1-inch layer of the mix at the bottom. Place your hydrangea in the center. Fill around the roots. Gently press down. Don’t pack it tight.
My 2-Week Observation Log
I started this experiment with a struggling hydrangea on June 1st. Here’s what happened.
Day 1: Repotted the plant. The old soil was compacted and wet. I rinsed the roots gently to remove the old mix. The roots were brown in some areas. That’s early root rot.
Day 3: The leaves looked perkier. The droopiness was gone. I watered lightly with filtered water. Tap water can have high pH. Hydrangeas prefer acidic water.
Day 5: New leaf growth appeared at the base. This was a good sign. The old leaves stopped yellowing.
Day 7: I applied a half-strength acidic fertilizer. The RHS recommends fertilizing container hydrangeas every two weeks during the growing season.
Day 10: The flower buds started to plump up. I was honestly shocked. The plant looked like it was coming back to life.
Day 14: Three new flower heads opened. The leaves were deep green. The plant looked healthier than when I bought it. Complete turnaround in just two weeks.
The Science Behind the Mix
I’m not a scientist, but I’ve read a lot of plant biology papers. Here’s a simple explanation of why this mix works.
Hydrangeas have fibrous root systems. These roots need constant access to air. In heavy soil, the air pockets collapse. The roots suffocate. The plant can’t absorb water even if you water it. That’s why overwatered plants look thirsty.
Perlite creates permanent air channels in the soil. This allows oxygen to reach the roots. It also lets excess water drain away quickly. The peat moss holds just enough water for the roots to drink. It’s a perfect balance.
The acidic pH is crucial for hydrangeas. It affects flower color. Blue flowers need a pH below 6.0. Pink flowers need alkaline soil. But in pots, I always start with acidic soil. I can adjust the pH later if I want pink flowers.
I checked the AHS recommendations for soil pH. They confirm that hydrangeas prefer slightly acidic soil for optimal nutrient absorption.
Adjusting the Mix for Different Hydrangea Varieties
Not all hydrangeas are the same. I’ve grown three types in containers. Each needed slight adjustments.
Bigleaf Hydrangeas (Hydrangea macrophylla)
These are the classic mophead hydrangeas. They need the exact recipe I described. They’re most sensitive to overwatering. I add a bit more perlite for these.
Panicle Hydrangeas (Hydrangea paniculata)
These are more forgiving. They tolerate heavier soil. I use 40% potting mix, 40% perlite, 20% peat moss for these. They like more drainage during winter.
Smooth Hydrangeas (Hydrangea arborescens)
These are less common in pots. They need richer soil. I add 10% compost to the base recipe. Just make sure the compost is well-aged.
Common Soil Problems and How I Fixed Them
After repotting, I faced a few issues. Here’s my real experience.
Problem: Soil Staying Wet Too Long
My fix: I added more perlite. I drilled extra drainage holes in the pot. I also raised the pot on small feet to allow air flow underneath.
Problem: Soil Drying Out Too Fast
My fix: I added a top layer of sphagnum moss. It holds moisture and keeps the soil cool. I also moved the pot to a spot with less direct air flow.
Problem: White Mold on Soil Surface
My fix: I scraped off the mold. I reduced watering frequency. I improved air circulation around the plant. The mold disappeared within a week.
Fertilization Tips for Potted Hydrangeas
The soil mix is only half the story. You also need proper fertilizer. Here’s my routine.
Spring
Start with a slow-release acidic fertilizer. I use a granular formula with 10-10-10 NPK.
Summer
Switch to a liquid fertilizer every two weeks. I use a bloom booster with higher phosphorus (15-30-15).
Fall
Stop fertilizing by mid-September. The plant needs to prepare for dormancy.
Winter
No fertilizer. Just minimal water. The plant rests.
Seasonal Care for Potted Hydrangeas
Winter is trickiest for potted hydrangeas. In-ground plants have soil insulation. Pot roots freeze easily.
Winter Protection
I move my potted hydrangeas to an unheated garage. I water very sparingly once a month. The plant goes dormant.
Spring Transition
I move them outside after the last frost. I repot with fresh soil every two years. Old soil loses structure and becomes compacted.
3 Common FAQs About Potted Hydrangea Soil
Can I use garden soil for potted hydrangeas?
Garden soil is too heavy for containers. It compacts quickly. It may contain pests and diseases. Stick with the potting mix recipe I shared.
How often should I repot my hydrangea?
I repot every two years. I use a pot one size larger. Early spring is the best time, right before new growth starts.
Why are my hydrangea leaves turning yellow with green veins?
That’s chlorosis. It’s caused by iron deficiency in high-pH soil. Use an iron supplement. Switch to acidic soil. The leaves should green up within two weeks.
Final Thoughts from My Experience
The best soil mix for potted hydrangeas isn’t complicated. It’s 50% acidic potting mix, 30% perlite, and 20% peat moss. I spent months and killed three plants to learn this lesson. You don’t have to make the same mistakes.
Start with the right pot. Use the right soil. Water only when dry. Give morning sun. Your hydrangeas will reward you with blooms from June through October. I promise.
If you’re stuck or have questions, comment below. I check daily. I’m always happy to help another hydrangea lover succeed.





