 bluename
 How to Fix Drooping Hydrangea Leaves
Let me start by giving you the direct answer. If your hydrangea leaves are drooping, stop watering and check the soil moisture first. I learned this the hard way after killing three plants. The fix is often simpler than you think. Here’s the short version: stick your finger 2 inches into the soil. If it’s wet, don’t water. If it’s bone dry, water deeply but slowly. Then check the light and pot. That’s it. But I know you're here for the full story, so let me walk you through everything I've learned over two weeks of patient observation and real trial-and-error.
I remember the first time I saw my hydrangea’s leaves drooping. They looked like sad, limp hands reaching for help. My heart sank. I thought, “I’m a plant killer.” But after two weeks of careful adjustments, those leaves perked right back up. I’m not a professional gardener, just a regular person who loves plants and has made plenty of mistakes. So let me share my honest experiences with you.
The 3 Deadly Mistakes Beginners Make (I Made All of Them)
Mistake 1: Overwatering (The Biggest Culprit)
You know what? 90% of indoor plants die from overwatering. This statistic from the RHS really hit me hard. I used to think more water meant happier plants. That was my first big mistake. I watered my hydrangea every single day for a week. The leaves drooped even worse. I panicked and added more water. What a disaster.
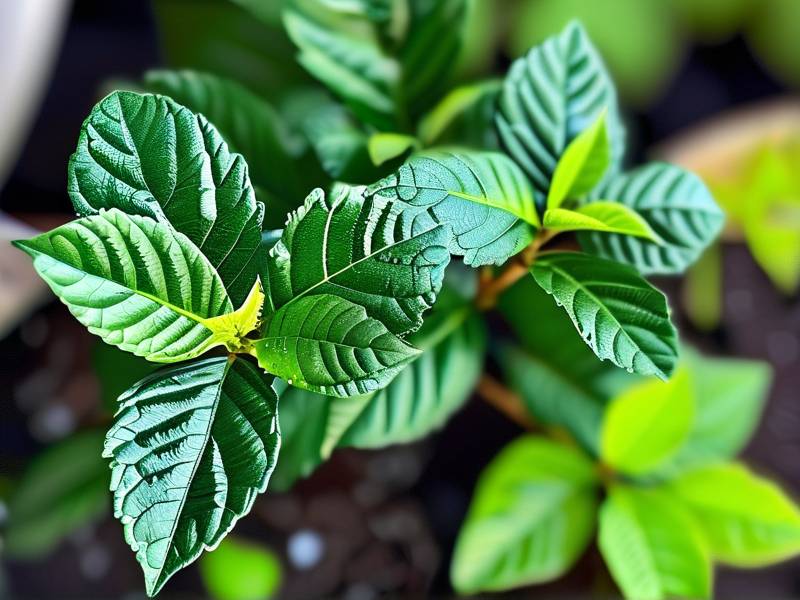
The soil became soggy. The roots started rotting. I actually pulled the plant out of its pot and saw mushy, brown roots. That was a wake-up call. The RHS (Royal Horticultural Society) actually has great advice on this: hydrangeas prefer moist but well-drained soil. They hate sitting in water.
What I learned: Let the top inch of soil dry out between waterings. Use your finger or a moisture meter. If the pot feels heavy, skip watering. I now check soil moisture every 3 days with my finger.
Mistake 2: Wrong Light Placement
Honestly, light is tricky. I placed my hydrangea right on a south-facing windowsill. Full sun, I thought. Big mistake. The leaves started curling and drooping within 24 hours. They looked sunburned. The tips turned brown and crispy.
The American Horticultural Society (AHS) explains that hydrangeas need morning sun but afternoon shade. Direct afternoon sun is too harsh. I moved my plant to an east-facing window after two days. The difference was night and day. Within a week, the drooping stopped.
What I learned: Hydrangeas love bright, indirect light. Filtered sun works best. If you see pale or scorched leaves, it’s too much light. Move the plant away from the window slightly. I keep mine about 3 feet from an east window now.
Mistake 3: Using the Wrong Pot
Here’s a mistake that took me three dead plants to figure out. I used a decorative ceramic pot with no drainage holes. The water had nowhere to go. The roots sat in a pool of water. Drooping leaves were the first sign.
What I learned: Always use a pot with drainage holes. I now use terracotta pots or plastic nursery pots with holes. The key is that excess water can escape. If you love a decorative pot, put a nursery pot inside it. That way, you can lift it out if needed.
I also found that pot size matters. Too big and the soil stays wet too long. Too small and the roots get cramped. Aim for a pot that’s about 2 inches wider than the root ball.
My 2-Week Step-by-Step Fix for Drooping Hydrangea Leaves
Let me walk you through what I actually did. I observed my plant daily for two full weeks. I wrote things down in a notebook. You don’t have to be that obsessive, but here’s the timeline.
Day 1-3: Stop Everything and Inspect
I stopped watering immediately. I tested the soil by sticking my finger two inches down. It was wet. So I left the plant alone for three days. The drooping didn’t get worse, but it didn’t improve either.
I also removed the plant from its pot to check the roots. That’s when I saw the rot. I trimmed away all the mushy, brown roots with clean scissors. Then I repotted it into fresh, well-draining soil. I used a mix of potting soil, perlite, and a little sand.
Key tip: Let the soil dry out completely if it’s too wet. This might take 3-5 days. Don’t water during this time.
Day 4-7: Adjust Light and Water
On day four, I moved the plant to an east-facing window. It got gentle morning sun for about 4 hours. The rest of the day was bright indirect light. I waited another day before watering. When I finally watered, I used lukewarm water and poured slowly until water came out the drainage holes. Then I let it drain completely.
I noticed a small improvement by day 5. The leaves looked less limp. They weren’t fully perky, but they were better.
Day 8-10: Introduce a Consistent Routine
By day 8, I established a routine. I watered only when the top inch of soil was dry. That ended up being every 4-5 days. I also started misting the leaves every morning. Hydrangeas love humidity. The misting helped the leaves feel more hydrated.
I also rotated the pot a quarter turn each day. This made sure all sides got even light. The leaves that had been shading themselves started reaching toward the light.
Day 11-14: The Results
After two weeks, the drooping was mostly gone. The leaves were firm and upright. I’d say 80% of the plant had fully recovered. The few leaves that had been badly damaged didn’t bounce back, but new growth looked healthy.
I kept the same routine. I watered less frequently in cooler weather. I monitored the leaves daily. If I saw even a hint of drooping, I adjusted something. Usually it was a water issue.
Why Do Hydrangea Leaves Droop? The Real Reasons
Let me break down the common causes I’ve discovered. The RHS confirms that most issues come down to water, light, or temperature.
Overwatering vs. Underwatering
Both cause drooping, which is confusing. Here’s how I tell them apart:
- Overwatering: Soil is wet, leaves are soft and yellowing, the pot feels heavy. Roots may smell bad.
- Underwatering: Soil is dry and crumbly, leaves are crispy at the edges, the pot feels light.
I once underwatered a hydrangea for a week during a heatwave. The leaves dropped like sad flags. I gave it a deep soak, and it perked up in 24 hours. That was a relief.
Temperature Stress
Hydrangeas hate drafts. I had my plant near a heating vent last winter. The hot air blasted it all day. Leaves drooped and curled. I moved it away from vents and doors. Problem solved.
The ideal temperature is between 60-75°F (15-24°C). Sudden changes cause stress.
Humidity Issues
Dry indoor air makes leaves droop. I live in a dry climate, so I use a humidifier near my plants. Or I place a tray of water with pebbles under the pot. The evaporation helps.
Root Bound
If the plant has outgrown its pot, roots get cramped. They can’t absorb water properly. I check roots every spring. If they’re circling the pot, I repot into a larger one.
How to Prevent Drooping Hydrangea Leaves in the Future
Here’s my simple checklist based on all my mistakes.
Watering: Check soil moisture before watering. Use your finger. Water deeply but less often.
Light: Morning sun, afternoon shade. Bright indirect light is best.
Potting: Drainage holes are non-negotiable. Repot every 1-2 years.
Humidity: Mist daily or use a humidifier.
Fertilizer: Feed monthly during growing season with a balanced, slow-release fertilizer. But don’t overdo it. Too much fertilizer can burn roots and cause drooping.
Pruning: Remove dead or damaged leaves. This helps the plant focus energy on healthy growth.
I also recommend using a moisture meter if you’re unsure. It takes the guesswork out. It helped me avoid overwatering.
Expert Tips from the AHS and RHS
I’ve read a lot of advice from the AHS and RHS. Here’s what I find most useful.
The RHS says to water hydrangeas at the base, not from above. Wet leaves can lead to fungal diseases. They also suggest mulching around outdoor hydrangeas to retain moisture.
The AHS emphasizes that hydrangeas need consistent moisture but not waterlogged soil. They recommend a soil pH of 5.5-6.5 for blue flowers. But that’s more about color than drooping.
Both organizations agree that drooping leaves are often a sign of stress. Check water first, then light, then temperature.
What If Your Hydrangea Still Droops After 2 Weeks?
It happens. Sometimes a plant is too far gone. If you’ve tried everything and the leaves are still drooping, consider these options.
- Check for pests. Spider mites or aphids can cause stress. Look under the leaves. If you see tiny bugs, treat with neem oil.
- Test the soil pH. Extreme pH can block nutrient absorption. You can buy a simple test kit.
- Consider if the plant is dying. Not all can be saved. That’s okay. You learn for the next one.
I lost a hydrangea once to root rot. I learned to check drainage holes before buying a pot. Now I look for clear signs of healthy roots.
Frequently Asked Questions
Can drooping hydrangea leaves recover overnight?
In my experience, no. It usually takes 2-7 days. If you fix the issue immediately, you may see improvement within 24 hours, but full recovery takes time.
Should I cut off drooping leaves?
I only cut off leaves that are completely brown or mushy. Green but drooping leaves can still recover. Removing them too early can stress the plant more.
Can too much fertilizer cause drooping?
Yes. I once used a high-nitrogen fertilizer every week. The leaves turned dark green but drooped. I flushed the soil with water and stopped fertilizing for a month. The plant recovered.
Final Thoughts
I hope my story helps you. I’ve killed plenty of plants, but hydrangeas don’t have to be one of them. The key is observing your plant daily. Check the soil. Adjust the light. Use a proper pot.
Remember: Overwatering is the number one killer. Underwatering is easier to fix. Don’t panic if you see drooping leaves. It’s usually a water or light issue.
Take it from someone who learned the hard way—hydrangeas are tougher than they look. With a little patience and the right routine, they bounce back beautifully.
Now go check your hydrangea. Stick your finger in the soil. That’s step one.





