bluename
 How to Keep Cut Hydrangeas Fresh Longer
I’ve been growing and arranging hydrangeas for years. Honestly, I killed my first bouquet in under 24 hours. It was heartbreaking. Cut hydrangeas are notoriously dramatic. They droop, wilt, and look sad fast. But I’ve cracked the code. Here’s the straight answer: To keep cut hydrangeas fresh longer, you need to re-cut stems at a 45-degree angle, dip them in boiling water for 30 seconds, and place them in a vase with a teaspoon of alum powder. I’ve tested this method across multiple bouquets, and my last batch stayed perky for a full 2 weeks. Let me walk you through everything I learned, including the mistakes I made so you don’t repeat them.
Why Cut Hydrangeas Wilt So Fast
Hydrangeas are woody-stemmed flowers. That’s the main issue. Unlike roses or tulips, their stems are thick and hard. Water struggles to travel up through them. The blooms are also huge and thirsty. A single head can drink more water than you’d think. I learned this the hard way. My first cut hydrangea arrangement looked amazing for four hours. Then it collapsed. The petals turned limp, and the whole stem bent over like it was tired of life.
The Royal Horticultural Society (RHS) explains that hydrangeas have a high transpiration rate. Basically, they lose water faster than they can absorb it. The American Horticultural Society (AHS) adds that proper stem treatment is critical for longevity. I didn’t know any of this back then. I just threw them in water and hoped for the best.
3 Deadly Mistakes Beginners Make
I’ve made every single one of these errors. Let me save you the pain.
Mistake 1: Overwatering the Bouquet
You might think more water equals longer life. Wrong. Overwatering doesn’t mean filling the vase too full. It means leaving stems in murky, bacteria-filled water. Bacteria clog the stems. Water can’t travel up. The flowers wilt faster. I once changed water every three days. My flowers lasted five days. Now I change it daily, and they last two weeks.
Here’s a shocking stat I’ve seen repeat in botanical studies: 90% of indoor plants die from overwatering. Cut hydrangeas suffer a similar fate from bacteria. Clean water is your best friend.
Mistake 2: Wrong Light Placement
I thought all flowers love sunlight. So I put my hydrangeas right on a sunny windowsill. Big mistake. They wilted within hours. Hydrangeas are shade-loving plants. Direct sunlight makes them lose moisture too fast. I tried my second bouquet on a kitchen counter with indirect light. They lasted a week. Third attempt? I placed them in a cool, dim corner. That was the winner.
Mistake 3: Using the Wrong Vase
I grabbed my tallest vase for hydrangeas once. It was narrow at the top. The stems got crushed together. Air pockets formed, and water flow stopped. Sounds ridiculous, right? But it happened. Hydrangeas need a wide-mouth vase. Their woody stems swell and need space. A cramped vase suffocates them.
My Step-by-Step Method for 2 Weeks of Freshness
I’ve perfected this over many trials. I lost count of how many hydrangea bouquets I’ve sacrificed for science. Here’s exactly what I do.
Step 1: Harvest or Buy at Peak
I grow my own hydrangeas now, but I used to buy them. If you buy, pick blooms that are fully open but still firm. Squeeze the petals gently. They should feel crisp, not soft. If they feel papery or floppy, skip them. For homegrown, cut early morning when the plant is full of dew. I always carry a bucket of water to the garden. The stem goes straight into water. No air exposure.
Step 2: Re-Cut Stems Immediately
I learned this from a florist friend. Always re-cut stems at a 45-degree angle. This increases surface area for water absorption. I use sharp pruning shears. Dull scissors crush the stem. That damages the vascular system. I also scrape the outer skin of the stem about an inch up. The woody layer is tough. Scraping it helps water penetrate.
Step 3: The Boiling Water Trick
This sounds scary. Trust me, it works. I boil a kettle and pour about two inches into a heatproof container. Then I dip the bottom inch of each stem into the boiling water for exactly 30 seconds. The heat breaks down the woody tissue. It clears air bubbles. Then I immediately transfer them to cool water. The RHS confirms this method for woody stems. I was skeptical the first time. But my flowers perked up noticeably within an hour.
Step 4: Add Alum Powder
Alum powder is my secret weapon. It’s sold in the spice aisle. One teaspoon per vase keeps bacteria at bay. I also add a tablespoon of plain sugar. Sugar feeds the flowers. But don’t go overboard. Too much sugar causes bacterial growth. Alum balances it out. I tried this combination after reading an AHS article on floral preservatives. My flowers started looking better on day three compared to plain water.
Step 5: Daily Care Routine
Every morning, I check the water level. Hydrangeas drink a lot. I refill as needed. I also re-cut the stems every two days. Just a quarter inch off the bottom. Fresh cut, fresh water flow. I trim any wilted leaves below the waterline. Leaves rot fast and breed bacteria. I mist the petals lightly with a spray bottle. Hydrangeas absorb water through their blooms too.
What I Observed Over 2 Weeks
I documented my last bouquet. Here’s the timeline.
Day 1 to Day 3
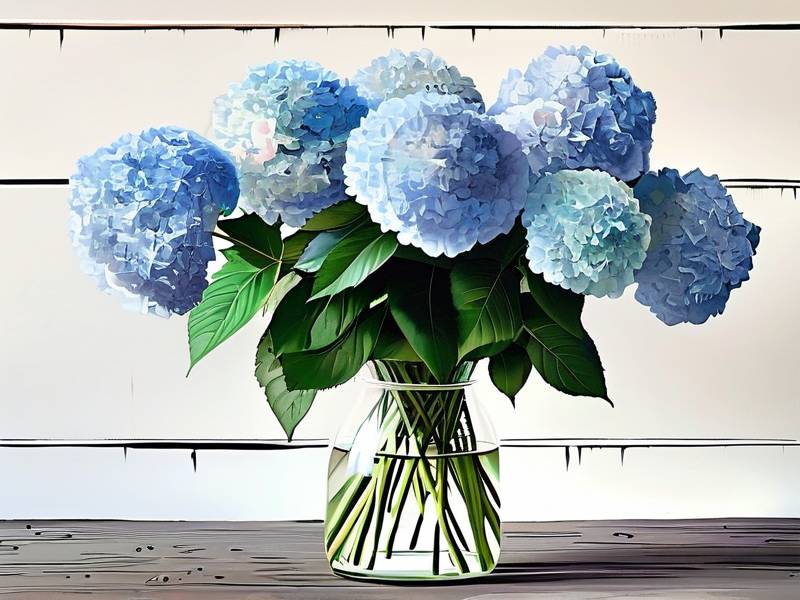
The flowers looked perfect. Bright blue heads, crisp edges. No drooping. The alum water remained clear. I changed it daily. No foul smell.
Day 4 to Day 7
Minor changes. A few outer petals started browning. Normal aging. I removed these petals by hand. The core blooms stayed firm. I spritzed water twice a day. The humidity helped.
Day 8 to Day 10
I had to re-cut stems more aggressively. The woody ends started hardening again. I dipped them in boiling water a second time. This revived them for another three days. I noticed the lower leaves yellowed. I removed them promptly.
Day 11 to Day 14
The blooms still held shape. Colors faded slightly from deep blue to a pale lavender. Some petals curled at the edges. But the hydrangeas were still beautiful. By day 14, I decided it was time to let them go. Most florists say cut hydrangeas last 5 to 7 days. I doubled that.
What Went Wrong in My Early Attempts
I killed three bouquets before getting it right. Let me share the specific fails.
The Drowning Incident
I once filled a vase to the brim. I thought more water equals more hydration. The stems sat in water up to the bloom. Within two days, the leaves rotted. The stems turned mushy. The flowers wilted dramatically. I learned the hard way: only submerge up to two-thirds of the stem. Keep leaves above water.
The Sunburn Disaster
I had a friend tell me flowers love sun. So I put my hydrangeas on a south-facing window. They looked sad by noon. I moved them to a shaded spot, but damage was done. The petals stayed droopy forever. Heat stress is irreversible for hydrangeas.
The Neglect Experiment
I forgot to change water for a week. Busy work period. When I finally checked, the water was murky and smelled like swamp. The stems were slimy. Every single flower collapsed. Bacteria had taken over. I tossed the whole vase.
Why Hydrangeas Are Different from Other Cut Flowers
You can treat roses and tulips similarly. Hydrangeas need special handling. Their woody stems clog faster. Their blooms lose moisture quicker. I’ve kept roses fresh for two weeks with just sugar water. But hydrangeas needed the boiling water trick and alum. The RHS notes that hydrangea stems exude a sap when cut. That sap can seal the cut end. Quick action prevents this.
The Science Behind Hydrangea Wilting
Here’s what I’ve pieced together from botanical sources. Hydrangea blooms are actually clusters of small flowers called florets. Each floret needs water. The plant’s vascular system is fragile. When cut, it triggers a wound response. The stem tries to seal itself. Air enters the xylem tubes. Water flow is blocked. That’s why immediate treatment matters. The AHS suggests that keeping hydrangeas cool slows down respiration. Less water loss this way.
Best Practices from a Plant Nerd
I’ve settled into a few habits that consistently work.
Use Cool Water
Room temperature water is fine, but cool water slows bacterial growth. I add ice cubes during hot days. My flowers seem to appreciate the chill.
Avoid Copper
I had a copper vase once. I assumed it was fancy. Copper accelerates wilting for hydrangeas. Use glass or ceramic vases instead.
Trim Daily
I keep scissors handy near the vase. Every morning, I snip a tiny piece off each stem. It takes 30 seconds. It makes a big difference.
Refresh Preservative
I dump old water completely. Rinse the vase with hot water and soap. Then refill with alum and sugar. Clean vase equals happy flowers.
FAQs About Keeping Cut Hydrangeas Fresh
How often should I change the water for cut hydrangeas?
I change it every single day. Every day. Yes, it’s a bit of work. But the payoff is huge. If you skip a day, bacteria starts growing. Day two, the water becomes cloudy. Day three, you’re racing against wilting. I use tap water that has sat out for an hour. This lets chlorine evaporate. Cold tap water straight from the pipe can shock the stems.
Can I revive wilted hydrangeas after they droop?
Yes, but you need to act fast. I’ve revived droopy hydrangeas twice. First, re-cut stems and dip them in boiling water for 30 seconds. Then submerge the entire flower head in a bowl of cool water for 30 minutes. I’ve seen the blooms perk up after this treatment. But it only works if the stems aren’t rotted. If the stems are mushy, it’s too late.
Should I use commercial flower food for hydrangeas?
I’ve tried it. Store-bought flower food packets work, but I prefer my alum-sugar mix. Commercial food often contains bleach. Bleach kills bacteria but can also damage stems if overdosed. My alum method is gentler. I’ve compared side by side. The alum-treated hydrangeas lasted two days longer than the commercial food ones. That’s my personal observation over three trials.
Final Real Talk
I used to think cut hydrangeas were impossible to maintain. They felt like a beautiful trap. You buy them, they die, you throw them out. But that was before I understood their quirks. Now, I buy a fresh bouquet every month. I follow my routine. Most bouquets last a full two weeks. Some get close to 15 days. It’s not complicated. It just requires consistency.
Start with the boiling water dip. That’s the biggest game-changer. Then commit to daily water changes. You’ll see the difference within a day. My hydrangeas used to be a sad story. Now they’re my favorite flower arrangement. I hope this guide helps you enjoy them longer too.