How to Care for Variegated Spider Plant - Division Propagation for Fast Pot Expansion
Seeing your beautiful variegated spider plant bursting at the seams of its pot is a proud moment for any plant parent. But that lush, crowded center can also signal a hidden struggle. Overcrowding leads to competition for water and nutrients, potentially causing browning tips, stunted growth, and a loss of that stunning variegation. Instead of letting your plant suffer, there’s a remarkably simple and fast solution: division propagation. This guide will walk you through every step of how to care for variegated spider plant through the powerful method of division, transforming one cramped plant into multiple thriving specimens for a rapid pot expansion.
Understanding the Variegated Spider Plant’s Growth Habit
Before we dive into the division process, it’s crucial to understand what makes your plant tick. The variegated spider plant, scientifically Chlorophytum comosum ‘Vittatum’ or ‘Variegatum’, is a resilient perennial known for its arching green and white striped leaves and its prolific production of plantlets, or “spiderettes,” on long stolons. However, its most relevant feature for our purpose is its growth from a central clump of thick, tuberous roots and rhizomes. Over time, this clump multiplies, creating a dense mass beneath the soil. This natural habit is what makes division not just possible, but highly beneficial and a key technique for fast pot expansion.
Why Division is the Superior Method for Fast Pot Expansion
While spider plants are famously propagated by rooting the spiderettes in water or soil, division is the undisputed champion for immediate results. Rooting plantlets takes weeks to establish a decent root system. Division, in contrast, gives you a fully-formed, mature plant with an extensive root network in a matter of minutes. It’s the fastest route to a larger, fuller-looking plant collection. According to horticultural best practices cited by the Royal Horticultural Society (RHS), division is the recommended method for rejuvenating overgrown clump-forming perennials, as it instantly relieves root congestion and stimulates a fresh burst of growth. This method directly addresses the core desire for rapid spider plant multiplication.
Gathering Your Tools and Preparing for Success
A successful division starts with the right preparation. You’ll need:
- A sharp, clean knife or a pair of sterilized garden shears. Clean cuts prevent crushing and reduce disease risk.
- Fresh, well-draining potting mix. A standard houseplant mix amended with a handful of perlite is perfect.
- New pots with drainage holes. Have a few ready, sized appropriately for your new divisions.
- A workspace you can get a little dirty, like a newspaper-covered table.
- Your overgrown variegated spider plant, ideally watered a day or two before the procedure to hydrate the roots.
Step-by-Step Guide to Division Propagation
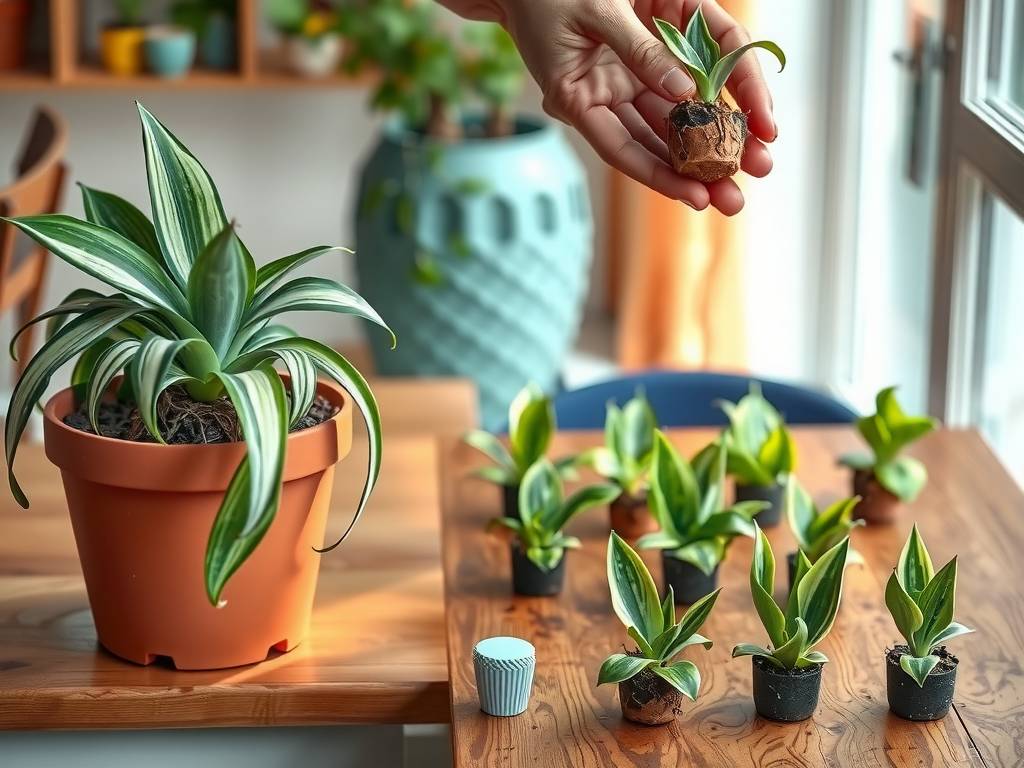
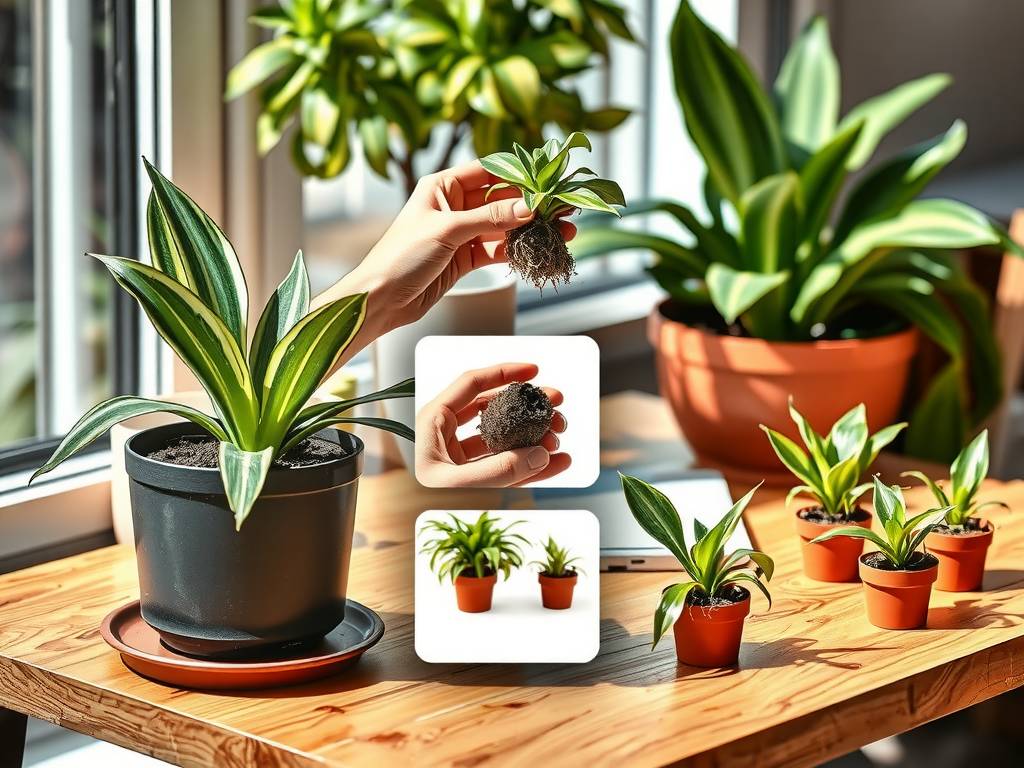
Step 1: Removing and Inspecting the Root Ball Gently tip the pot on its side and coax the plant out. Support the base of the leaves and avoid pulling. Once free, carefully shake and loosen the old soil to expose the root and rhizome mass. This is your chance to inspect for health—firm, white or tan roots are good. Trim away any mushy or blackened roots with your sterilized tool.
Step 2: Dividing the Clump Look for natural separation points in the clump. You’ll see individual “crowns” or growth points with their own set of leaves and roots. Using your hands, gently tease these sections apart. For very tough, intertwined clumps, you may need to use your clean knife to slice through the central mass, ensuring each division has a healthy amount of roots and several leaf fronds attached. A good rule of thumb is that each new section should have at least 3-5 mature leaves and a robust root system.
Step 3: Potting Up Your New Divisions Fill your new pots partway with fresh potting mix. Place a division in the center, spreading its roots out. The base of the leaves should sit just below the rim of the pot. Add more soil around the roots, gently firming it to eliminate large air pockets. Leave about an inch of space at the top for watering. Repeat for all divisions.
Step 4: Post-Division Care for Optimal Recovery This is a critical phase in caring for a divided spider plant. Water each newly potted division thoroughly until water runs freely from the drainage holes. This settles the soil around the roots. Place them in a location with bright, indirect light. Avoid direct sun, which can stress the recovering plants. Hold off on fertilizing for at least 4-6 weeks to allow the roots to settle and avoid burn. Maintain slightly moist (but not soggy) soil for the first few weeks as the plants establish. You should see new growth emerging from the center of each division within a few weeks, a sure sign of success.
Troubleshooting Common Post-Division Issues
Even with care, your plants might need a little extra attention. If leaves wilt or droop persistently, check that the soil isn’t too dry or, conversely, waterlogged. Ensure the plant is not in a draft or receiving too much direct light. Some initial leaf die-back on the outer leaves is normal as the plant redirects energy to root establishment. Simply trim these off with clean scissors.
Advanced Tips for Maintaining Variegation and Vigor
The beautiful striping on your plant is dependent on good light. To maintain strong variegation after division, provide plenty of bright, filtered light. Low light can cause the leaves to revert to solid green. As recommended by the American Horticultural Society (AHS), a balanced, water-soluble fertilizer applied at half-strength monthly during the growing season (spring and summer) will support the lush growth of your newly expanded collection. Remember, a well-cared-for plant is your best defense against pests, but keep an occasional eye out for common issues like aphids or spider mites.
Frequently Asked Questions
My divided plant has brown tips. What did I do wrong? Brown tips are very common in spider plants and are rarely due to the division itself. They are most often caused by low humidity, fluoride or chlorine in tap water, or inconsistent watering. Use distilled, rainwater, or tap water that has been left out overnight to water your plants, and consider increasing humidity around them.
How often should I divide my variegated spider plant? There’s no strict schedule, but a good indicator is when the plant becomes extremely pot-bound, dries out incredibly quickly, or the center becomes too dense. Typically, this might be every 2-3 years. Division is best performed in the spring or early summer when the plant enters its active growth phase.
Can I divide a spider plant that has baby spiderettes on it? Absolutely. You can perform division on the mother plant regardless of the spiderettes. You can choose to leave the stolons attached and pot the plantlets separately after division, or you can remove them beforehand. The division process focuses on the root clump, so the aerial plantlets don’t interfere.
Mastering the art of division propagation is the ultimate skill for any variegated spider plant enthusiast. It solves the problem of overcrowding, instantly multiplies your collection, and rejuvenates an older plant for renewed vigor. By following these clear steps—from gentle separation to attentive aftercare—you empower your plant to thrive. With your new knowledge, that single overgrown pot is no longer a dilemma but an opportunity, ready to be transformed into a flourishing display of elegant, variegated foliage.


