How to Care for Sedum Aizoon: Low-Maintenance Tips for Vigorous Growth
Your Guide to a Thriving, Effortless Perennial
Many gardeners dream of a vibrant, flourishing garden but are held back by the fear of high-maintenance plants. If you're seeking a resilient, beautiful perennial that thrives with minimal fuss, Sedum aizoon is your perfect match. This comprehensive guide, brought to you by Plant Care News, will walk you through every step of how to care for Sedum aizoon, unlocking its potential for vigorous growth with surprisingly simple routines. Often praised for its durability and stunning seasonal displays, this plant is a cornerstone of low-maintenance landscaping.
Understanding Your Sedum Aizoon
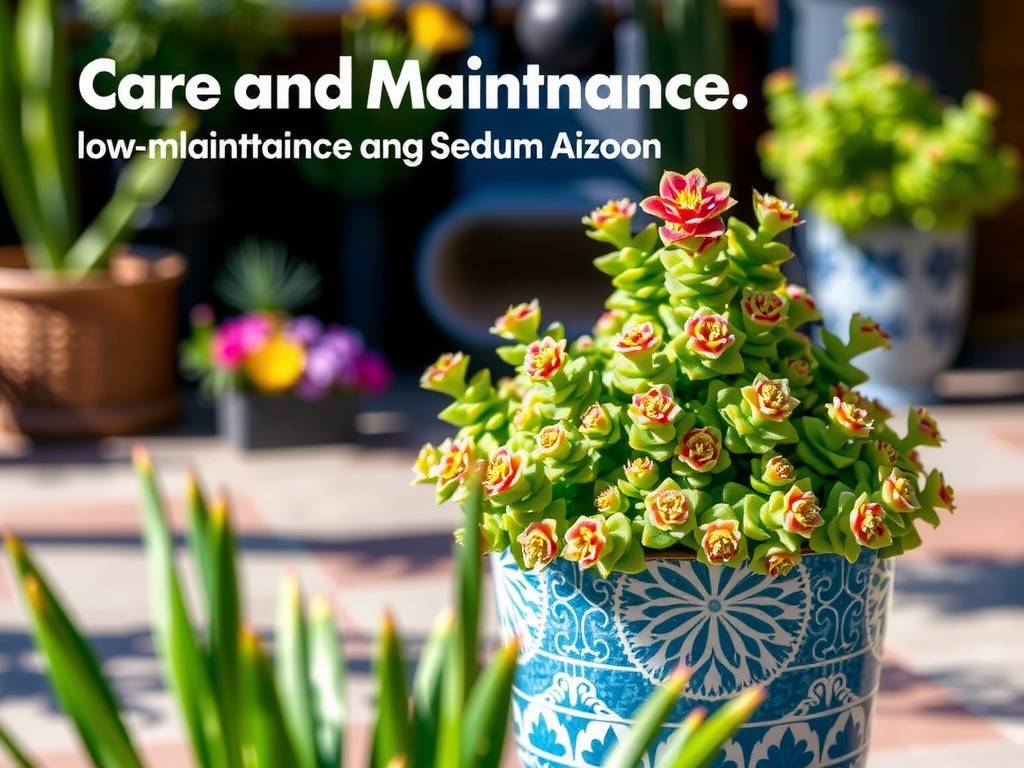
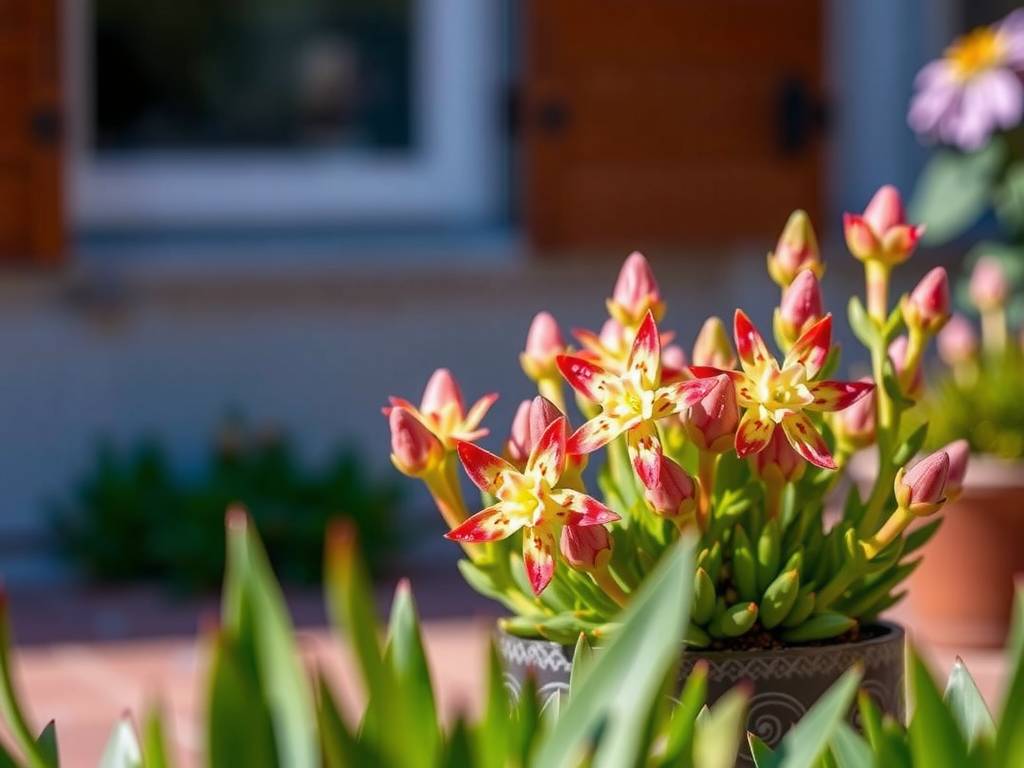
Sedum aizoon, commonly known as Aizoon Stonecrop, is a hardy herbaceous perennial prized for its upright growth habit and clusters of starry yellow flowers. Unlike many succulents, it forms clumps of serrated, green leaves that provide texture and interest even when not in bloom. Its true strength lies in its adaptability and resilience, making low-maintenance gardening not just a goal, but a reality.
According to the Royal Horticultural Society (RHS), Sedums, as a genus, are celebrated for their drought tolerance and ability to thrive in poor soils, requiring very little intervention for healthy growth. This makes Sedum aizoon an ideal candidate for gardeners of all skill levels.
Ideal Growing Conditions for Maximum Health
Creating the right environment is the first step toward ensuring your Sedum aizoon prospers. Getting these fundamentals right minimizes problems down the line.
Sunlight Requirements
Sedum aizoon craves full sun. Aim for at least 6 to 8 hours of direct sunlight daily. This exposure encourages sturdy, compact growth and maximizes flower production. In too much shade, the stems may become leggy and weak, and flowering will be sparse.
Perfect Soil and Drainage
This is arguably the most critical factor for successful Sedum aizoon cultivation. The plant demands exceptionally well-draining soil. Heavy, water-retentive clay is its enemy. A sandy or gravelly loam is perfect.
You can improve garden soil by mixing in coarse sand, perlite, or fine gravel. For container growth, use a dedicatedSedum aizoon container potting mix (a type of cactus and succulent potting mix). The American Horticultural Society (AHSA) emphasizes that for drought-tolerant perennials like Sedum, ensuring rapid drainage is key to preventing root rot, a common issue in waterlogged conditions.
Climate and Hardiness
Sedum aizoon is remarkably cold-hardy, with specific adaptability to USDA hardiness zones 3 through 9. To ensure optimal growth across these zones, follow these zone-specific care steps: For zones 3-4 (harsh winters with temperatures as low as -30°F/-34°C), add a 2-3 inch layer of mulch (such as straw or shredded leaves) around the base of the plant in late fall. This mulch layer helps insulate the root system from freezing temperatures. Remove the mulch gradually in early spring once the threat of frost has passed to avoid trapping moisture around new growth. For zones 5-7 (moderate winters), no additional winter protection is needed, but you can still trim back dead stems in late winter to prevent snow mold buildup. For zones 8-9 (mild winters with little to no frost), continue light watering every 2-3 weeks during dry spells in winter, as the plant may not go fully dormant. In summer, when temperatures exceed 90°F (32°C), provide partial afternoon shade in zone 9 to prevent leaf scorch, and ensure the soil remains slightly moist (but not waterlogged) during heatwaves.
Step-by-Step Sedum Aizoon Care Routine
With the basics in place, a simple, seasonal routine will keep your plant vigorous and blooming year after year.
Watering: The "Less is More" Approach
Mastering Sedum aizoon watering frequency (a core part of its care needs) requires following these specific steps to avoid overwatering: Step 1: Check soil moisture before watering. Insert your finger 1-2 inches into the soil—if it feels dry to the touch, it’s time to water. For container-grown plants, lift the pot to gauge weight; a light pot indicates dry soil. Step 2: Watering method for in-ground plants. Use a soaker hose or drip irrigation system to apply water directly to the base of the plant. Avoid overhead watering, as this can lead to leaf spot diseases. Water slowly and deeply, allowing the water to penetrate 6-8 inches into the soil. Step 3: Watering frequency in active growth (spring-summer). Water once a week if there is no rainfall. If temperatures exceed 85°F (29°C) or there is prolonged drought, increase to twice a week, but still allow the soil to dry out between waterings. Step 4: Watering frequency in fall-winter. Reduce watering to once every 2-3 weeks in fall. In winter, water only if the soil is completely dry (once a month or less for in-ground plants; every 3-4 weeks for container plants in sheltered areas). Step 5: Container-specific watering tips. Ensure the pot has drainage holes in the bottom. After watering, empty any excess water from the saucer to prevent root rot. Use a potting mix with added perlite to improve drainage, and water until water flows freely from the drainage holes.
Feeding for Vigorous Growth
Sedum aizoon is not a heavy feeder, but strategic feeding can boost growth—follow these step-by-step feeding instructions: Step 1: Choose the right fertilizer. Opt for a balanced, slow-release fertilizer with an N-P-K ratio of 10-10-10 or 5-10-10 (low nitrogen to avoid leggy growth). Alternatively, use a liquid fertilizer diluted to half strength (such as fish emulsion or seaweed fertilizer). Step 2: Timing is key. Apply fertilizer only once in early spring, when new growth is 1-2 inches tall. Avoid fertilizing in summer or fall, as this can encourage new growth that is vulnerable to frost damage. Step 3: Application method for slow-release fertilizer: Sprinkle the fertilizer evenly around the base of the plant, keeping it 2-3 inches away from the stem to prevent burn. Use 1-2 tablespoons per plant (adjust based on the size of the clump). Water the area thoroughly after application to activate the fertilizer. Step 4: Application method for liquid fertilizer: Dilute the fertilizer according to the package instructions (typically 1 teaspoon per gallon of water). Pour the diluted fertilizer around the base of the plant, ensuring the soil is moist before application. Avoid getting fertilizer on the leaves, as this can cause scorching. Step 5: Post-feeding care. Monitor the plant for 1-2 weeks after feeding. If leaves turn yellow or appear burnt, reduce the amount of fertilizer used next season. If growth is still sparse, you can apply a second light feeding 4-6 weeks after the first, but this is rarely necessary.
Pruning and Seasonal Maintenance
Pruning and seasonal maintenance follow a simple, step-by-step routine to keep the plant healthy and tidy: Step 1 (Deadheading): After the summer bloom (typically August-September), use clean pruning shears to remove spent flower heads. Cut the stem just above the nearest set of healthy leaves. This step is optional but helps prevent self-seeding and keeps the plant looking neat. Step 2 (Winter Pruning): In late winter (February-March, before new growth emerges), use pruning shears or hedge clippers to cut back all dead stems to ground level. Make clean cuts at a 45-degree angle to avoid damaging the crown of the plant. Step 3 (Spring Cleanup): Remove any fallen leaves, debris, or mulch from around the base of the plant to allow new shoots to emerge unobstructed. Inspect the plant for signs of damage or disease—trim any soft, rotted stems if present. Step 4 (Summer Maintenance): Periodically check the plant for leggy stems during the growing season. If stems become weak or floppy, pinch back the tips (remove 1-2 inches of growth) to encourage bushier growth. This is especially helpful if the plant is growing in partial shade.
Planting and Propagation
Plant Sedum aizoon in spring or early fall, following these step-by-step planting instructions: Step 1: Choose a planting site that receives 6-8 hours of full sun daily. Clear the site of weeds, rocks, and debris, and loosen the soil to a depth of 8-10 inches using a garden fork or tiller. Step 2: If the soil is heavy clay, amend it by mixing in 30% coarse sand and 20% compost (by volume) to improve drainage—this mimics the well-draining conditions the plant prefers. Step 3: Dig a hole that is twice as wide as the plant’s root ball and the same depth as the root ball. Gently remove the plant from its nursery pot, taking care not to damage the roots. Step 4: Place the plant in the hole, ensuring the top of the root ball is level with the surrounding soil. Backfill the hole with the amended soil, pressing lightly to eliminate air pockets. Step 5: Water the plant thoroughly immediately after planting to settle the soil around the roots. For propagation, follow these detailed steps: Option 1 (Division): In early spring, dig up a mature Sedum aizoon clump using a garden spade. Use a sharp knife or spade to divide the clump into 2-3 sections, ensuring each section has at least 3-4 healthy shoots and a intact root system. Plant each division following the same steps as above, spacing them 12-18 inches apart. Option 2 (Stem Cuttings): In early summer, select a healthy, non-flowering stem that is 4-6 inches long. Use clean, sharp pruning shears to make a cut just below a leaf node. Remove the lower 2-3 leaves from the cutting, leaving 2-3 leaves at the top. Let the cutting sit in a dry, shaded area for 24 hours to allow the cut end to callous over—this prevents rot when planting. Fill a small pot with a mix of 50% perlite and 50% cactus potting soil. Insert the calloused end of the cutting 1-2 inches into the soil, pressing lightly to secure it. Water the soil lightly (just enough to moisten) and place the pot in a bright, shaded area (avoid direct sunlight). Keep the soil slightly moist but not soggy, and roots should form within 3-4 weeks. Once roots are established (you can gently tug the cutting to feel resistance), transplant the new plant to its permanent location.
Troubleshooting Common Issues
Even the toughest plants can face challenges. Here’s how to identify and solve common problems.
Yellowing or Wilting Leaves
This is almost always a sign of overwatering and poor drainage—follow these step-by-step troubleshooting steps: Step 1: Assess soil moisture. Insert a moisture meter (or your finger) 2-3 inches into the soil. If it reads above 70% moisture or feels soggy, overwatering is confirmed. Step 2: Stop watering immediately. Allow the soil to dry out completely before considering watering again—this may take 1-2 weeks for in-ground plants and 3-5 days for container plants. Step 3: Improve drainage for in-ground plants. If the area is prone to waterlogging, dig a 4-6 inch deep trench around the plant to redirect excess water. Add a 2-inch layer of gravel around the base to increase surface drainage. For persistent issues, transplant the plant to a raised bed filled with well-draining soil (sandy loam + compost). Step 4: Repot container plants. If the plant is in a pot, gently remove it from the container. Inspect the roots—brown, mushy roots indicate rot. Use clean pruning shears to cut off all rotted roots. Repot the plant in a new container (slightly larger than the root ball) with fresh potting mix (50% cactus mix + 50% perlite). Water lightly after repotting and place in a bright, shaded area for 1-2 weeks to recover. Step 5: Remove damaged foliage. Use clean scissors to cut off yellowed, wilted, or rotted leaves and stems. Dispose of the damaged plant material away from the garden to prevent the spread of rot.
Leggy or Floppy Growth
This is caused by insufficient sunlight. The plant stretches toward the light, resulting in weak stems. The only solution is to move it to a sunnier location. You can also propagate from the healthiest tips of a leggy plant to start anew in a better spot.
Pests and Diseases
Sedum aizoon is largely pest-resistant, but occasional infestations or diseases can occur—follow these step-by-step treatment methods: Step 1: Identify common pests. Mealybugs appear as white, cottony masses on leaf undersides and stems. Scale insects are small, brown, and oval-shaped, clinging to stems and leaves. Step 2: Treat mealybugs. For small infestations, dip a cotton swab in rubbing alcohol and dab each mealybug individually. For larger infestations, mix 1 teaspoon of insecticidal soap with 1 quart of water and spray the entire plant (including leaf undersides) every 7-10 days until pests are gone. Step 3: Treat scale insects. Scrape off small numbers of scale with a fingernail or soft brush. For larger infestations, use horticultural oil (diluted according to package instructions) and spray the plant in early spring before new growth emerges—this suffocates overwintering scale. Step 4: Prevent root/stem rot. If you notice soft, rotted stems or a foul odor from the soil, follow the overwatering troubleshooting steps (stop watering, improve drainage, repot if needed). You can also dust the roots with a fungicide (such as neem oil powder) during repotting to prevent fungal growth. Step 5: Long-term pest/disease prevention. Avoid overhead watering, maintain good air circulation around the plant (space plants 12-18 inches apart), and remove fallen debris from around the base. Inspect the plant monthly for signs of pests or disease to catch issues early.
Design Ideas and Companion Planting
Sedum aizoon's upright form (growing 1-2 feet tall) and bright yellow summer flowers make it a versatile addition to any garden—follow these step-by-step design and companion planting tips: Step 1: Choose the right location in your garden. For rock gardens, plant Sedum aizoon in sunny, well-drained pockets between rocks. For borders, place it in the middle or front of the border (since it’s medium-sized) to add height and color. For ground cover, plant multiple clumps 12-18 inches apart to create a dense mat. Step 2: Select complementary companion plants. Pair with other sun-loving, drought-tolerant plants such as: Ornamental grasses (e.g., Fountain Grass, Blue Fescue) – their wispy texture contrasts with Sedum’s upright form. Echinacea (Coneflower) – its pink/purple flowers complement yellow Sedum blooms. Russian Sage – its silvery foliage and purple flowers add contrast and attract pollinators. Smaller Sedum varieties (e.g., Sedum spectabile) – create a layered Sedum display. Step 3: Plan for seasonal interest. Sedum aizoon blooms in summer, so pair it with plants that bloom in spring (e.g., Daylilies) and fall (e.g., Chrysanthemums) to ensure year-round color. Step 4: Container design ideas. Plant Sedum aizoon in a terracotta pot (which improves drainage) with other succulents (e.g., Sempervivum) and trailing plants (e.g., String of Pearls) for a mixed container garden. Place the pot in a sunny patio or balcony. Step 5: Pollinator-friendly design. Add Sedum aizoon to a pollinator garden—its flowers attract bees, butterflies, and hoverflies. Pair it with other pollinator plants like Lavender and Black-eyed Susans to create a thriving ecosystem.
Frequently Asked Questions (FAQ)
Q: How often should I water my Sedum aizoon in the winter? A: During winter dormancy, water very sparingly. For in-ground plants, natural rainfall is usually sufficient. For containers in a sheltered spot, a light watering once a month may be all that's needed, only if the soil is completely dry.
Q: Can Sedum aizoon grow in partial shade? A: While it can survive in partial shade, it will not thrive. Flowering will be reduced, and stems are likely to become leggy and less sturdy. For the best performance and form, full sun is strongly recommended.
Q: Is Sedum aizoon deer resistant? A: Yes, one of its many advantages is that it is typically deer and rabbit resistant. The succulent foliage is not appealing to most browsing animals, making it an excellent choice for gardens in areas with wildlife.
By providing plenty of sun, excellent drainage, and practicing restrained watering—following the detailed steps outlined above—you'll be rewarded with a robust, flowering Sedum aizoon that returns faithfully each year. Its resilience and beauty perfectly demonstrate that a stunning garden doesn't require constant work. Whether you're a beginner or an experienced gardener, the step-by-step care routine for Sedum aizoon is easy to follow and yields consistent results. Embrace its easy-going nature, and enjoy the vibrant texture and color it adds to your landscape with minimal effort on your part. As you implement these care steps, you’ll also develop a better understanding of drought-tolerant perennials, allowing you to expand your low-maintenance garden with confidence. Remember to adjust your care routine based on your specific climate zone (as outlined in the hardiness section) to ensure the plant thrives in your unique growing conditions. With a little attention to the fundamentals—sunlight, drainage, and proper watering—your Sedum aizoon will be a long-lasting, low-fuss star in your garden.