How to Care for Alocasia Seedlings: Your Guide to Thriving Small Green Leaves and Flowers
You've just brought home a delicate Alocasia seedling, captivated by the promise of its elegant, arrow-shaped leaves and the potential for those unique, small spathe flowers. But now, you're faced with tiny, tender green leaves and a wave of uncertainty. Why are the leaf edges turning brown? Is it getting enough light? How do you keep this tropical beauty alive? Caring for Alocasia seedlings can feel daunting, as they demand specific conditions to flourish. This guide cuts through the confusion, offering a clear, step-by-step roadmap to nurture your seedling into a stunning, mature plant.
Understanding Your Alocasia Seedling's Core Needs
Alocasia seedlings are the infants of the plant world, requiring more attentive and consistent care than their established counterparts. Their small root systems and developing leaves make them particularly sensitive to environmental shifts. Success hinges on replicating their native tropical understory habitat: think steady warmth, high humidity, bright but filtered light, and a carefully balanced approach to water and nutrients. Mastering these elements is the key to encouraging not just survival, but vigorous growth and the eventual emergence of its distinctive flowers.
Creating the Perfect Warm and Humid Environment
This is the non-negotiable foundation for how to care for Alocasia seedlings. These plants originate from tropical regions where heat and moisture are constant.
- Maintaining Ideal Warmth: Your seedling thrives in temperatures between 65°F to 80°F (18°C to 27°C). Avoid placing it near drafty windows, air conditioning vents, or heating units, as sudden temperature drops can stunt growth or cause leaf loss. Consistency is more critical than extreme heat.
- Boosting Humidity Levels: Aim for humidity levels of 60% or higher. Dry air is a primary cause of crispy, brown leaf edges on those precious small green leaves. Here are effective methods to increase humidity:
- Use a Humidifier: The most reliable and consistent solution.
- Pebble Tray: Place the pot on a tray filled with water and pebbles, ensuring the pot sits above the waterline.
- Group Plants: Cluster your Alocasia with other humidity-loving plants to create a beneficial microclimate.
- Regular Misting: A temporary boost, but avoid overdoing it as water on leaves can invite fungal issues if airflow is poor.
Mastering Light and Watering for Healthy Growth
Getting water and light right prevents the most common ailments in young Alocasias.
Providing Optimal Indirect Light Your seedling needs bright, indirect light to fuel its growth and develop strong stems and leaves. Direct sunlight, especially through a window, will scorch the delicate foliage, causing yellow or brown patches. An east-facing window is ideal, or a spot a few feet back from a south or west-facing window. If natural light is limited, consider a grow light placed about 12-18 inches above the plant for 12-14 hours a day.
Perfecting Your Watering Technique Overwatering is the fastest way to lose an Alocasia seedling, leading to root rot. Underwatering will cause drooping and dry soil stress.
- The Golden Rule: Water thoroughly only when the top 1-2 inches of soil feel dry to the touch. For a small seedling, this might mean watering once a week, but always check first.
- The Method: Water slowly and evenly around the soil until it runs freely from the drainage holes. Discard any excess water in the saucer after 15 minutes. Never let the plant sit in water.
- Water Quality: Use room-temperature water. If possible, use filtered or rainwater, as Alocasias can be sensitive to chemicals and minerals in tap water.
Soil, Potting, and Nutritional Support
The right foundation supports a healthy root system, which in turn supports those beautiful small spathe flowers in the future.
- Choosing the Right Soil Mix: A well-draining, airy, yet moisture-retentive mix is essential. A standard potting mix amended with 30-40% perlite, orchid bark, or coconut coir works perfectly. This prevents compaction and allows roots to breathe.
- Selecting an Appropriate Pot: Always use a pot with ample drainage holes. For a seedling, a small pot (about 2-3 inches in diameter) is best. A pot too large holds excess moisture around the small root ball, increasing rot risk. Terracotta pots are excellent as they wick away extra moisture.
- Fertilizing with Care: Seedlings need very light feeding. During the active growing season (spring and summer), use a balanced, water-soluble fertilizer (like a 10-10-10 or 20-20-20) diluted to half-strength once a month. Do not fertilize in fall or winter when growth slows. Over-fertilization will burn the delicate roots.
Troubleshooting Common Alocasia Seedling Problems
Even with great care, issues can arise. Here’s how to identify and fix them.
- Yellowing Leaves: Often a sign of overwatering or poor drainage. Check your soil moisture and ensure the pot drains freely. Could also indicate a need for light fertilizer (if older leaves yellow) or less direct light.
- Brown, Crispy Leaf Edges: Almost always due to low humidity. Increase ambient moisture using the methods above. It can also result from underwatering or fluoride in tap water.
- Drooping Leaves: Can signal underwatering (check soil) or, paradoxically, overwatering and root rot (smell the soil and check roots). Temperature shock is another common cause.
- Pests: Keep an eye out for spider mites (tiny webs, stippled leaves) and aphids (small clusters on new growth). Wipe leaves with a damp cloth regularly and treat infestations early with insecticidal soap or neem oil.
Encouraging Development and Blooms
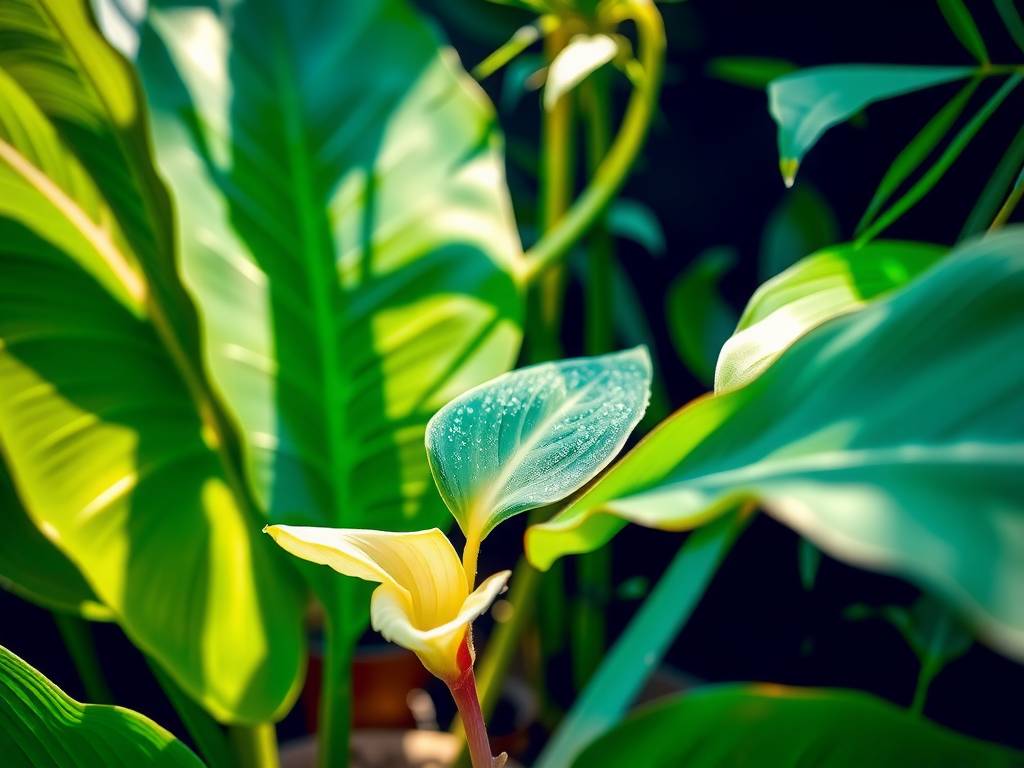
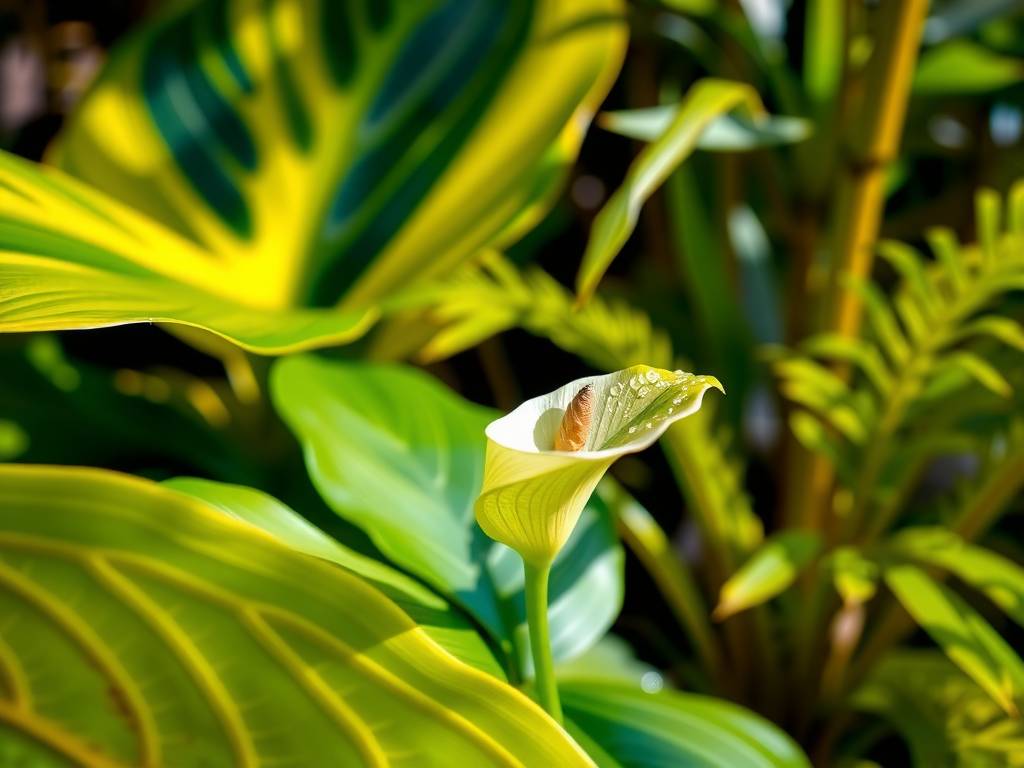
While the primary allure is the foliage, mature, happy Alocasias may produce inflorescences. The flower structure consists of a hood-like spathe (often in shades of green, white, or pale yellow) surrounding a spadix. To give your seedling the best chance of one day blooming:
- Focus on Maturity: Getting an Alocasia to flower is typically a sign of a very content, mature plant. Don't expect blooms from a seedling.
- Provide Consistent Care: The path to blooms is the same as for healthy leaves: perfect the basics of light, humidity, and seasonal feeding.
- Understand Energy Use: Blooming requires significant energy. Some growers remove the flowers to redirect the plant's energy back into stronger leaf growth, which is often the main attraction.
What is the fastest way to increase humidity for my Alocasia seedling? Investing in a cool-mist humidifier is the most effective and consistent method. It allows you to precisely control the environment, directly addressing the need for warm humid conditions that Alocasia seedlings crave, far more reliably than occasional misting.
Why are the new leaves on my seedling smaller than the old ones? This is usually related to insufficient light. While Alocasias don’t want direct sun, they require substantial bright, indirect light to produce large, robust leaves. Move your plant to a brighter location (without direct rays) and observe if the next new leaf improves in size.
Should I repot my Alocasia seedling as soon as I buy it? It’s generally advisable to let the seedling acclimate to your home for 2-4 weeks before repotting. Only repot sooner if the soil is poor (stays soggy) or you suspect pests. When you do repot, choose a pot only 1-2 inches larger in diameter to prevent overwatering issues.
Nurturing an Alocasia seedling from its early stages of small green leaves to a majestic, mature plant is a deeply rewarding journey. It requires attentiveness to its signals—a droop, a change in leaf color, the feel of the soil. By prioritizing a stable, warm, and humid environment, providing bright indirect light, watering with mindful precision, and using a well-draining soil mix, you create the foundation for lifelong health. With patience and consistent care, you’ll not only enjoy its stunning foliage but may one day be rewarded with the subtle beauty of its unique botanical blooms.