 bluename
 How to Care for Gardenia: Acidic Soil Mix to Prevent Yellow Leaves
There's nothing more disheartening for a gardener than watching the lush, dark green leaves of a beloved gardenia bush slowly fade to a sickly yellow. You've provided ample water, found the perfect sunny spot, and yet, those telltale yellow leaves keep appearing, often followed by dropped buds and a lack of blooms.
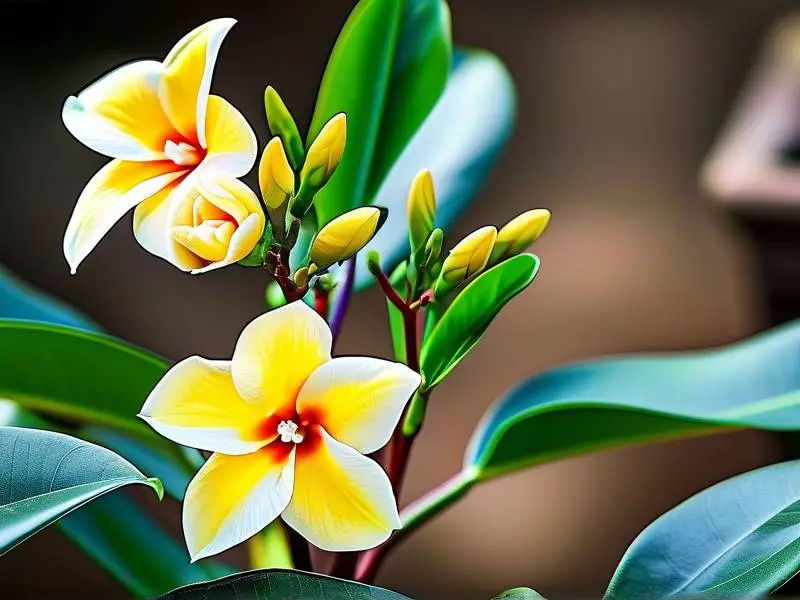
The culprit, more often than not, lies beneath the surface. The secret to unlocking vibrant health and prolific flowering in gardenias isn't just about what you see; it's fundamentally about what you can't see: the soil.
Mastering how to care for gardenia plants hinges on one critical, non-negotiable factor: providing a properly acidic soil mix. This is the single most effective strategy to prevent yellow leaves and ensure your gardenia thrives.
Understanding the "Why": The Acid-Loving Nature of Gardenias
Gardenias (Gardenia jasminoides) are classic acid-loving plants, sharing this requirement with azaleas, camellias, and blueberries. Their need for acidity isn't a mere preference; it's a physiological necessity tied to nutrient availability.
In alkaline or neutral soils, key nutrients—especially iron, manganese, and magnesium—become chemically "locked up" and inaccessible to plant roots. Even if these nutrients are physically present in the soil, the gardenia cannot absorb them.
This deficiency, particularly iron chlorosis, manifests as yellow leaves. The classic pattern is interveinal chlorosis, where the leaf tissue between the veins turns yellow while the veins themselves remain green. If uncorrected, the entire leaf can turn pale yellow or even white, growth becomes stunted, and flower production ceases.
Therefore, learning how to prevent yellow leaves on gardenia isn't just about treating a symptom; it's about addressing the root cause by managing soil pH.
The Gold Standard: Creating the Perfect Acidic Soil Mix for Gardenias
Your first and best defense is to start with the right foundation. Planting a gardenia in a high-quality, well-draining acidic mix sets it up for long-term success and significantly reduces future corrective headaches.
Ideal Soil Composition and pH Target
Aim for a soil pH between 5.0 and 6.0. This is the sweet spot where gardenias can efficiently access all necessary nutrients. You can test your native soil or potting mix with a simple pH test kit available at any garden center.
A superior homemade acidic soil mix for gardenias could consist of:
40% Acidic Potting Mix: Use a commercial mix labeled for azaleas, camellias, or rhododendrons as your base. These are pre-acidified.
30% Peat Moss: An excellent organic component that helps acidify the soil and retain moisture without waterlogging.
20% Perlite or Coarse Sand: Ensures critical drainage. Gardenias despise "wet feet," and soggy soil can lead to root rot, compounding your problems.
10% Well-Rotted Pine Bark or Composted Oak Leaves: Adds structure, fosters beneficial microbes, and gently acidifies as they decompose.
Expert Note: As noted by horticultural experts from the American Horticultural Society (AHS), "For ericaceous plants like gardenias, amending the planting site with generous amounts of organic matter such as peat or composted bark is the first step in creating a sustainable acidic environment."
This mix provides the perfect balance of acidity, moisture retention, and drainage.
Planting for Success
When planting, dig a hole twice as wide as the root ball but no deeper. Gently tease out any circling roots, place the plant so the top of the root ball is level with the soil surface, and backfill with your prepared acidic mix. Water thoroughly to settle the soil and eliminate air pockets.
A 2-3 inch layer of acidic mulch, like pine straw or shredded oak leaves, on the soil surface helps conserve moisture, suppress weeds, and gradually add acidity as it breaks down.
⚠️ What I Learned After Killing My First Three Gardenias
I killed my first gardenia within eight weeks. The second lasted a bit longer, but the yellow leaves spread like a slow heartbreak. I finally understood the problem when I tested my tap water and soil pH.
The Shock: My tap water had a pH of 7.8, and over time, every watering was slowly neutralizing the acidic mix I thought was working.
The Fix: Most professional growers agree that alkaline water is the single most overlooked reason gardenias fail in home gardens. I switched to collecting rainwater and filtered water for my gardenias.
The Result: Within one month, the new growth on my surviving third plant came in deep green instead of pale yellow. I also stopped guessing about fertilizer. Instead of using a general-purpose food, I switched to a 30-10-10 formula labeled specifically for acid-loving plants. The difference was not subtle. My gardenia finally bloomed that summer.
Ongoing Care: Maintaining Acidity and Preventing Yellow Leaves
Planting correctly is half the battle. Consistent aftercare is what keeps yellow leaves at bay season after season.
Watering Wisely with Acidic Intentions
Water is a tool for pH management. Tap water in many regions is alkaline (hard water). Over time, watering with hard water can gradually raise your soil's pH, neutralizing your efforts.
Best Practice: Where possible, use rainwater, distilled water, or filtered water for your gardenias.
Technique: Always water deeply at the base of the plant, allowing the top inch of soil to dry out between waterings. Consistent moisture is key, but overwatering is a fast track to root issues.
Fertilizer Choice: The Acidifying Agent
To actively combat yellow leaves and maintain low pH, incorporate an acidifying fertilizer. This is a cornerstone of effective gardenia care.
Acid-Loving Formula: Use a fertilizer specifically formulated for acid-loving plants. Look for products with an NPK ratio like 30-10-10 or similar, which include ammonium-based nitrogen sources that help keep soil acidic.
Chelated Iron Supplements: At the first sign of yellowing leaves, a liquid chelated iron supplement can provide a rapid "green-up." The chelation process makes the iron readily available even in less-than-ideal pH conditions, offering a quick fix while you address the broader soil pH.
Schedule: Feed your gardenia with acid fertilizer in early spring as new growth emerges and again in mid-summer. Avoid late fall fertilization, which can stimulate tender growth vulnerable to frost damage.
Royal Horticultural Society (RHS) Advice: "Feed ericaceous plants in spring with a dedicated fertiliser. Over-feeding can cause salt build-up and damage roots, so follow label instructions carefully."
Correcting Soil pH When Problems Arise
If your gardenia is already showing signs of yellowing and a soil test confirms the pH has crept too high, you can take corrective action.
| Method | Speed | Best For | Notes |
|---|---|---|---|
| Soil Sulfur (Elemental Sulfur) | Slow (Months) | Garden Beds | Most reliable long-term solution. Soil microbes convert it to sulfuric acid. Be patient. |
| Aluminum Sulfate | Fast | Containers | Acts faster than soil sulfur but requires caution. Risk of aluminum toxicity if over-applied. |
| Liquid Soil Acidifiers | Very Fast | Containers / Boost | Diluted and applied during watering. Useful for a rapid boost alongside other measures. |
For potted gardenias: The simplest solution is often a complete repotting with fresh acidic potting mix every 2-3 years.
🧠 The Root Physiology Lesson That Changed Everything
I used to think yellow leaves meant I needed to water more or move the plant to a sunnier spot. Here is what I learned from a professional horticulturist after my fourth gardenia nearly died.
Plant roots breathe. They require oxygen dissolved in water to perform cellular respiration, which powers nutrient uptake. When soil pH rises above 6.5, iron ions chemically bind with hydroxide molecules and form insoluble compounds. The plant roots simply cannot pull these nutrients across their cell membranes, no matter how much iron is physically present in the soil.
This is why adding iron fertilizer to alkaline soil does nothing. The roots are not broken. The soil chemistry is broken. Once I understood that lowering pH restores iron availability without adding extra iron, I stopped wasting money on random supplements. I focus on pH first, and only then do I consider adding nutrients.
🔍 Troubleshooting Beyond pH: Other Causes of Yellow Leaves
While acidic soil deficiency is the prime suspect, other factors can contribute to yellowing. A comprehensive approach to gardenia care requires ruling these out.
Overwatering or Poor Drainage: Yellow leaves that are more generalized and may be accompanied by wilting or brown, mushy roots indicate root rot. Ensure your pot has drainage holes and your soil mix is fast-draining.
Underwatering: Stress from drought can also cause yellowing and leaf drop. Maintain consistent soil moisture.
Nutrient Deficiencies: While often pH-related, a lack of nitrogen (uniform pale green/yellowing of older leaves) or magnesium (similar to iron but yellowing starts on older leaves) can occur. A balanced, acid-forming fertilizer addresses these.
Pests and Disease: Sap-sucking insects like spider mites or whiteflies can cause stippling and yellowing. Inspect the undersides of leaves regularly.
Environmental Stress: Excessive direct hot sun can scorch leaves, while too little light reduces vigor. Gardenias prefer bright, indirect light. Cold drafts or sudden temperature changes can also trigger leaf drop.
❓ Frequently Asked Questions (FAQ)
Why are the buds on my gardenia turning brown and falling off before they open?
This is most commonly caused by environmental stress, often related to moisture. Fluctuations in watering (either drought or waterlogging), low humidity, or sudden temperature drops can cause bud blast.
Solution: Ensure consistent soil moisture, mist the foliage regularly to increase humidity (avoiding the flowers), and protect the plant from drafts and extreme temperature changes.
Can I use coffee grounds to acidify the soil for my gardenia?
Used coffee grounds are slightly acidic and can be a beneficial addition to your compost pile or used sparingly as a mulch. However, they are not a reliable or strong enough amendment to significantly alter soil pH on their own. They should be viewed as a supplemental organic addition, not a primary pH correction method. Rely on soil sulfur, acidifying fertilizers, and peat moss for definitive pH control.
My gardenia is in a pot and its leaves are yellowing. What should I do first?
Check Drainage: First, check for "wet feet" by ensuring the pot drains freely.
Test pH: Second, test the soil pH of the potting mix.
Repot: If it's above 6.0, the most effective and immediate solution is often to repot the plant entirely using a fresh, high-quality acidic potting mix formulated for azaleas and camellias. This instantly resets the root environment.
Treat: Follow up with an application of chelated iron and an acidifying fertilizer to support recovery.
❌ Common Myths & Quick Fixes
"Can I use vinegar to lower soil pH for gardenias?"
No. White vinegar diluted with water at a ratio of one tablespoon per gallon can temporarily lower pH, but this effect lasts only a few days. Vinegar is not a sustainable solution because soil microbes quickly break it down. Use soil sulfur or a commercial acidifier for lasting results. I tried vinegar once and saw no improvement after two weeks.
"How often should I test my gardenia's soil pH?"
Test your soil pH every three months for container gardenias and every six months for in-ground plants. Regular testing helps you catch pH drift before yellow leaves appear. Most home pH test kits cost under fifteen dollars and provide results in under a minute.
"What is the fastest way to fix yellow leaves on a gardenia?"
Apply a liquid chelated iron supplement according to label directions. Chelated iron bypasses the soil pH problem and delivers iron directly to the plant. You will see new growth green up within 7 to 10 days.
Warning: However, this is a temporary fix. You must still lower your soil pH with sulfur or an acidifying fertilizer for long-term health.
📝 The Final Checklist: Remember This
Here's what I want you to remember from my years of trial and error with gardenias:
1.✅ Test First: Test your soil pH before you do anything else, because guessing leads to killing plants.
2 ✅ The Magic Number: Acidic soil between 5.0 and 6.0 is not optional for gardenias; it is the difference between yellow leaves and green leaves.
3 ✅ Watch the Water: Your tap water might be slowly destroying your soil pH, so switch to rainwater or filtered water if possible.
4 ✅ Specialized Food: Use fertilizer made specifically for acid-loving plants, not a general-purpose product.
5 ✅ Read the Signs: When you see yellow leaves, look at the pattern. If veins stay green and the tissue between them turns yellow, that is iron chlorosis from high pH.
Start with a fresh acidic potting mix and a pH tester. Water your gardenia only when the top inch of soil feels dry. Feed it once in early spring with an acid-forming fertilizer. Collect rainwater in a simple bucket. If you do these five things for eight weeks, you will see new green growth.
I learned this the hard way through dead plants and wasted money. You do not have to repeat my mistakes.