# How to Care for Air Plants: From Soaking for Hydration to Stylish Display Ideas
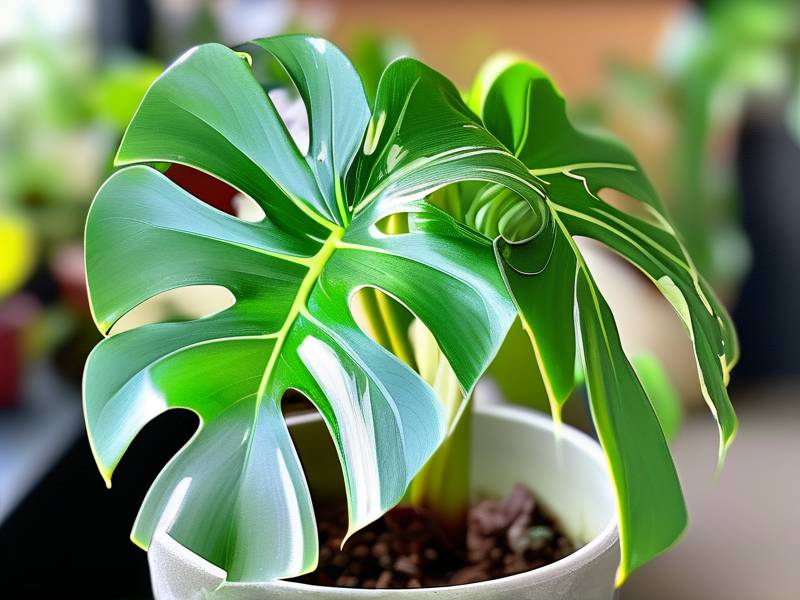
Air plants—scientifically known as *Tillandsia*—are the ultimate low-fuss houseplants for anyone who loves greenery but hates dealing with soil. Their ability to thrive without pots or dirt makes them perfect for small spaces, creative decor, and busy plant parents. But while they’re easier than traditional potted plants, they still need proper care to stay lush and healthy—especially when it comes to hydration (soaking is key!), lighting, and even how you display them. In this guide, we’ll cover everything you need to know, from nailing the perfect soak to creating eye-catching arrangements that show off your air plants while keeping them happy.
## First Things First: Mastering Hydration—Why Soaking Beats Misting (and How to Do It Right)
One of the biggest myths about air plants is that a quick mist now and then is enough to keep them hydrated. The truth? Most air plants—especially larger varieties with thick leaves—need deeper, more consistent moisture, which is where soaking comes in. Air plants absorb water through tiny, hair-like structures on their leaves called *trichomes*, and soaking ensures these trichomes get fully saturated, unlike light misting that might only wet the surface. Let’s break down how to soak your air plants correctly, plus when to mist as a supplement.
### Step 1: Choose the Right Water (This Matters More Than You Think)
Air plants are sensitive to minerals and chemicals, so the water you use can make or break their health. Avoid:
- **Unfiltered tap water**: It contains chlorine, which can burn leaves and dry out trichomes over time.
- **Hard water**: High levels of calcium and magnesium leave white, crusty deposits on leaves, clogging trichomes so the plant can’t absorb moisture.
Instead, opt for these plant-friendly options:
- **Distilled water**: Easy to find at grocery stores, it’s mineral-free and safe for all air plant varieties.
- **Filtered water**: A home filter (like Brita) removes chlorine and heavy metals, making it a great budget-friendly choice.
- **Rainwater**: Collect it in a clean container during rainstorms—just avoid water that runs off roofs with moss or debris (it might have contaminants).
Pro tip: Let the water sit at room temperature for 30 minutes before soaking. Cold water shocks air plants (they’re used to stable indoor temps), while warm water can scald their delicate leaves.
### Step 2: The Perfect Soak—Time, Frequency, and Post-Soak Care
How long and how often you soak your air plants depends on their size, variety, and your home’s humidity. Here’s a foolproof guide:
- **Small air plants (e.g., *Tillandsia ionantha*, *Tillandsia bulbosa*)**: These have thinner leaves and dry out faster. Soak them for 10–15 minutes every 1–2 weeks.
- **Medium to large air plants (e.g., *Tillandsia xerographica*, *Tillandsia capitata*)**: Thicker leaves hold more moisture, so soak them for 20–30 minutes every 2–3 weeks.
- **Humid environments (e.g., bathrooms, kitchens with steam)**: Cut back on soaking—every 3–4 weeks is enough, since the air already provides extra moisture.
- **Dry environments (e.g., heated rooms in winter, air-conditioned spaces in summer)**: Soak more often (every 1–2 weeks) and add a light mist 1–2 times between soaks to keep leaves from drying out.
After soaking, don’t just plop your air plant back in its display—this is where many people go wrong! Excess water trapped in the base (where leaves meet the roots) or between leaf folds causes rot, the #1 killer of air plants. Instead:
1. Gently shake the plant to remove dripping water.
2. Lay it upside down on a paper towel or clean cloth in a well-ventilated spot (away from direct sunlight) for 4–6 hours. This ensures the base dries completely.
3. Once dry, return it to its display.
### When to Mist (Spoiler: It’s a Supplement, Not a Replacement)
Misting is great for:
- **Small, hard-to-soak air plants**: If you have tiny air plants in a wall mount or tight terrarium, a quick mist 2–3 times a week can supplement their hydration (just make sure they still get a soak every 2 weeks).
- **Between soaks in dry air**: A light mist helps keep trichomes active without overwatering.
- **Fertilizing (more on that later!)**: Mix fertilizer into misting water for easy feeding.
When misting, use a spray bottle with a fine-mist setting (avoid stream settings—they drench leaves too much). Hold the bottle 6–8 inches away and spray both the top and bottom of leaves (the undersides have the most trichomes!). Stop when leaves look lightly damp, not soaking wet.
## Lighting: Bright, Indirect, and Consistent—No Harsh Sun!
Air plants need light to photosynthesize, but they’re not built for the intense, direct sunlight that outdoor plants might tolerate. In their natural habitats (tropical rainforests, cloud forests, and deserts), they grow attached to trees or rocks, where they get filtered light—not full sun. Indoors, finding the right light spot is key to keeping them vibrant and preventing leaf burn.
### What “Bright, Indirect Light” Actually Looks Like
Forget dark corners or sun-drenched windowsills—aim for spots where the light is soft but consistent. Here are the best indoor locations:
- **North-facing windows (Northern Hemisphere)**: These windows get gentle, even light all day long—perfect for air plants. Place your plant 1–2 feet away from the window to avoid any accidental direct morning or evening sun.
- **East-facing windows**: Morning sun is cooler and less intense than afternoon sun, so this is a great spot. Put your air plant on a windowsill or shelf near the window, but use a sheer curtain if the morning sun is particularly bright (you’ll know if the leaves start to look faded or crispy).
- **South or west-facing windows**: These get hot, harsh afternoon sun, which can scorch air plant leaves. If these are your only options, place the plant 3–4 feet away from the window, or hang a sheer curtain to filter the light.
### Artificial Light: A Lifesaver for Low-Light Homes
If you live in a basement, apartment with small windows, or a home with limited natural light, don’t worry—air plants thrive under artificial light too! Here’s how to set it up:
- **LED grow lights**: These are the best choice. They’re energy-efficient, produce very little heat (so they won’t dry out your plants), and emit the exact spectrum of light air plants need for photosynthesis. Choose a panel or strip light and hang it 12–18 inches above the plants.
- **Fluorescent lights**: Regular fluorescent tubes (like the ones used in offices) work well too. Use a fixture with two tubes and place it 10–12 inches above the plants.
- **Avoid incandescent bulbs**: They produce too much heat (which dries out leaves) and don’t emit the right light for growth—stick to LED or fluorescent.
Set a timer for your artificial lights to stay on for 12 hours a day. This mimics natural daylight and helps your air plants maintain a healthy growth cycle.
### Signs Your Air Plant Isn’t Getting the Right Light
- **Too much light**: Leaves turn brown, crispy, or develop dry, papery spots. The plant might also look wilted even after soaking—this is because the leaves are losing moisture faster than they can absorb it.
- **Too little light**: Leaves become pale green or yellow, and the plant grows slowly or stretches toward the light (called “legginess”). The base might also get soft—this happens because the plant isn’t using water efficiently, so moisture builds up.
Fix it by moving the plant to a better spot—air plants are quick to recover once they get the right light!
## Ventilation: The Overlooked Key to Preventing Rot
You could soak your air plants perfectly and give them the best light, but if they don’t have good airflow, they’ll still struggle. Outdoor air plants get natural wind to dry out after rain, but indoor air is often stagnant—especially in closed containers or rooms with no windows. Stagnant air traps moisture on leaves and in the plant’s base, leading to rot, mold, or bacterial infections. The good news? Improving ventilation for your air plants is easy.
### Simple Ways to Boost Airflow
- **Open windows daily**: Even opening a window for 30 minutes a day (weather permitting) lets fresh air circulate around your plants. This helps dry out excess moisture from soaking or misting and prevents stale air buildup. If it’s cold outside, crack the window slightly—just make sure the plant isn’t in a direct draft (drafts can dry out leaves too quickly).
- **Use a small fan**: A desk fan or clip-on fan is a game-changer. Set it to the lowest speed and aim it so the air flows *near* the plant, not directly at it. Direct wind can dry out leaves in hours, but gentle airflow helps moisture evaporate slowly. Run the fan for 2–3 hours after soaking or misting to speed up drying.
- **Avoid closed containers**: Sealed glass jars, terrariums with no vents, or tight boxes are a death sentence for air plants. They trap moisture and have zero airflow. Opt for open displays instead (we’ll cover those next!).
### Signs of Poor Ventilation
- **Mold or fuzzy growth**: White, green, or gray fuzz on leaves or the base means moisture is trapped. This is mold, and it can kill your plant if not fixed quickly.
- **Leaves stay wet for hours**: After soaking or misting, leaves should be dry within 4–6 hours. If they’re still damp after 8 hours, the airflow is too poor.
- **Musty smell**: A damp, earthy smell coming from the plant or its display means rot is starting. Act fast to save your plant!
Fix it by moving the plant to a more ventilated spot, gently wiping leaves with a dry paper towel to remove excess moisture, and trimming any moldy or rotted parts with clean, sterilized scissors (dip scissors in rubbing alcohol first to prevent spreading mold).
## Stylish Display Ideas: Show Off Your Air Plants (While Keeping Them Healthy)
The best part about air plants is their versatility—you can display them almost anywhere, from shelves to walls to coffee tables. The key is to choose displays that are open (for airflow) and won’t trap moisture. Here are our favorite ideas, plus tips to make sure your display is plant-friendly:
### 1. Driftwood or Cork Bark Displays
Driftwood and cork bark are natural, porous materials that won’t hold moisture—perfect for air plants. They also add a rustic, beachy vibe to any room. To set it up:
- Choose a piece of driftwood or cork bark with small crevices or branches (air plants can “sit” in these spots).
- Use a small amount of non-toxic glue (like E6000) or floral wire to secure the air plant to the wood (avoid covering the base—leave it exposed for airflow).
- Hang the driftwood on a wall, place it on a shelf, or set it on a coffee table. This works especially well for larger air plants like *Tillandsia xerographica* or *Tillandsia streptophylla*.
### 2. Wire or Metal Holders
Wire holders (like geometric terrarium frames, hanging orbs, or small wire baskets) are great because they let air flow around the plant from all sides. They’re modern and sleek, so they fit with any decor style.
- Look for holders with open designs—avoid closed wire boxes.
- Place the air plant inside the holder (no glue needed—most air plants will stay put if the holder is the right size).
- Hang the holder near a window, or set it on a desk. Smaller air plants like *Tillandsia ionantha* look adorable in tiny wire orbs.
### 3. Magnetic Mounts
Magnetic mounts are perfect for small spaces or anyone who loves unique wall decor. They’re easy to install and let you rearrange your air plants whenever you want.
- Buy magnetic air plant holders (they usually have a small dish or platform for the plant) or make your own by gluing a small magnet to a terra-cotta saucer (drill a few small holes in the saucer for airflow).
- Stick the mount to a fridge, metal wall, or magnetic board.
- Place the air plant on the mount—make sure the base is not touching any wet surfaces (wipe the mount dry if it gets damp).
### 4. Glass Displays (With a Catch!)
Glass displays can be beautiful, but you have to be careful—closed glass jars are a no-go. Instead, use open glass vessels like:
- **Glass teacups or mugs**: Place an air plant inside (no water in the cup—airflow is key!).
- **Hanging glass orbs with open tops**: These let air circulate while showing off the plant.
- **Glass shelves**: Set air plants on top of glass shelves near a window—light shines through the glass, highlighting the plant’s leaves.
Avoid closed glass terrariums unless they have vents—even then, check the plant daily for signs of moisture buildup.
### 5. Wall Art Displays
Turn your air plants into wall art with a few simple supplies. This is a great way to add greenery to a blank wall.
- Use a wooden frame with chicken wire or mesh stretched across it (the mesh lets air flow through).
- Secure small air plants to the mesh with floral wire or glue (again, leave the base exposed).
- Hang the frame near a window—this creates a living wall decor piece that’s sure to impress.
## Bonus Care Tips: Keep Your Air Plants Thriving Long-Term
- **Fertilize occasionally**: Air plants don’t get nutrients from soil, so a light fertilizer boost helps them grow and bloom. Use a diluted bromeliad fertilizer (air plants are part of the bromeliad family) once a month in spring and summer (their growing season). Mix 1/4 teaspoon of fertilizer into a cup of distilled water, then mist the plant with the mixture—this combines hydration and feeding. Don’t fertilize in fall or winter, when the plant is dormant.
- **Trim dead leaves**: As air plants grow, their bottom leaves naturally die off. Gently pull off brown, dry leaves—they can trap moisture and attract pests if left on.
- **Watch for pests**: Indoor air plants can get mealybugs (small white fuzzy insects) or scale (brown, shell-like bugs) if they’re near other infested plants. If you see pests, wipe the leaves with a cotton swab dipped in rubbing alcohol. Repeat every 3 days until the pests are gone.
- **Let them bloom**: Most air plants bloom once in their lifetime (usually after 2–3 years). The bloom can last for weeks, and it’s a sign your plant is happy! After blooming, the mother plant will produce “pups” (small baby plants) at the base. Once the pups are 1/3 the size of the mother, you can gently separate them and grow them on their own.
If you like my website, please save the URL plantcarenews.com or search for plantcarenews on Google

")